
EDI Generator Inbox View
The Inbox displays all EDI messages that have been received from your trading partners. It helps users to quickly review the status and manage files with individual or bulk actions.
Understanding the Inbox Table

- Partner name & ID – The name of the sender partner, with their AS2 ID shown below it.
- File Name – The name of the EDI file that was received.
- Type – The received EDI document type (e.g., SM, PO for X12, or ORDERS, DESADV for EDIFACT).
- Group - The Functional Group Control Number of the received EDI message. Each functional group (X12 GS/GE segments, or EDIFACT UNG/UNE segments) has a unique control number that helps track, organize, and reference the group of transactions within the EDI.
Status – The current status of the received EDI entry:
Inbox Status When it Happens PendingThe EDI entry has been received and is awaiting processing. CompletedProcessed successfully. RejectedOrganization ID mismatch; content/schema validation failure. ErrorEnvelope/structure errors, unknown partner, unknown document type, FA generation failure. - TXN – One or more unique Transaction Numbers assigned to the incoming EDI message. Multiple transaction numbers may appear if the message contains more than one transaction set.
- Key - One or more identifier values extracted from the incoming EDI message. For example, for an EDI 850, this field will contain the Purchase Order (PO) number.
- Date – The timestamp of when the EDI was received.
- Dispatch – The status of dispatching the received EDI to your configured external integration (e.g., HTTP, SFTP or QuickBooks Online). A dash (-) is shown if the entry has not been dispatched to an external integration. Hover over the dispatch icon to see the dispatch status and the integration type.
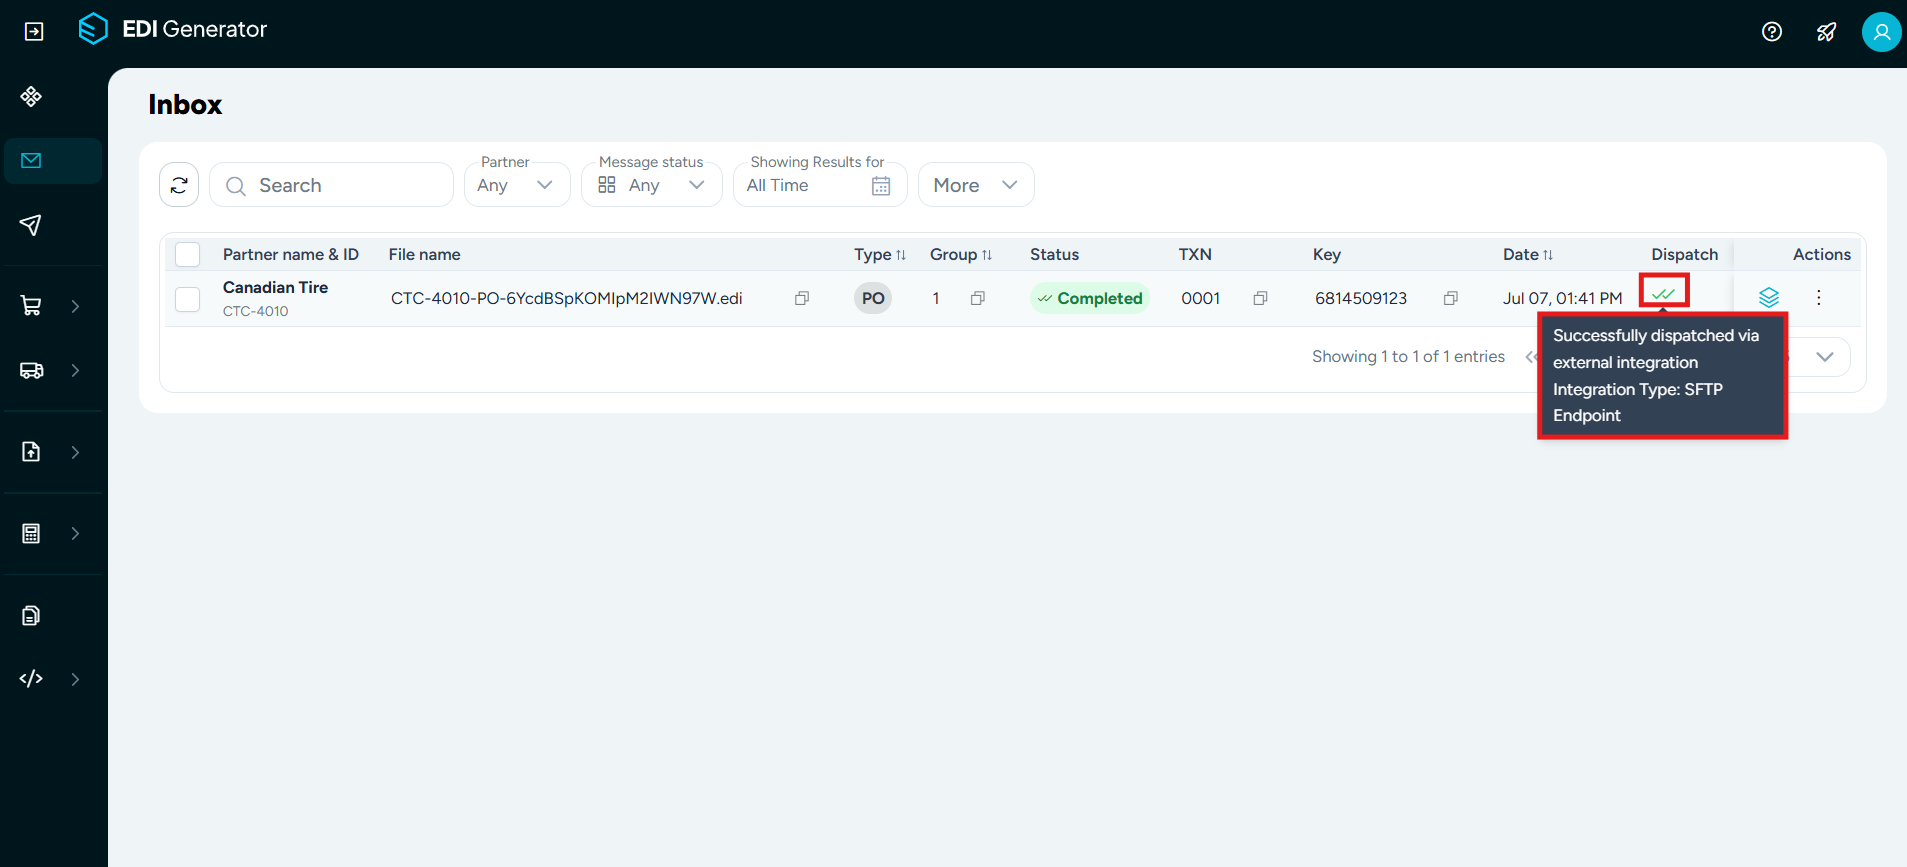
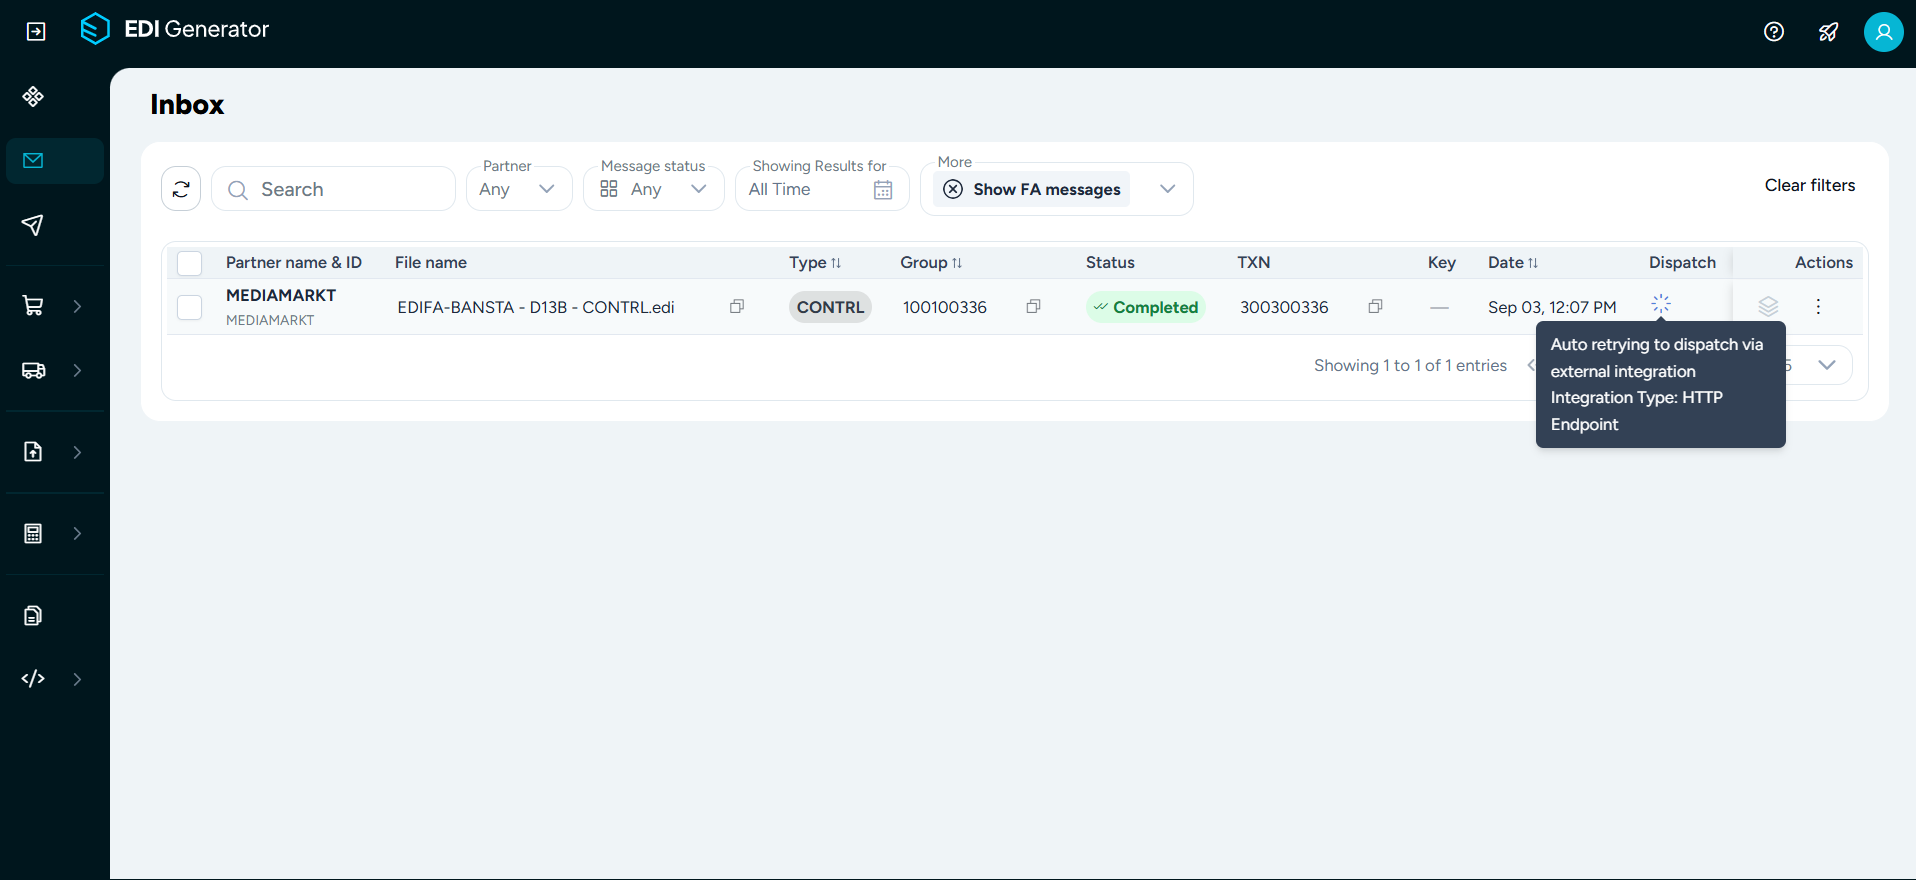
You can sort the table by Type, Group, or Date by clicking the column header. Hovering over a File Name, Group, TXN, or Key value displays a copy icon to quickly copy that value, and you can use the refresh button on the left side of the toolbar to reload the list.
Single Entry Actions
Every Inbox entry provides a set of actions for viewing and managing the EDI:
View Inbox Message
Click on any row in the table to open the Inbox Message detailed view.
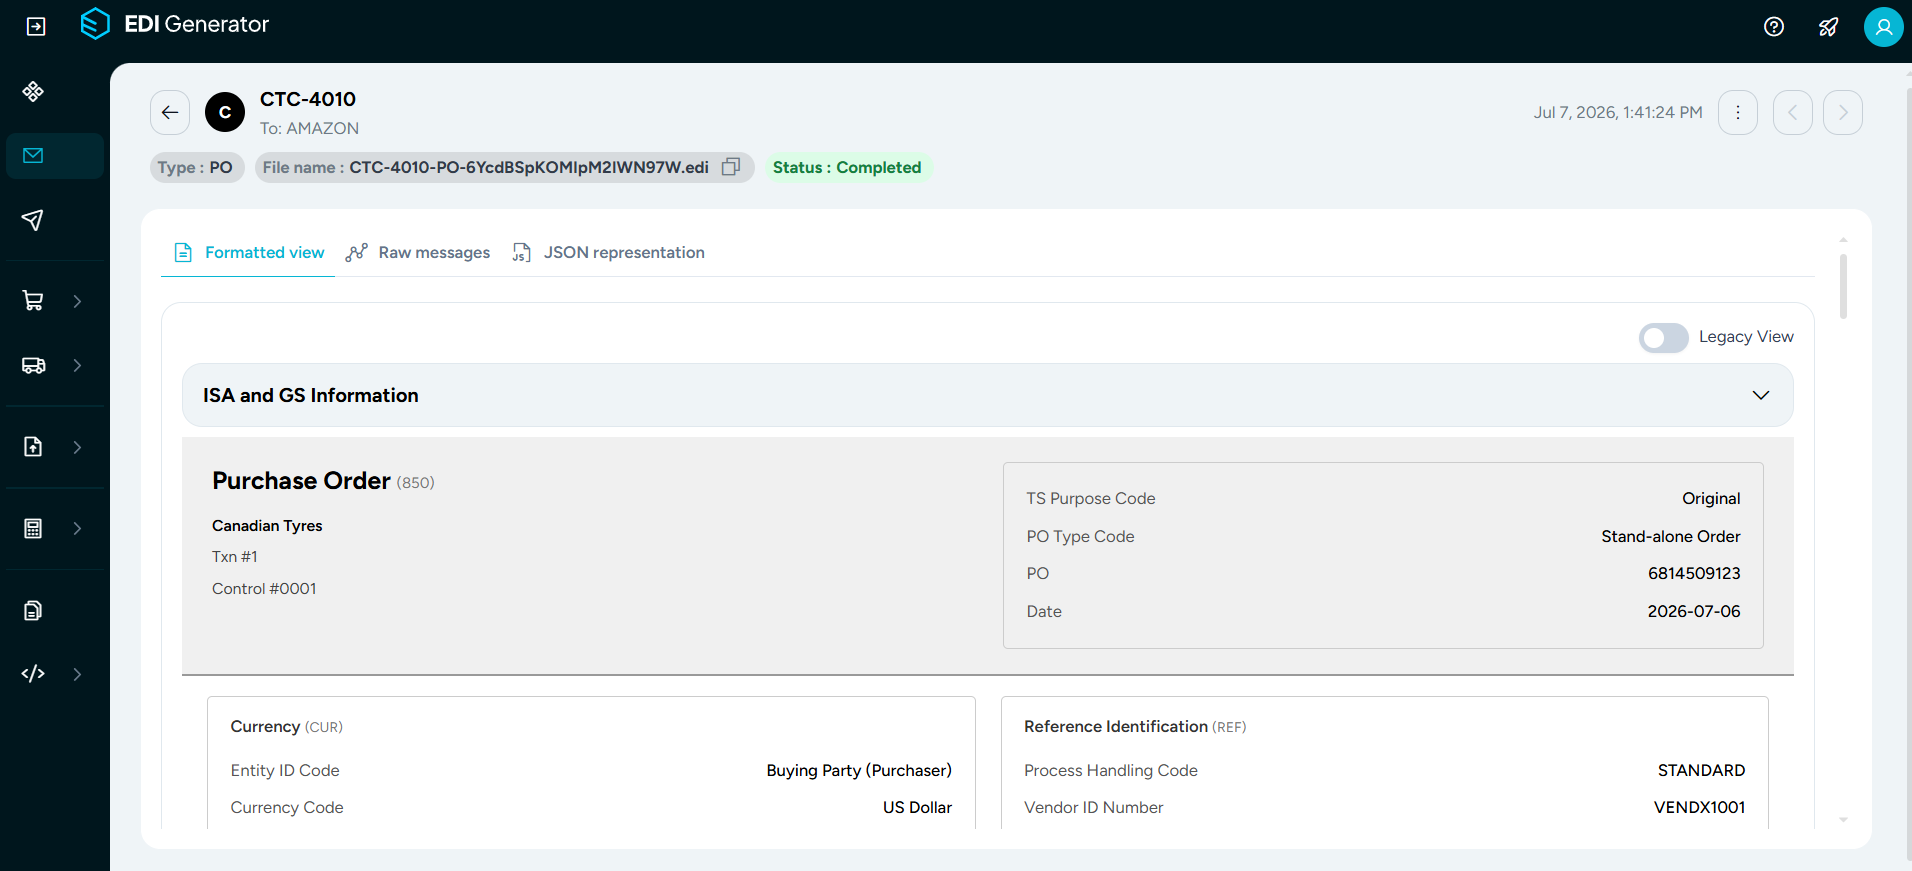
The top of the page shows information about the partner, document type, file name, status and received date of the Inbox message. Use the arrow buttons at the top right to move to the previous or next entry, the three-dot menu (⋮) to access the Inbox entry specific actions, and back arrow to return to the Inbox.
The page shows the received EDI in three different forms:
- Formatted View – The Formatted View displays the received EDI message in a human-readable, structured format. Instead of showing the raw EDI segments, it organizes the data into labeled sections, tables, and fields, making it easy to understand the content at a glance and also with the option to print the document. If available, you can use the Legacy View toggle to view the EDI in legacy formatted view layout.
- Raw Messages – Displays the original EDI content exactly as received.
- JSON Representation – Shows the internal JSON structure generated by EDI Generator for this EDI during processing.
Generate Option
Click the Generate () icon in the Actions column to generate a response document for the received EDI. This action is enabled only for entries that support document generation.
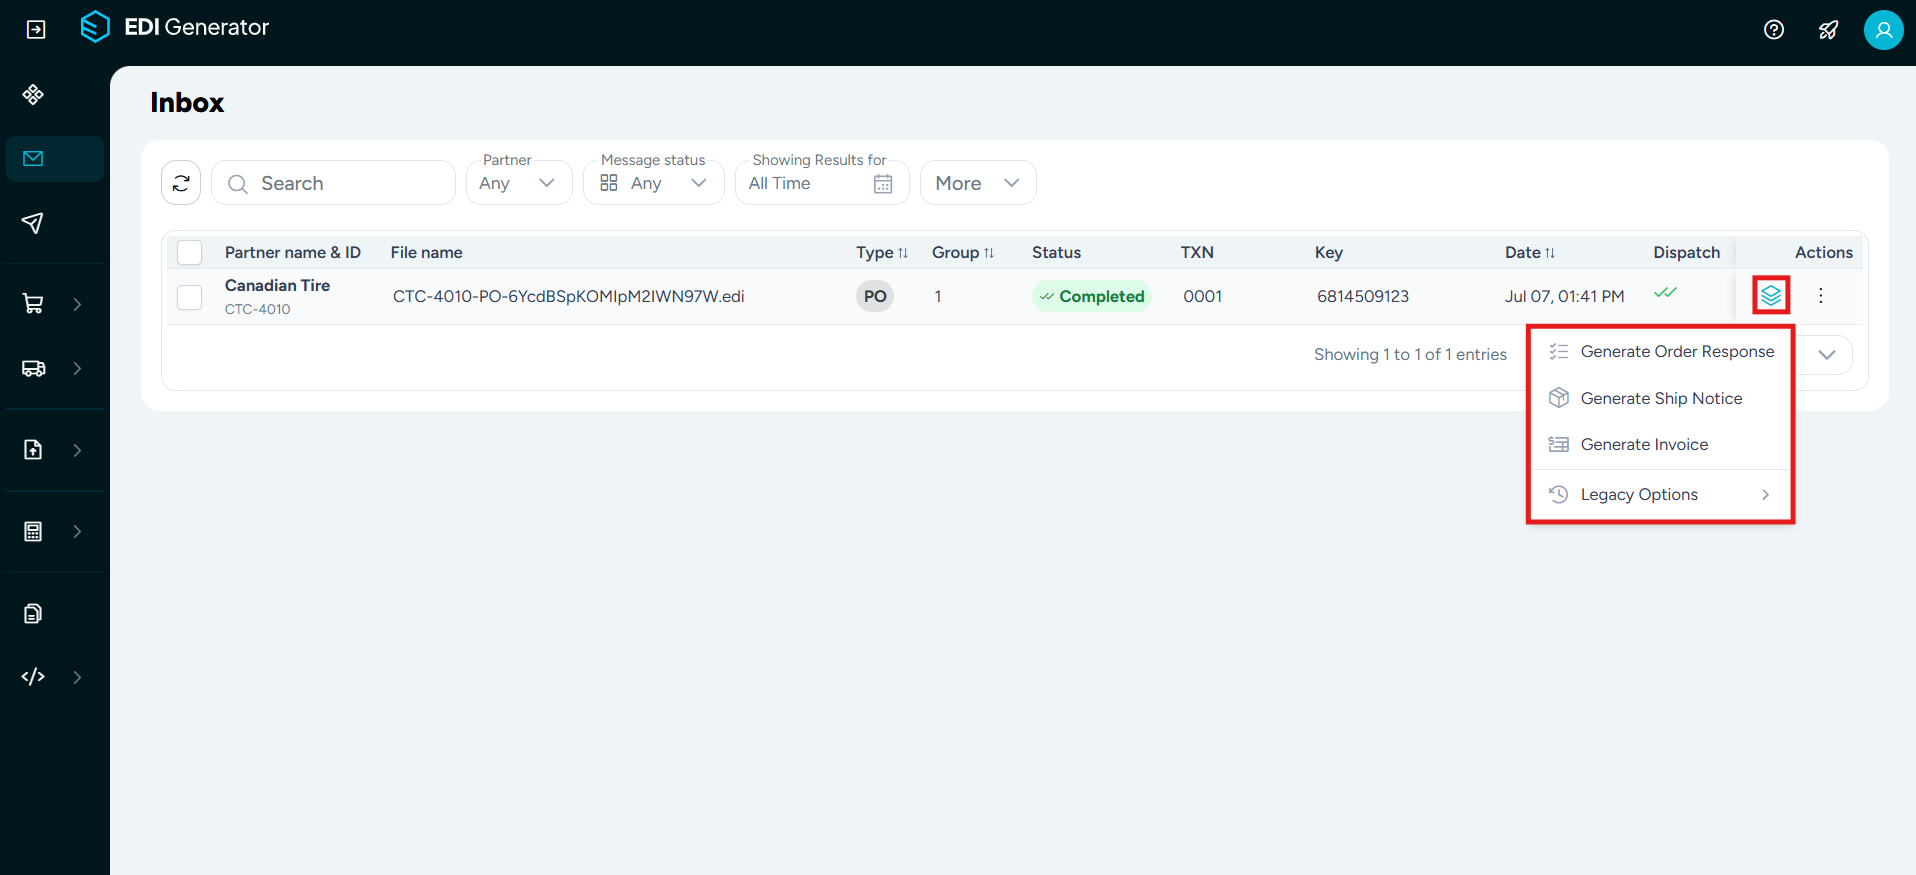
For example, the following options are available for a received X12 Purchase Order:
- Generate Order Response – Creates a Purchase Order Acknowledgment (e.g., X12 855) for the received order.
- Generate Ship Notice – Creates an Advance Ship Notice (e.g., X12 856) for the received order.
- Generate Invoice – Creates an Invoice (e.g., X12 810) for the received order.
- Legacy Options – Lists the document generation options available with the legacy EDI definitions.
By clicking the three-dot menu (⋮) in the Actions column, you can access additional actions.

Process Again
This will process the received EDI as a newly received entry without sending a functional acknowledgment. This option is useful if you need to reprocess any failed or previously processed EDI without sending an acknowledgment from your side.
Process Again and ACK
This will process the received EDI as a newly received entry and send a new functional acknowledgment. You need to be careful when using this option, because if an acknowledgment has already been sent to the partner, it might cause confusion.
Dispatch Again
Dispatches the received EDI again to your configured external integration. This is useful to retry a failed dispatch, or to send entries received before the integration was configured.
Mark as
This option allows the user to manually change the status of the received entry to Pending or Completed.
Transmission Details
This option allows you to view incoming transmission-related information from the MFT Gateway side of the message.
The following actions are available:
- Copy AS2 identifier – Copies the AS2 identifier (or SFTP identifier) associated with the transmission.
- Copy MFTG message ID – Copies the message ID assigned by MFT Gateway.
- Navigate to MFTG message – Opens the corresponding message in MFT Gateway.
This information is useful when troubleshooting transmission issues or when cross-referencing messages between EDI Generator and MFT Gateway.
Archive
Moves the inbox entry to the archived state. Archived entries can be accessed by enabling the Show Archived filter.
Delete
Permanently removes the entry from the Inbox.
Selected Actions
When one or more entries are selected using the checkboxes, the action toolbar becomes active, allowing you to perform batch actions on the selected EDIs.

Change Status - Manually changes the status of the selected entries to Pending or Completed.
Archive - Moves selected entries to the archived state.
Generate PDF - Creates a PDF containing the formatted views of the selected entries.
Download Options - Download selected entries either as Raw EDI files or JSON converted files.
Export as CSV - Exports the main details of the selected EDIs into a CSV file.
Delete - Removes all selected entries.
Click the close (✕) icon on the toolbar to clear the selection.
Search and Filters
The toolbar above the table allows users to refine and locate received EDIs quickly:
Search Text Box
Search for received EDIs by TXN Set ID, Type, Key, TXN #, Group # or the File Name. You can wrap the search phrase with double-quotes for exact matches.
Filter By Partner
Filter received EDIs by specific trading partners.

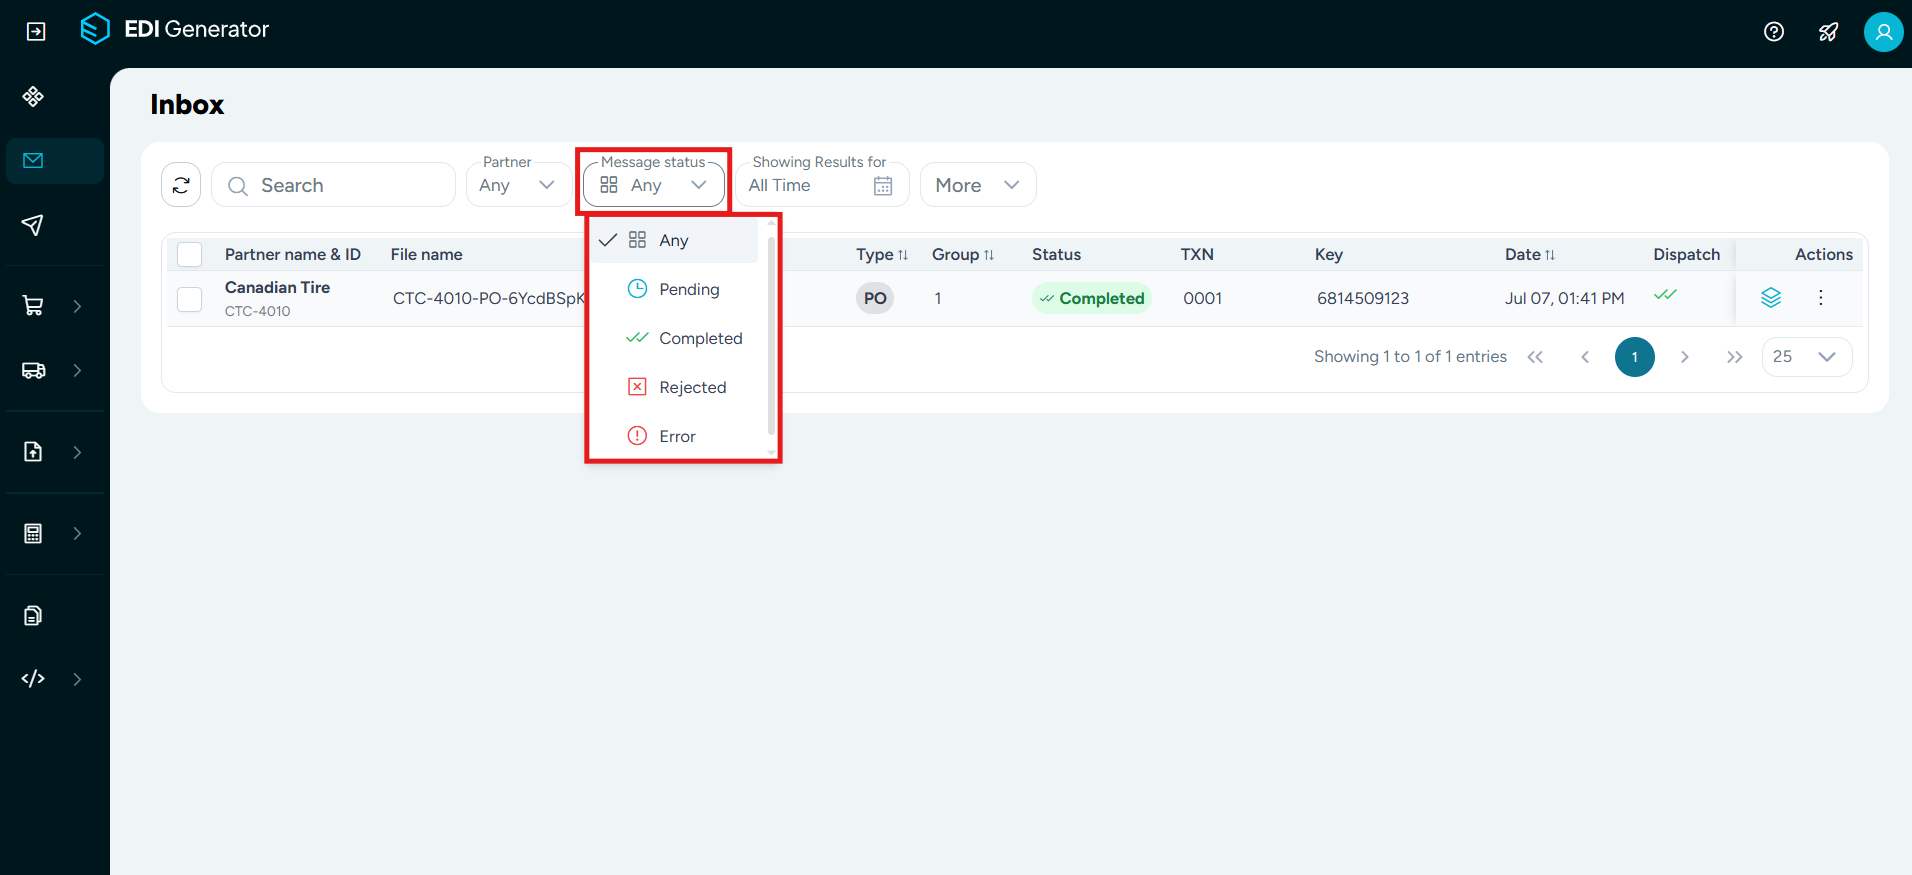
Filter by Message Status
Filter EDIs by status such as Pending, Completed, Rejected or Error.
More
Use the options in the More dropdown to:
Show FA messages – Include received Functional Acknowledgments (X12 997 or EDIFACT CONTRL) in the inbox list.
Show archived – Display only the archived Inbox messages.

Filter by Date
Use the Date range selector to filter the received EDIs by a predefined or a custom date range.

Click Clear filters at the right of the toolbar to reset all applied filters.


