EDI Generator Integration for AS2
1 Introduction
The MFT Gateway can be integrated with EDI Generator for processing any EDI files received from your trading partners and to compose EDI files to be sent to your trading partners.
You must have access to an EDI Generator account to use EDI Generator integration.
If you have only registered for an MFT Gateway account currently, and wish to create an EDI Generator account as well, try to log in to EDI Generator using the ORG-ADMIN credentials of your MFT Gateway account. Then you will be provided the option to create a new EDI Generator account, which will be accessible with the same user credentials of the MFT Gateway account.
For the MFT Gateway <-> EDI Generator integration to work, there are certain configurations to be done on the MFT Gateway account as well as on the EDI Generator account. This section guides you on configuring that integration on the MFT Gateway account. For the details on completing the integration on EDI Generator account, please refer to this guide.
2 EDI Generator Integration

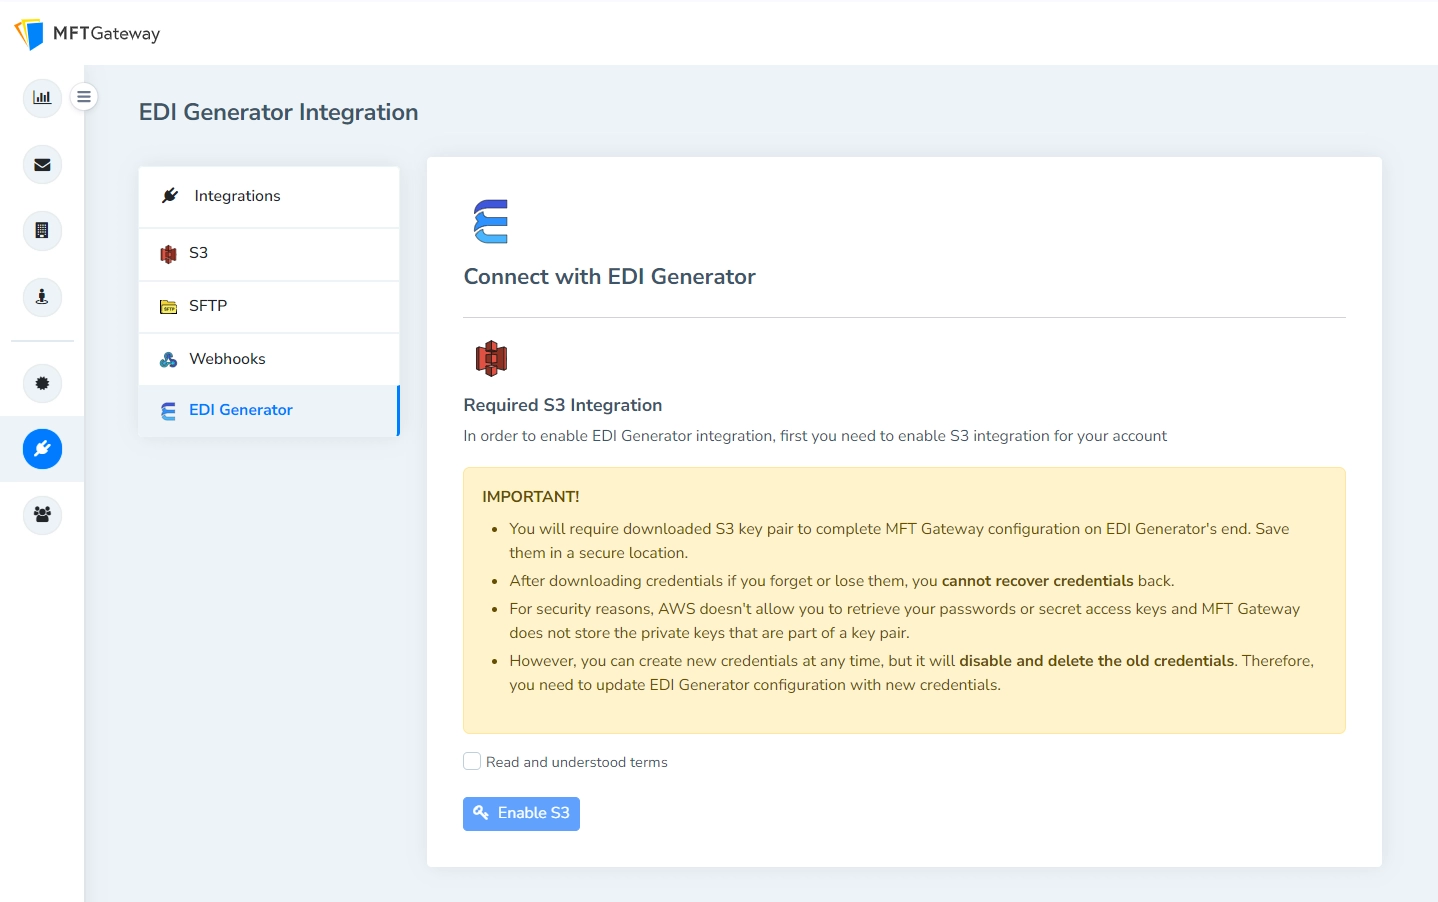
- Navigate to EDI Generator after clicking the Integrations menu icon on the left navigation pane. If you have not already setup EDI Generator integration the above page will appear, allowing you to enable the integration.
2.1 Enabling S3 Integration
If you have not already enabled AWS S3 Integration, you will be presented with the informational message that S3 integration will be enabled on the account. AWS S3 is used to exchange AS2 messages between the MFT Gateway and the EDI Generator, and must be enabled first.
- Check the Read and understood terms check box and click Enable S3 to enable the S3 integration.
- A pair of S3 access credentials are generated and made available for download. Save these credentials into a secure location. The credentials are in a CSV file, which contains an AWS Access Key and a Secret Key.
e.g.
Access key ID,Secret access key
AKIAXVKF5NVFHMFVNWQI,GzXQ0DOVQjuxld9/Jy0iRjEzd1mbbjBBkLaS+f1h
If you have already enabled AWS S3 Integration for your account before, you will be directly taken to the next step. But you must have the credentials file which was downloaded at that time (or the values of AWS Access Key and Secret Key) to be configured on EDI Generator side at a later step.
2.2 Configuring Integration

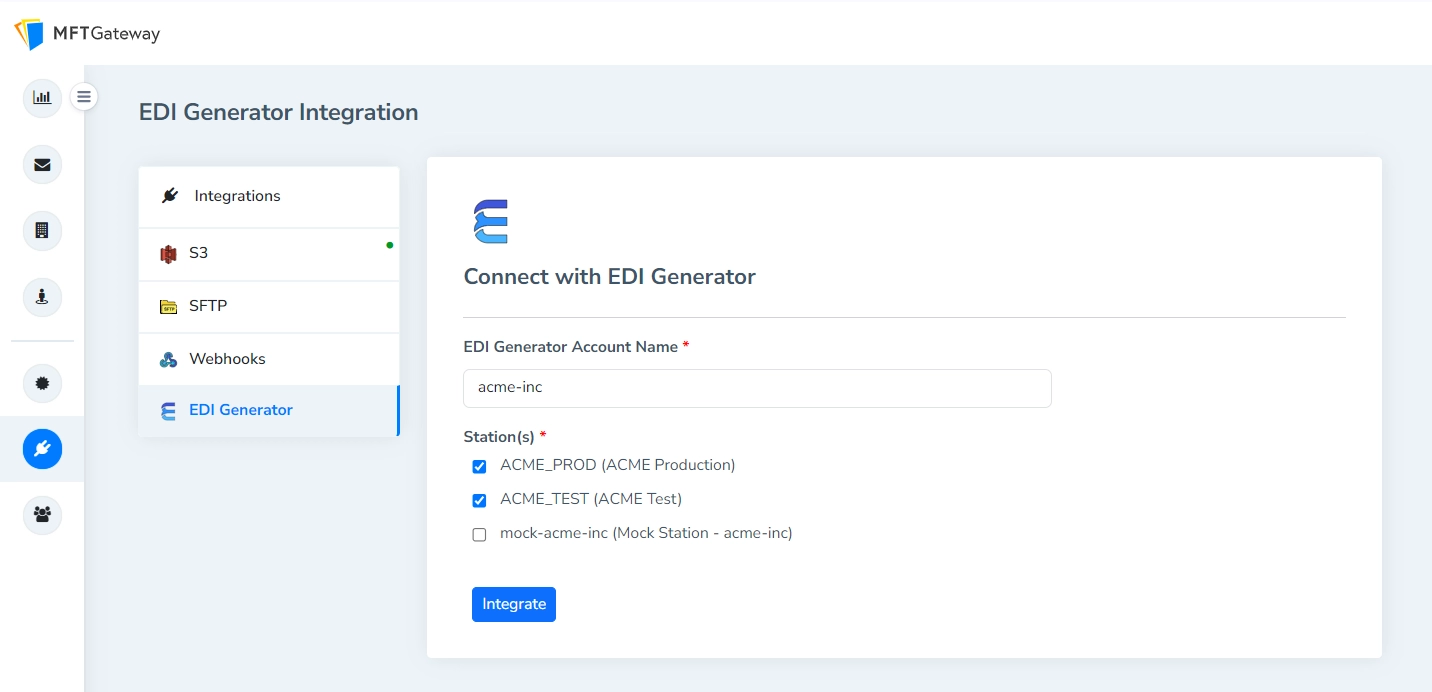
- Provide the EDI Generator Account Name, which is your unique account identifier in the EDI Generator. This account name will be shown on the EDI Generator account under the MFT Gateway integration section.
- Select one or more AS2 Stations to be integrated with the EDI Generator. Only the EDI messages received for these selected stations will be processed by EDI Generator.
Even if a certain station was selected under the EDI Generator integration, only the received files which are identified as “EDI files” will be processed by EDI Generator by default. A file will be identified as an “EDI file” if one of the following conditions are met.
- The content type of the file is
application/x12orapplication/edi- The extension of the file is
.x12,.edior.edifactIn case you require all the files received by a certain station to be processed by the EDI Generator irrespective of the above criteria, please contact MFT Gateway team.
- Click Integrate to complete the integration from the MFT Gateway account.
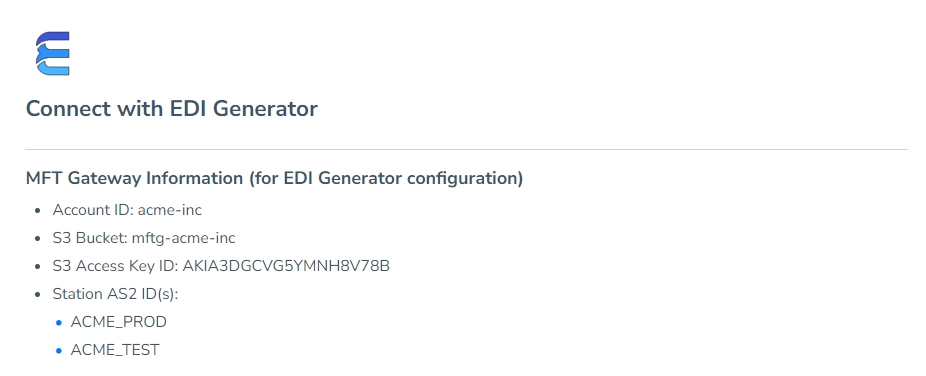
- Note the information under MFT Gateway Information (for EDI Generator configuration), and the AWS Secret access key downloaded previously. These will be required for completing the setup on EDI Generator side.

2.3 Integration from EDI Generator account
To complete the integration steps from the EDI Generator side, log into your EDI Generator account and follow the steps mentioned on this guide.


