Adding an AS2 Partner
1 What is an AS2 Partner
An AS2 Partner definition within the MFTGateway specifies details about a trading partner, with which your Organization would be exchanging messages using AS2. Similar to an AS2 Station, a Partner has a unique AS2 ID, URL and certificates. You will select the Partner, when sending AS2 messages through the MFTGateway. When messages are received into your AS2 inbox, they will also list the Partner from whom they have been received.
2 Creating an AS2 Partner
Partners need to be added/declared on MFT Gateway, before you can send, as well as receive, messages from them. Declaring a Partner requires some information from the respective remote party, such as its AS2 ID, URL and certificate/s. (These are the information of the remote trading station corresponding to the ‘Partner Configuration’ that we saw on our local trading station page in the previous section).
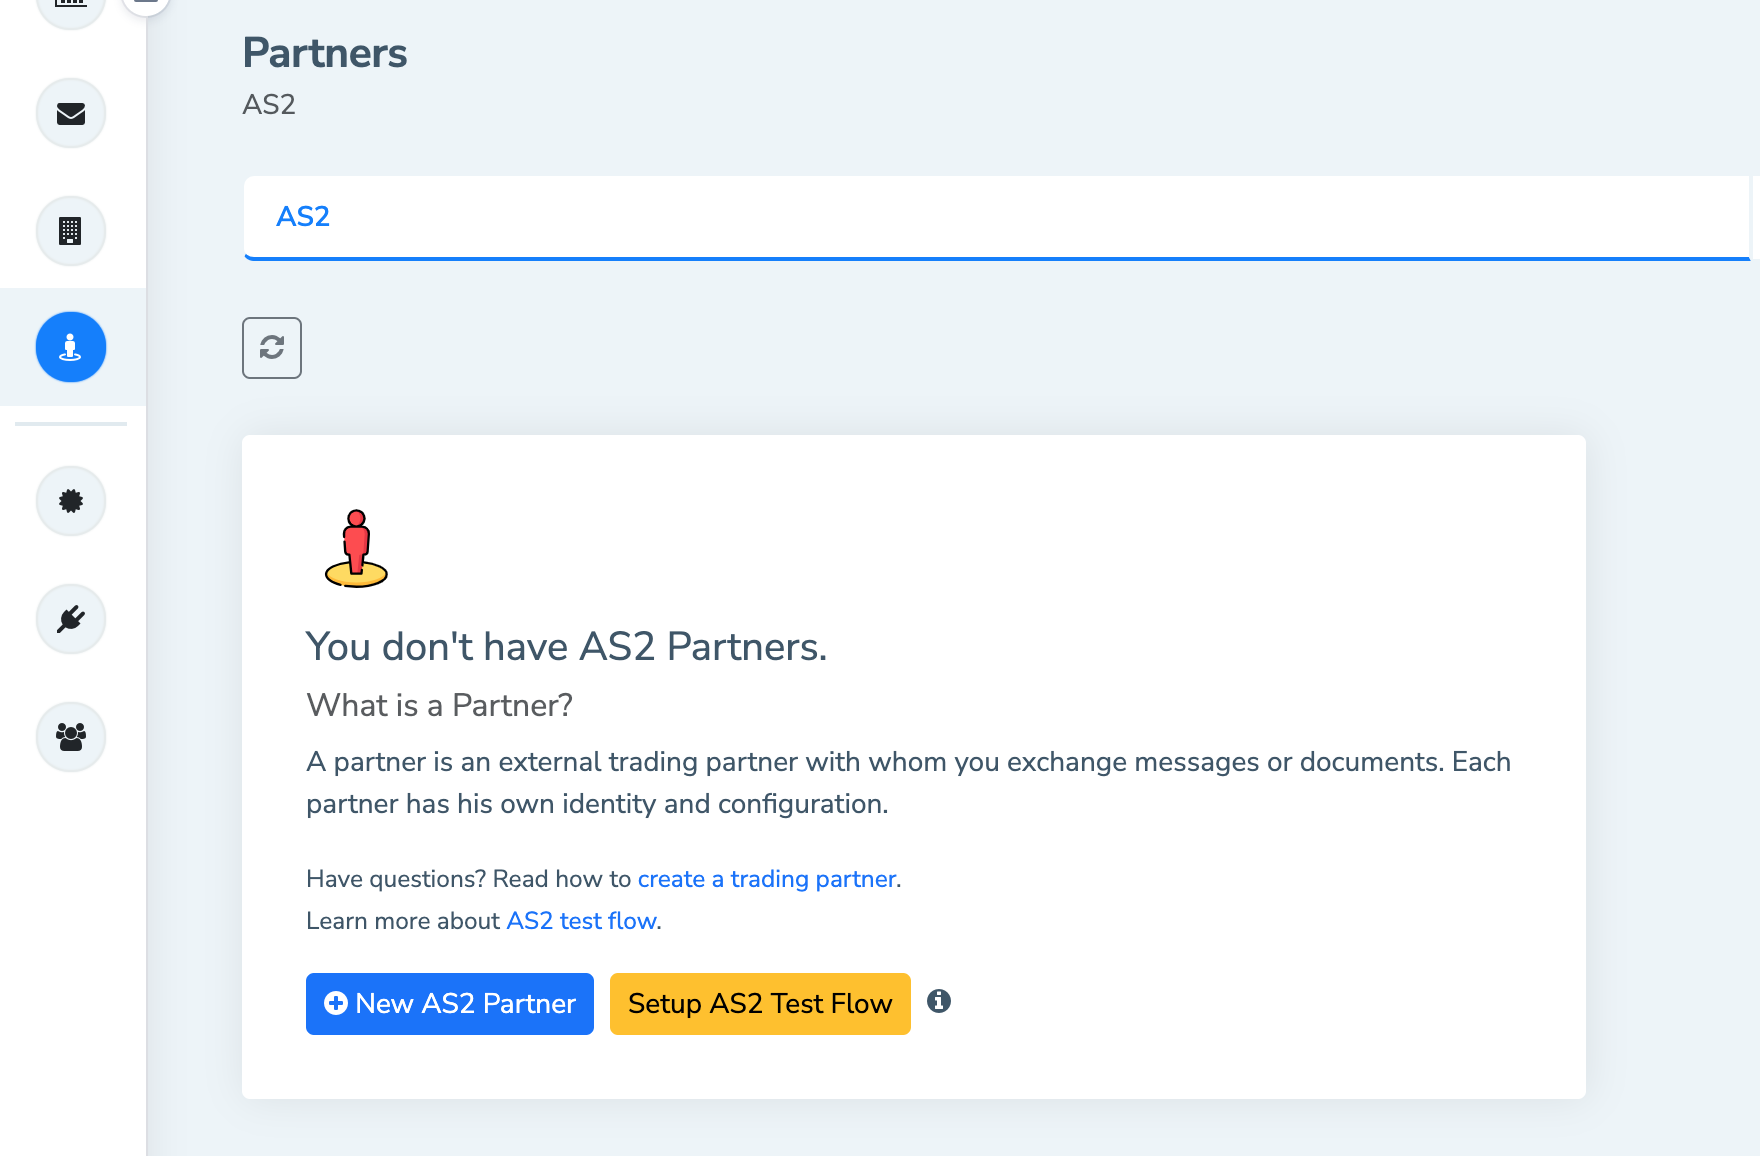
To add a partner, first go to the partners view using the ‘Partners’ icon on the left navigation menu. Then click the ‘ New AS2 Partner’ button.
2.1 Basic information of a Partner
Provide the required information to configure the trading partner you are about to add. Your Partner would be sending you this information, usually through email.
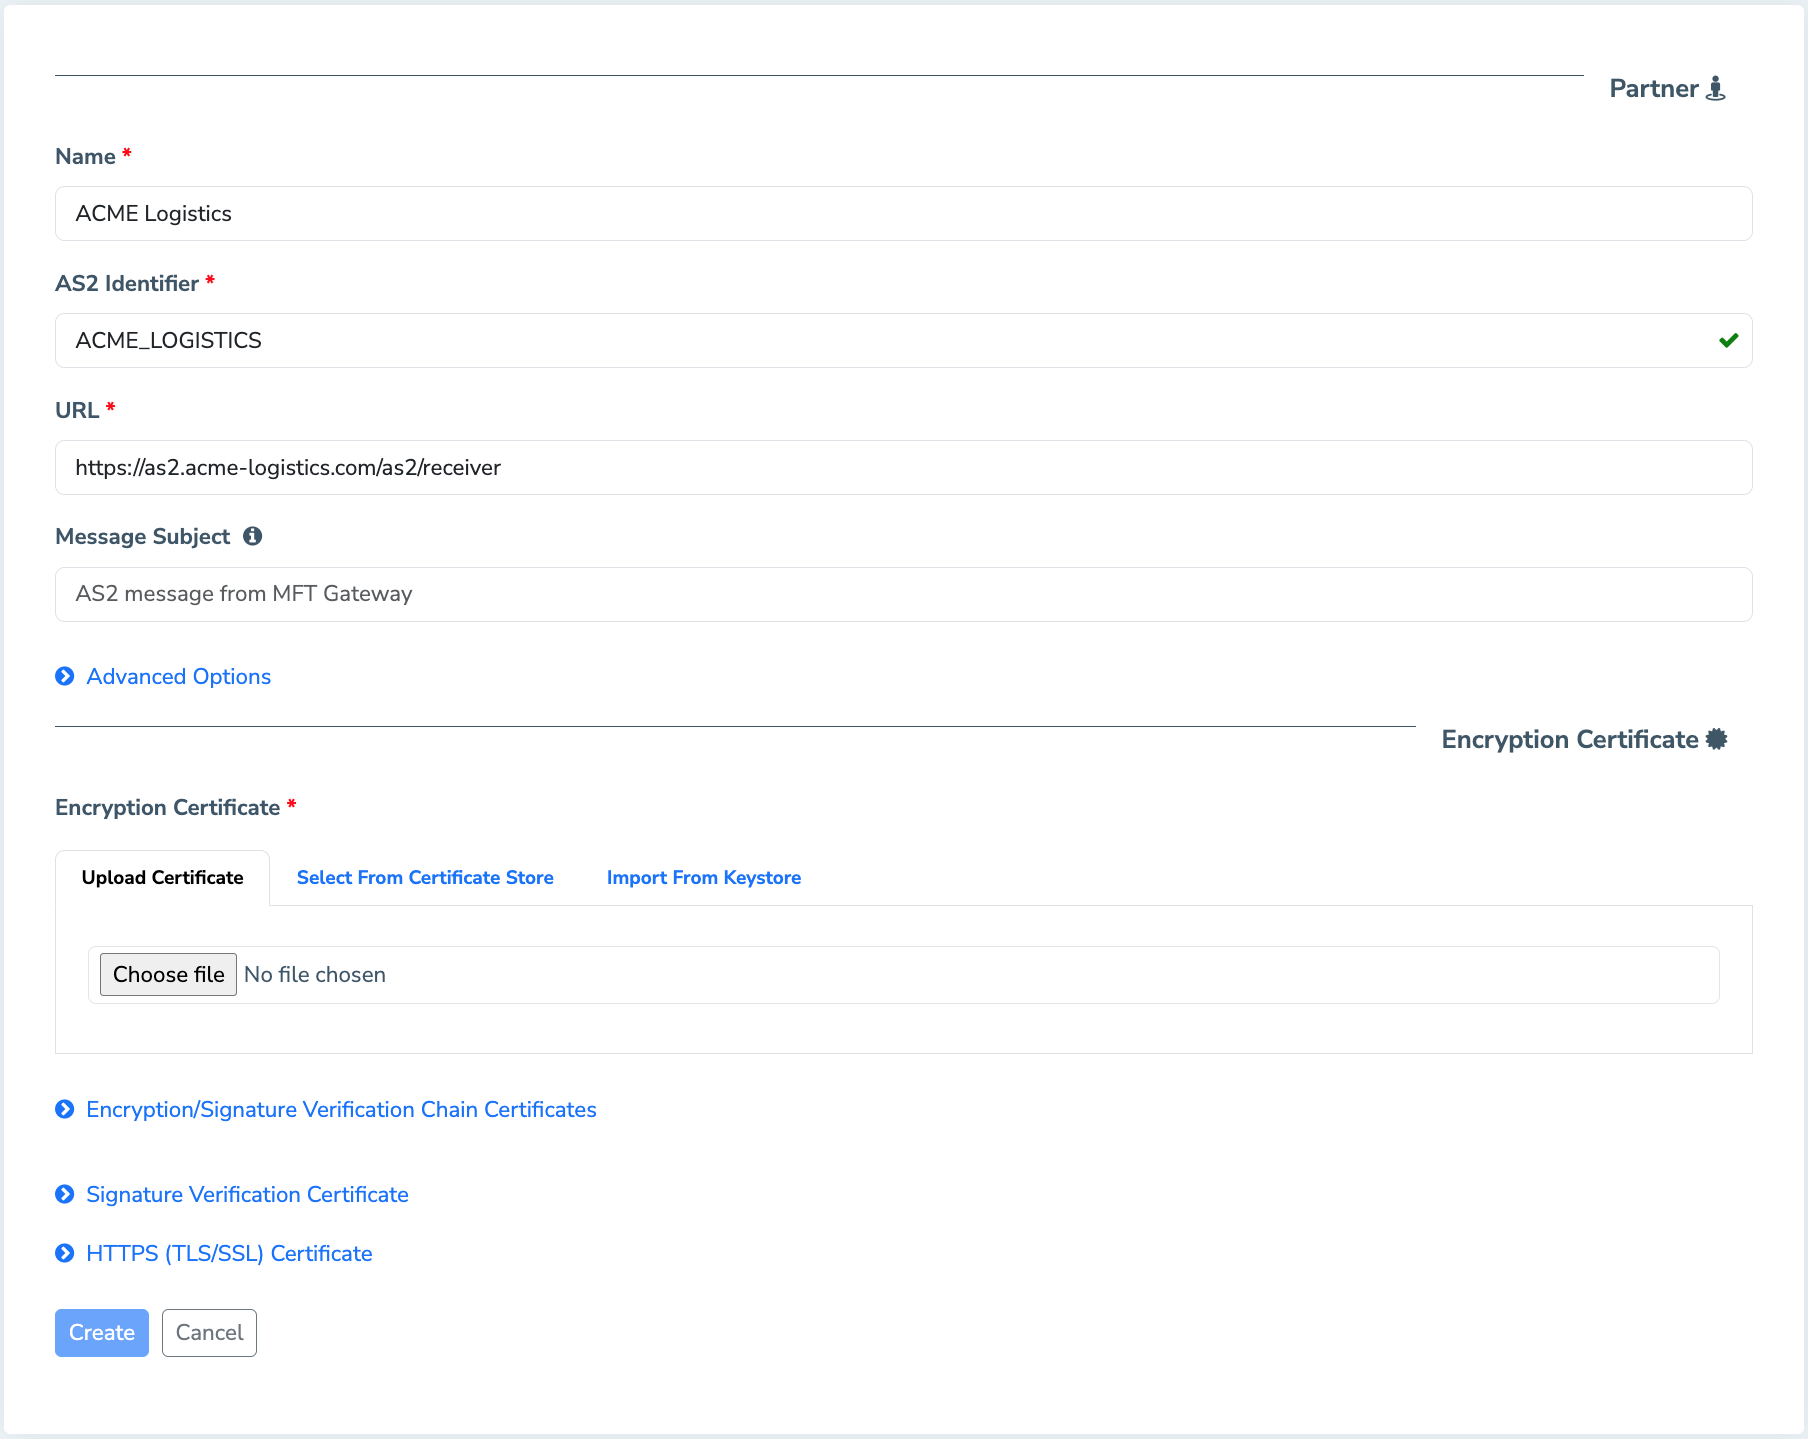
- Specify a name for the trading partner. This is a textual identifier for you to easily distinguish this partner from others in the system. This will be very helpful when your partners use cryptic AS2 identifiers, such as
08925485US00by Walmart. The name will not be used within the AS2 communications. - Specify the AS2 Identifier of the partner, which will be provided to you by your Partner.
- Specify the partner URL that your Partner will provide you. It will be used to send messages to this partner, and the partner would be listening on this URL for incoming messages.
- Provide a default message subject (similar to an email subject line) which will be used if a subject has not been specified when sending messages. A subject line is optional, and you can leave this to its default value.
- Check the ‘Advanced Options’ section below if you would be needing to configure any advanced configuration options
- Upload the partner’s public certificate, which will be provided by your Partner. MFT Gateway will use this to encrypt messages (if encryption has been enabled for outgoing messages), so that they can only be decrypted on the partner’s end, using the corresponding private key.
- Click the Create button to submit the form.
Once the partner has been created, you will land back in the partner list view. Now that we have a station and a partner, we can proceed to sending our first message!
Uploading Partner’s Public Certificate
The MFT Gateway offers three distinct options for importing your partner’s public certificate. You can utilize the following methods:
- Upload Certificate: You have the flexibility to upload a certificate file in pem, cer, der, or txt formats using the “Upload Certificate” option.
- Select From Certificate Store: If you have previously uploaded a certificate, you can conveniently select it from the “Select From Certificate Store” option.
- Import From Keystore: Should you receive your partner’s certificate in any of the following keystore formats - jks or pkcs - you can seamlessly import it using the “Import From Keystore” option.
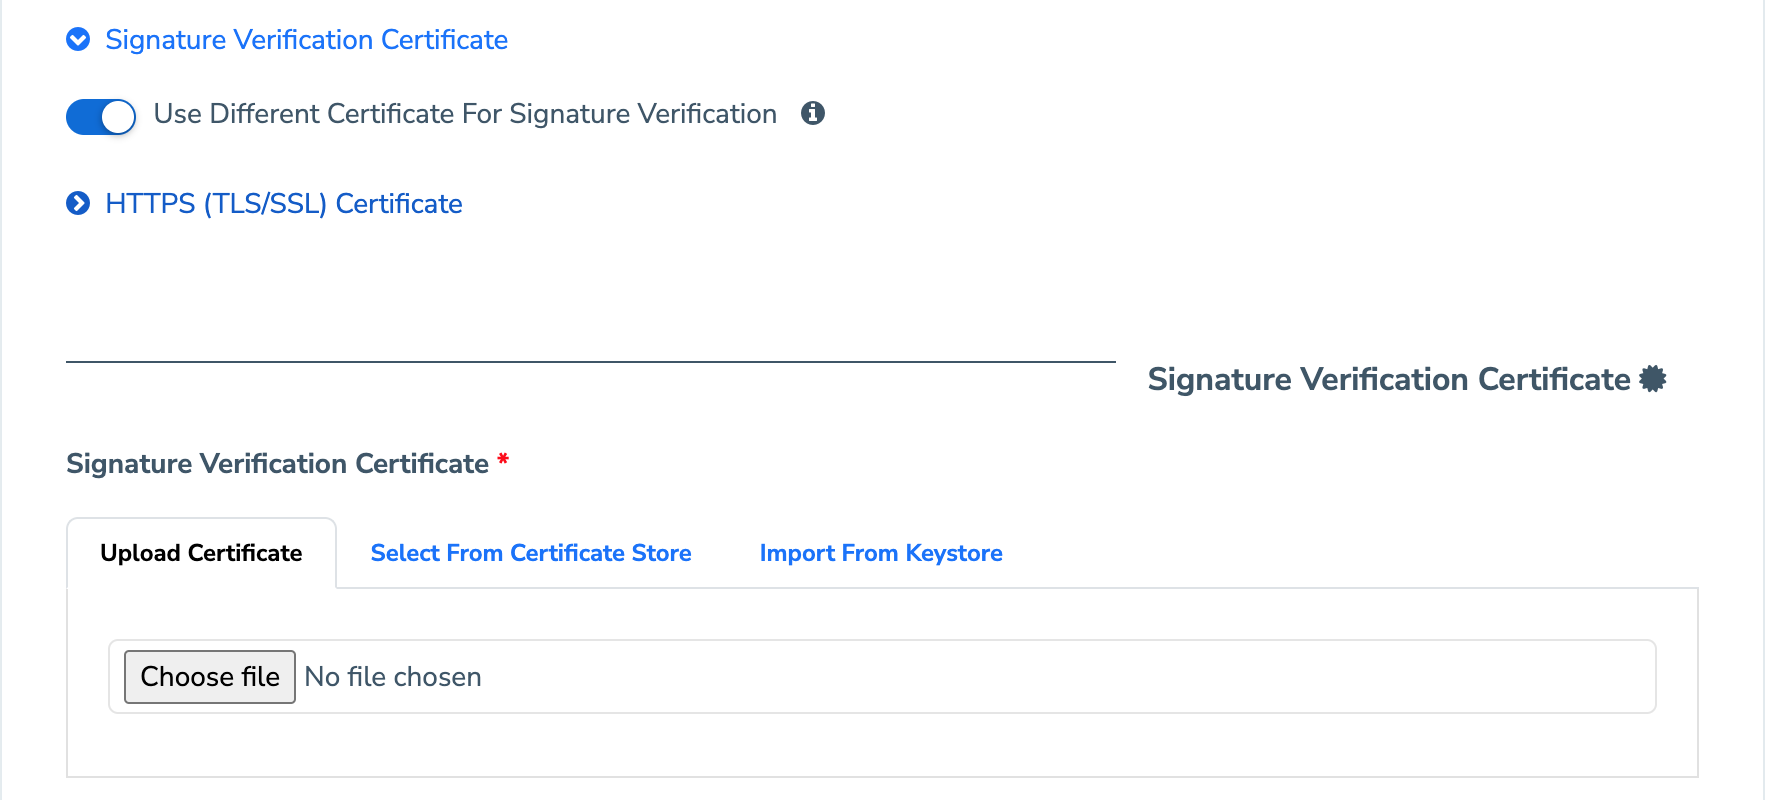
Use different certificate as sign certificate
While most AS2 partners use the same certificate and key-pair for both encryption and digital signatures, there are some partners who use two different ones. If your partner uses two certificates, slide the ‘Use different certificate as sign certificate’ to enable you to upload a separate certificate for digital signatures. In addition, if your partner requires a custom SSL certificate to be trusted to establish a TLS/SSL connection, you can upload it by opening the ‘HTTPS (TLS/SSL)’ section and uploading the SSL certificate and any Chain certificates.
2.2 Advanced configuration for an AS2 Partner
2.2.1 AS2 Security
2.2.1.1 Encrypt Messages
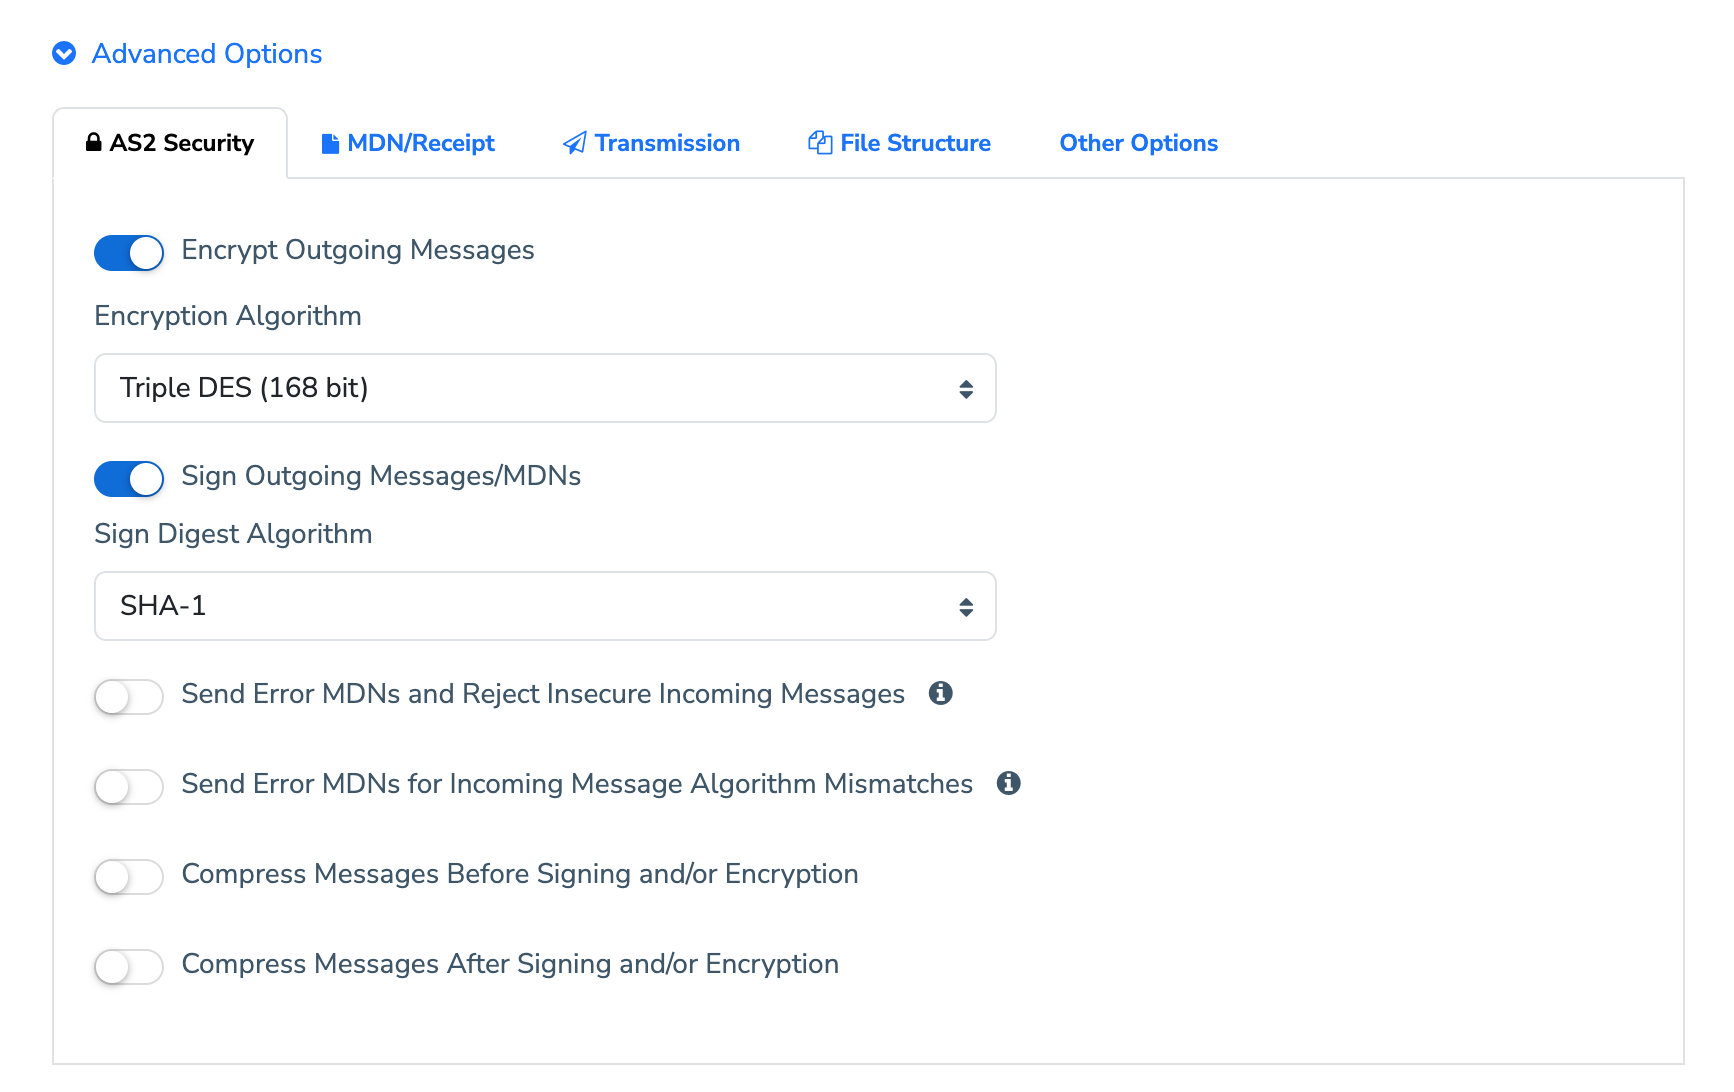
Specifies if messages should be encrypted, and if so using which algorithm. Encryption would generally be enabled for all partners, as its one of the key advantages of the AS2 protocol. AES 256 or Triple DES are most commonly used.
The following encryption algorithms are currently supported in MFT Gateway:
- Triple DES (168-bit): DES_EDE3_CBC
- AES (128-bit): AES128_CBC
- AES (192-bit): AES192_CBC
- AES (256-bit): AES256_CBC
- Camellia (128-bit): CAMELLIA128_CBC
- Camellia (192-bit): CAMELLIA192_CBC
- Camellia (256-bit): CAMELLIA256_CBC
- CAST5/CAST-128 (128-bit): CAST5_CBC
- RC2/ARC2 (40-bit): RC2_CBC
- SEED (128-bit): SEED_CBC
2.2.1.2 Sign Messages
Specifies if messages should be digitally signed, and if so using what sign digest algorithm. Digital signatures are generally enabled for all partners, as its one of the key advantages of the AS2 protocol. SHA-256 or SHA-1 is most commonly used
The following signing (digest) algorithms are currently supported in MFT Gateway:
- SHA1
- MD5
- MD2
- SHA224
- SHA256
- SHA384
- SHA512
2.2.1.3 Send Error MDNs and Reject Insecure Incoming Messages
You can enforce encryption and digital signature for incoming messages with this option. If enabled, the MFT Gateway will generate an error Message Disposition Notification (MDN) for incoming messages that do not have encryption or a signature, and it will not proceed with further processing.
2.2.1.4 Send Error MDNs for Incoming Message Algorithm Mismatches
The MFT Gateway allows you to add another layer of validation to incoming messages with this option. If an incoming message is encrypted and signed, it must adhere to the same encryption and signature digest algorithms that are employed for outgoing messages.
When this option is enabled, the MFT Gateway will send an error Message Disposition Notification (MDN) for encryption/signature algorithm mismatches and reject incoming messages without further processing.
Additionally, if the “Send Error MDNs and Reject Insecure Incoming Messages” option is enabled and an incoming message is not encrypted or signed, the MFT Gateway will reject the incoming message and send error MDNs without performing the algorithm verification.
2.2.1.5 Compress Messages
You can specify if compression should be used, especially if your Partner has requested so. If your Partner supports compression, large EDI or text files could be compressed well for transmission as smaller payloads.
You can choose to run the compression:
- Before signing and/or encryption i.e. on the original set of files that you included in the message; in this case, the partner would need to first decrypt/verify the payload, and then decompress it
- After signing and/or encryption i.e. compression would be the last (outermost) action or “layer” on the payload; in this case, the partner would need to first decompress the payload, and then decrypt/verify the content
Under advanced options, you can specify if the messages sent to this Partner should:
- be encrypted, and if so using which algorithm. (Triple DES is most commonly used)
- be digitally signed, and if so using what sign digest algorithm. (SHA-1 is most commonly used)
Unless your partner has specified specific encryption and digital signature algorithms, it’s best to leave these at their default values. Some partners now choose to use SHA-256 as the sign digest algorithm.
2.2.2 Message Disposition Notification (MDN/receipt)
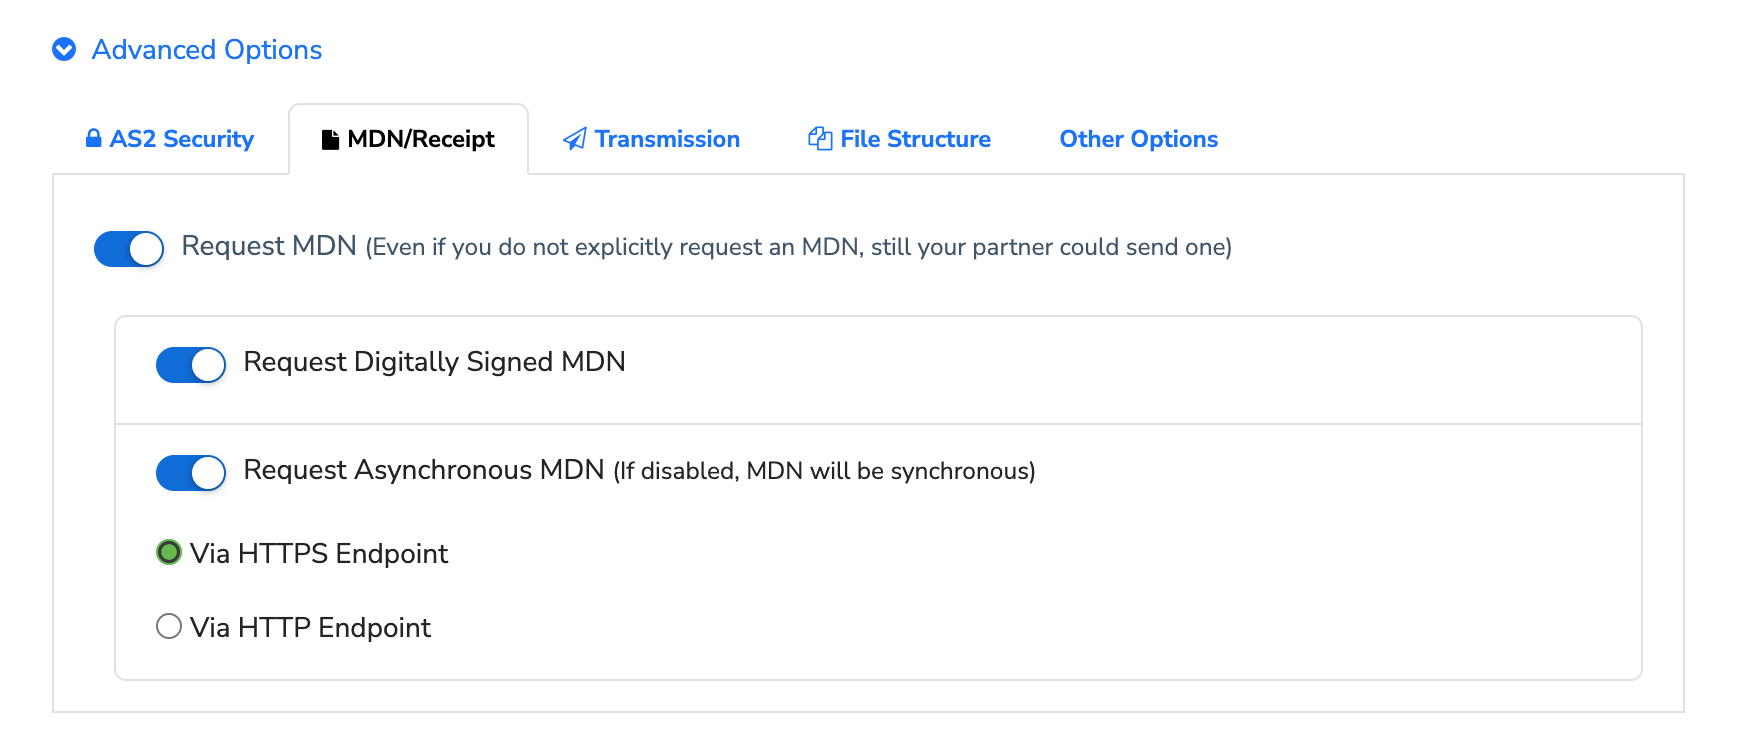
2.2.2.1 Request MDN
You can choose to request an MDN, which is the default and most widely used option, or, choose to turn it off if your partner has specifically informed you to.
2.2.2.2 Request Digitally Signed MDN
You can choose to request a digitally signed MDN for non-repudiation, a key advantage of the AS2 protocol. By saving the receiving MDN, you can prove that the Partner had received the exact version of the message that was sent. By default, this is enabled, as its widely used.
2.2.2.3 Request Asynchronous MDN
You can also specify if messages sent to this Partner should request an asynchronous MDN. By default, this is off, and the MFT Gateway will be requesting a synchronous MDN. However, if your Partner specifies that it will be issuing an asynchronous MDN, you would need to switch this on.
In this case, MFT Gateway will inform the partner system where (the URL/endpoint) to send the asynchronous MDN, by including an additional Receipt-Delivery-Option HTTP header on each AS2 message. This URL is, by default, http://service.mftgateway.com/mdn-receiver;
2.2.2.4 Request Asynchronous MDN over HTTPS
If your partner requires a HTTPS/secure URL (instead of plain HTTP) for sending asynchronous MDNs back, you can switch this option on. Note that the option is available only in asynchronous-MDN mode (Request Asynchronous MDN turned on).
2.2.3 Transmission
2.2.3.1 Enable Static IP Address for Outgoing Messages
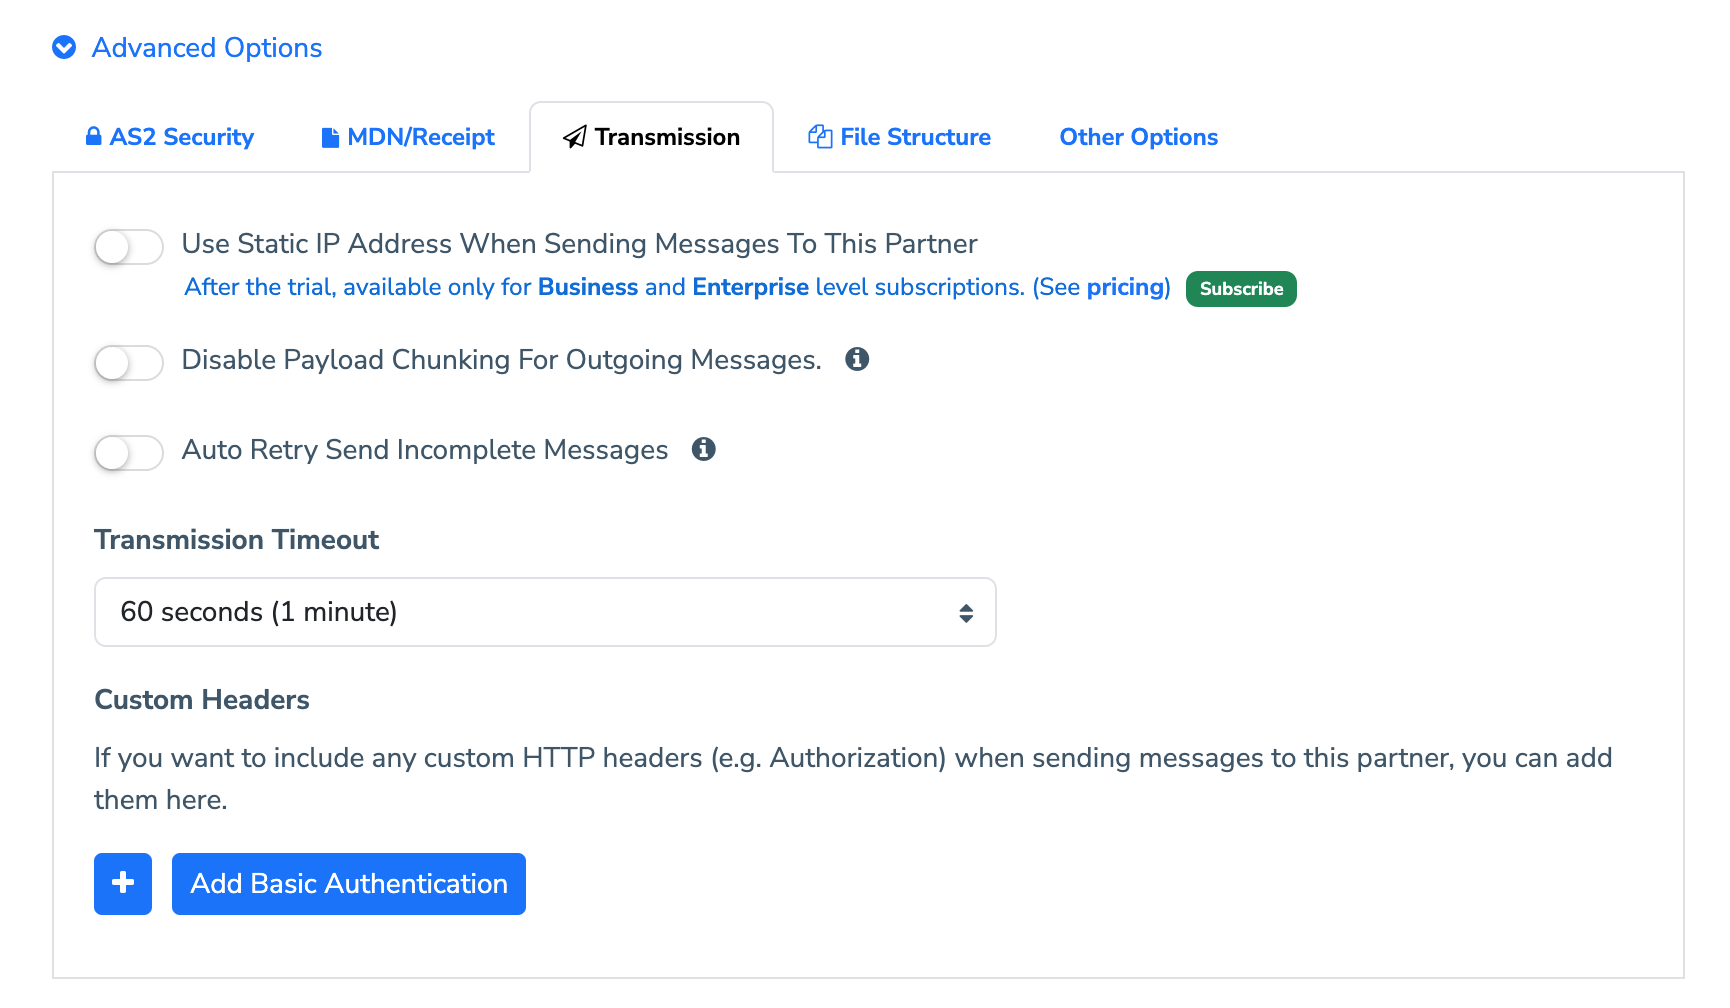
The option to use a static IP address for outgoing AS2 messages to this Partner is an optional value added service, available to Business and Enterprise subscription tiers. If you enable this option, you will need to subscribe to such a tier after your free trial ends.
2.2.3.2 Disable Payload Chunking For Outgoing Messages
If this option is enabled, the MFT Gateway will transmit the AS2 payload using Content-Length based encoding instead of chunked Transfer-Encoding.
2.2.3.3 Transmission Timeout
After sending an AS2 message, MFT Gateway waits for a finite amount of time to receive the network-level (HTTP) response for the transmission. If the response is not received within this time, the transmission is considered as a failure.
If your partner’s AS2 system generally tends to take a long time to respond, you may start getting many such “connection timed out” errors. In such cases, you can try increasing this Transmission Timeout value to tolerate such large delays, instead of failing at the default 60-second (1-minute) timeout.
The transmission timeout does not apply to asynchronous MDNs; if you send a message requesting an asynchronous MDN, and the partner sends the HTTP-level response (network acknowledgement) within the time-out period, all would be fine - regardless of how long the partner may take to send the final MDN. Even if the MDN gets delayed by several hours, MFT Gateway will continue retaining the message in “MDN pending” status until it is received.
You can also customize the Transmission Timeout for the partner, which represents the amount of time that MFT Gateway will allocate for a send operation to complete, before marking transmission as failed. If you intend to send larger files to your partner, it is recommended to configure a higher value for this.
2.2.3.4 Auto Retry Send Incomplete Messages
The MFT Gateway designates outgoing messages as incomplete when your trading partner accepted the message but failed to provide an acknowledgment within the specified transmission timeout. By default, the MFT Gateway will not automatically retry such messages to prevent possible message duplications on your partner’s end.
If this option is enabled, the MFT Gateway will initiate automatic retries for incomplete messages, and there is a possibility that the trading partner may receive duplicate messages if they have already successfully processed the earlier ones on their end.
2.2.3.5 Custom Headers
Some trading partners require you to send additional HTTP headers along with a standard AS2 message (e.g. for authentication or routing purposes). You can use this option to add one or more such headers as key-value pairs.
For example, to add the two headers
X-Cyclone-Routing-Key: ACME_PROD
Authorization: Basic abcdefgh1234
- Click +, to add a new key-value pair.
- Enter X-Cyclone-Routing-Key (excluding the colon and space,
:) on the Header Key field. - Enter ACME_PROD on the Header Value field.
- Repeat above steps for the second header: key Authorization, value Basic abcdefgh1234.
To remove an already defined header, click the dustbin-icon button against that row.
Note: Headers will be included in the AS2 message (HTTP request) in the order they are defined.
Using Basic Authentication
If your partner provides you with a username/password pair to use as basic authentication, you can use “Add Basic Authentication” option generate corresponding Authorization header.
E.g. for username foo and password bar, MFT Gateway generated header would be:
- Header Key:
Authorization - Header Value:
Basic Zm9vOmJhcg==
Once added, these headers will be included in every AS2 message that you send to this partner. If you have any advanced requirement, contact MFT Gateway support for more information.
2.2.4 File Structure
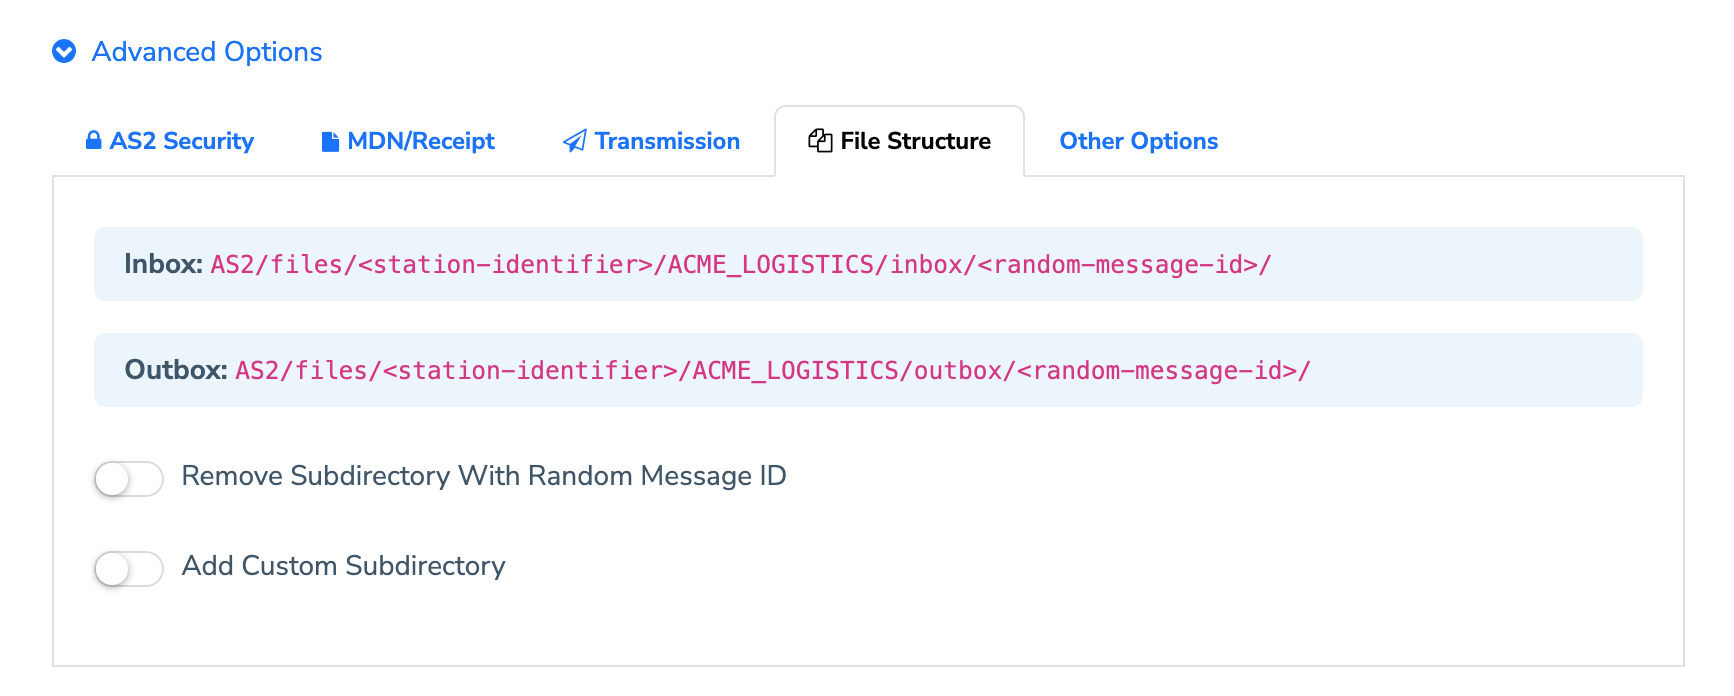
The MFT Gateway by default uses the following file structures to save inbound/outbound message content inside your dedicated S3 bucket.
/AS2/files/(AS2-Station-ID)/(AS2-Partner-ID)/inbox/(Random-Message-ID)/
/AS2/files/(AS2-Station-ID)/(AS2-Partner-ID)/outbox/(Random-Message-ID)/
The MFT Gateway allows you to customize the default file structure with following options.
2.2.4.1 Remove Subdirectory With Random Message ID
When you enable this option, you can remove the last subdirectory generated with a random message ID (unique for each message). Consequently, message content will be saved directly under the inbox/outbox directories. It’s important to note that this can introduce a risk of content being overridden.
2.2.4.2 Add Custom Subdirectory
You can specify your own custom subdirectory under the inbox/outbox for this partner. Once you enable this option and specify a custom subdirectory, the file structure will change as follows.
/AS2/files/(AS2-Station-ID)/(AS2-Partner-ID)/inbox/(Custom-Sub-Directory)/(Random-Message-ID)/
/AS2/files/(AS2-Station-ID)/(AS2-Partner-ID)/outbox/(Custom-Sub-Directory)/(Random-Message-ID)/
2.2.5 Other Options
2.2.5.1 Description
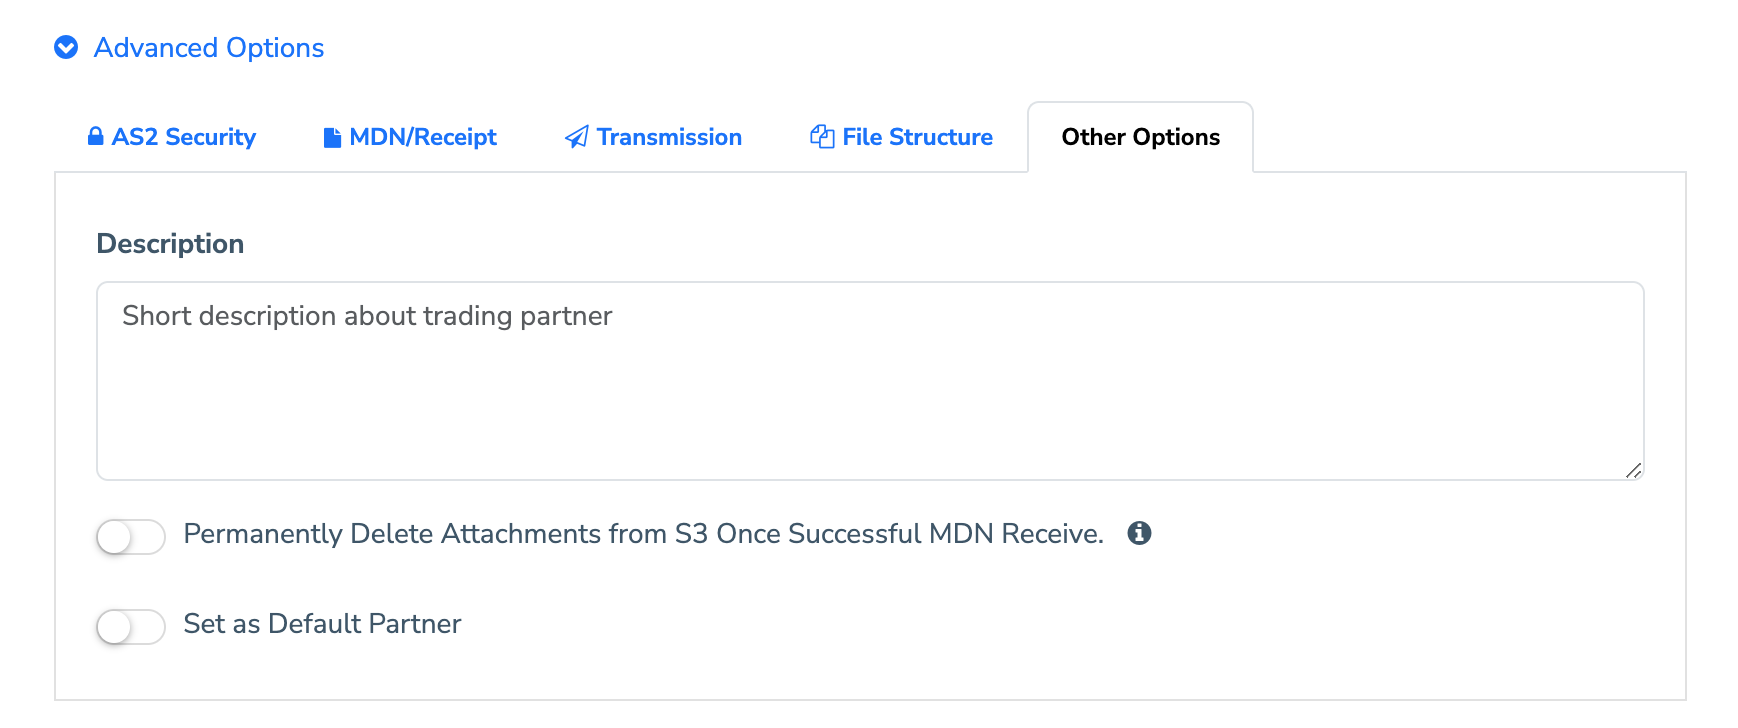
Specify a description of your trading partner; mainly just for identification purposes within your MFT Gateway account.
2.2.5.2 Permanently Delete Attachments from S3 Once Successful MDN Receive
If this option is enabled, the MFT Gateway will permanently delete outgoing message attachments from your S3 bucket upon the receipt of a successful MDN. Note that message metadata and raw files (including payload, MDN, and transport headers) will be retained indefinitely and will not be subject to deletion.
2.2.5.3 Set As Default Partner
Specify a default AS2 partner that will be pre-selected automatically in the message compose view.
2.3 Error handling when message transmissions fail
During message sending, if any error prevents the MFTGateway from safely retrying, the MFTGateway will not attempt a retransmission by default. For example, after a message has been sent by the MFTGateway to a Partner, the partner can take a long time to issue a synchronous MDN. During this time the socket connection could time out and get terminated, but the partner might have successfully enqueued the file after all. In such a scenario, a retransmission will send a duplicate copy of the same file. Usually this would be fine, since higher level applications should safely detect and ignore duplicates. However, to be safe, the MFTGateway will not attempt retransmission of such partially completed operations, unless the ‘Auto Retry Send Incomplete Messages’ is turned on.
Note: This does not apply if the MFTGateway could not send the messages at all in the first place. For example, where maintenance or unexpected downtime of partner systems prevents the MFTGateway from submitting a file, it will be automatically retried ten more times by default, with an exponential backoff between retries. If the message still does not succeed after the retries are exhausted, it will be placed into the Failed state. A user may trigger a retransmission attempt again, by logging into the system, navigating to the Failed messages list, and clicking on the retry button.


