
Basic Configurations
Login to the EDI Generator account and navigate to Organization under the Administration sub menu.
1 Details of the organization
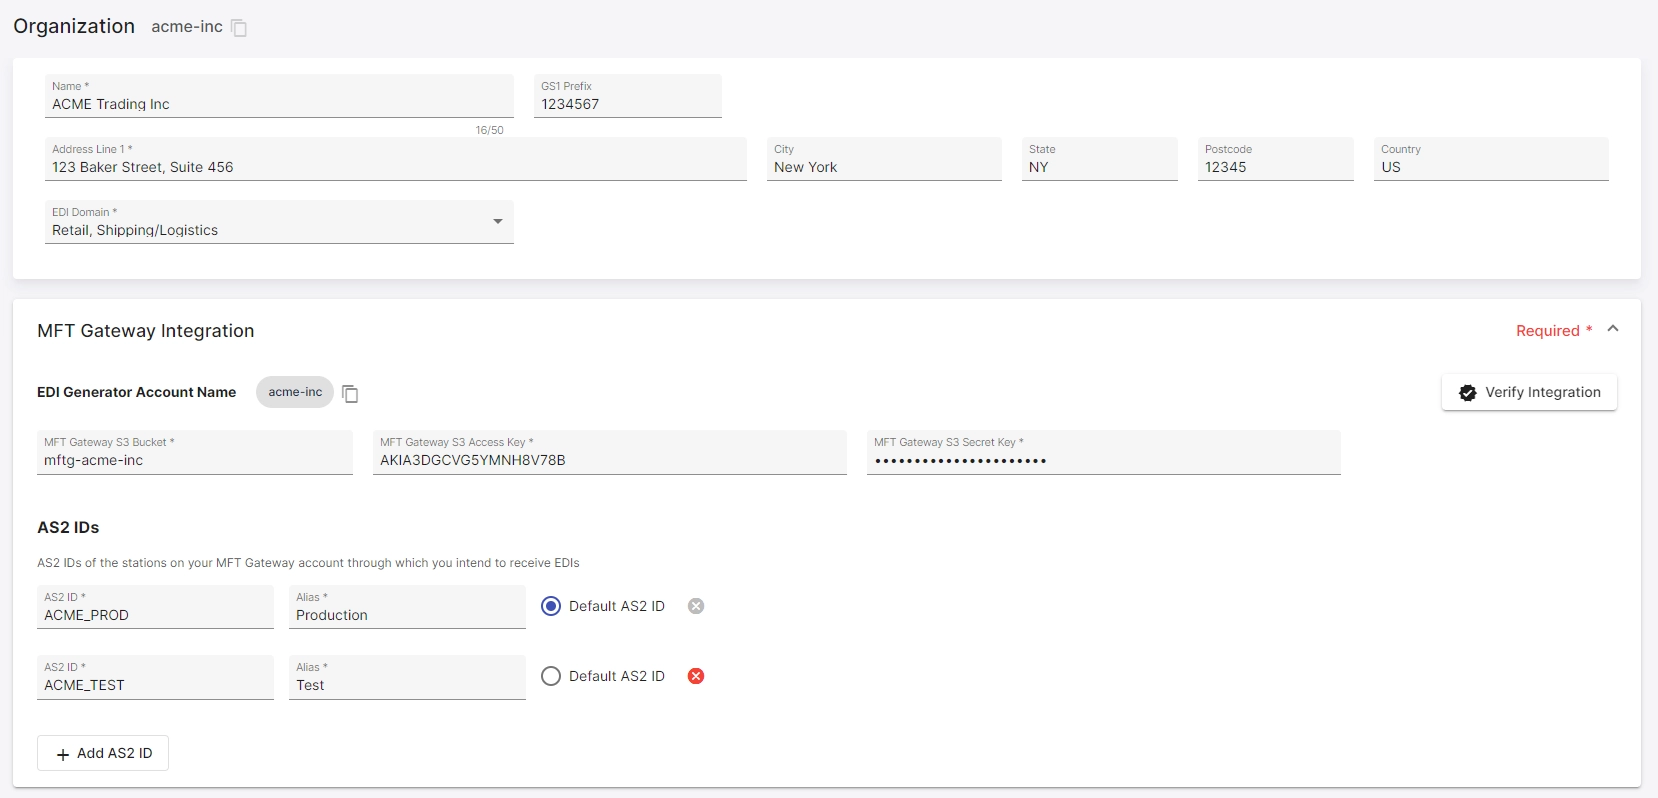
Specify the following details of your organization in the first section.
- Legal name of the organization
- GS1 prefix (required to generate barcodes for shipping labels)
- Address details (including the city, state, post code and the country)
1.1 EDI Domains and EDI types
Select one or more domains where your organization plans to implement EDI. The available EDI types in the EDI Generator will vary based on your selection.
- Retail - Purchase orders (850), PO Acknowledgments (855), Advanced Ship Notifications (856), Retail Invoices (810), etc.
- Shipping/Logistics - Load Tenders (204), Load Tender Responses (990), Shipment Statuses (214), Shipment Invoices (210)
1.1.1 Additional Outgoing Types
To enable generation support for any X12 EDI type not included by default in the two domains above or EDIFACT types, click Add Types and select the desired types X12 or EDIFACT from the list.

2 MFT Gateway Integration
2.1 Integration activities on MFT Gateway
For the MFT Gateway <-> EDI Generator integration to work, there are certain configurations to be done on the EDI Generator account as well as on the MFT Gateway account. Please refer to this guide on completing the integration on the MFT Gateway account.
Once completed, you should have the following information to be configured during the steps mentioned on the next section.
- MFT Gateway S3 bucket name
- S3 Access Key
- S3 Access Secret Key
- AS2 Identifiers of the stations to be integrated
2.2 Integration activities on EDI Generator

- Proceed to the MFT Gateway Integration section for configuring the integration with MFT Gateway account. On the top of this section, you will see your EDI Generator Account Name, which can be copied and used during the EDI Generator integration on MFT Gateway account.
- For MFT Gateway S3 Bucket, MFT Gateway S3 Access Key and MFT Gateway S3 Secret Key, provide the information from the MFT Gateway.
- Under AS2 IDs section add an entry for each station selected for the integration on MFT Gateway side.
- The AS2 ID field of the entry should have the AS2 identifier of that station, and any user-friendly name can be provided for the Alias field to identify the purpose of this AS2 ID (e.g. Production and Test).
- If you are integrating with multiple stations, a Default AS2 ID must be selected, which will be used when an AS2 ID is not explicitly selected for a certain operation (e.g. sending an EDI to a partner).
- Once the MFT Gateway Integration parameters are completed, click on the Verify Integration button to verify that the parameters are valid with what was configured on the MFT Gateway account.
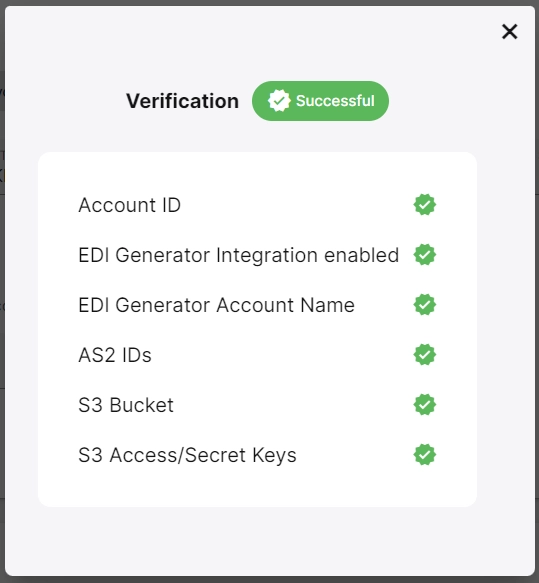
- If everything is correct, you will be presented with a result popup such as below. In case there are any errors specified, you will need to correct those and retry the verification.
3 EDI Identification (ISA/GS and UNB/UNG) configuration
- Under X12 ISA/GS Identifiers, specify one or more ISA and GS identifiers to be used for your organization, and the corresponding ISA qualifier prefixes. Usually, you can pick an identifier string reflecting your organization name between 2 and 15 characters, and use the ISA prefix as
ZZ. - Under EDIFACT UNB/UNG Identifiers, specify the corresponding UNB and UNG identifiers and the UNB qualifier prefix for your organization.
- Provide a user-friendly name for the Alias field of each entry to identify its purpose (e.g.,
ProductionandTest). - If you are configuring multiple entries, a Default ISA & GS (for X12) and/or a Default UNB & UNG (for EDIFACT) must be selected. This default will be used when an identifier is not explicitly selected for a certain operation (e.g., generating an EDI).
- For integration with Walmart, the Skip ISA/GS validation for EDI X12 816 should be checked, as Walmart will be sending a generic EDI 816 document to all partners.
- It is also possible to skip validation for any EDI you receive by enabling the Skip ISA/GS and UNB/UNG validation checkbox. However, this is not recommended for production use and should only be used temporarily during testing phases.
4 Enabling Notifications
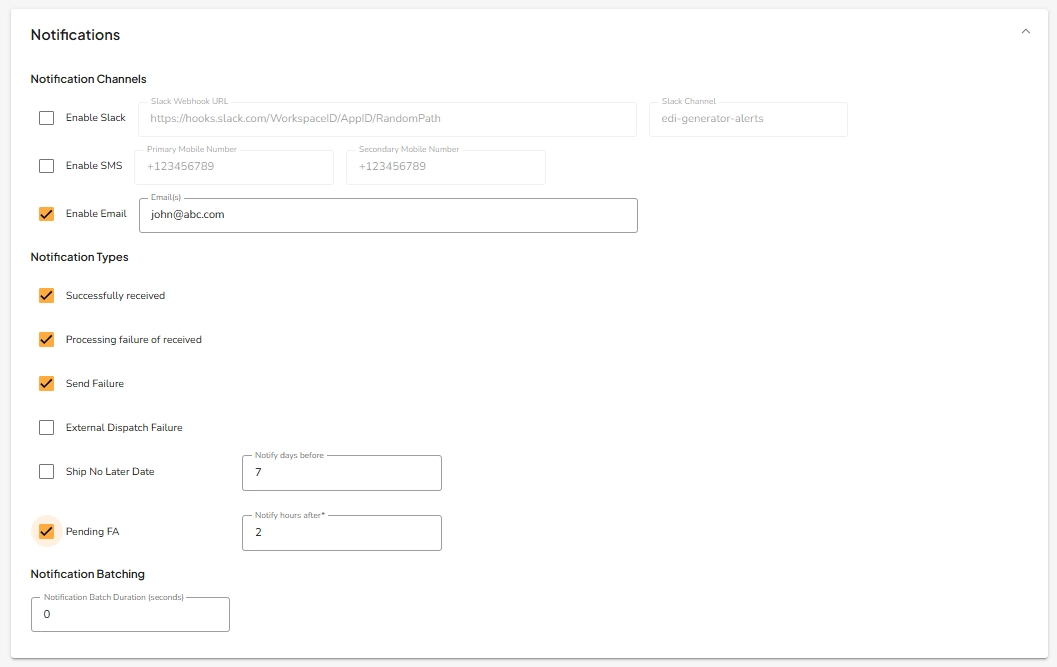
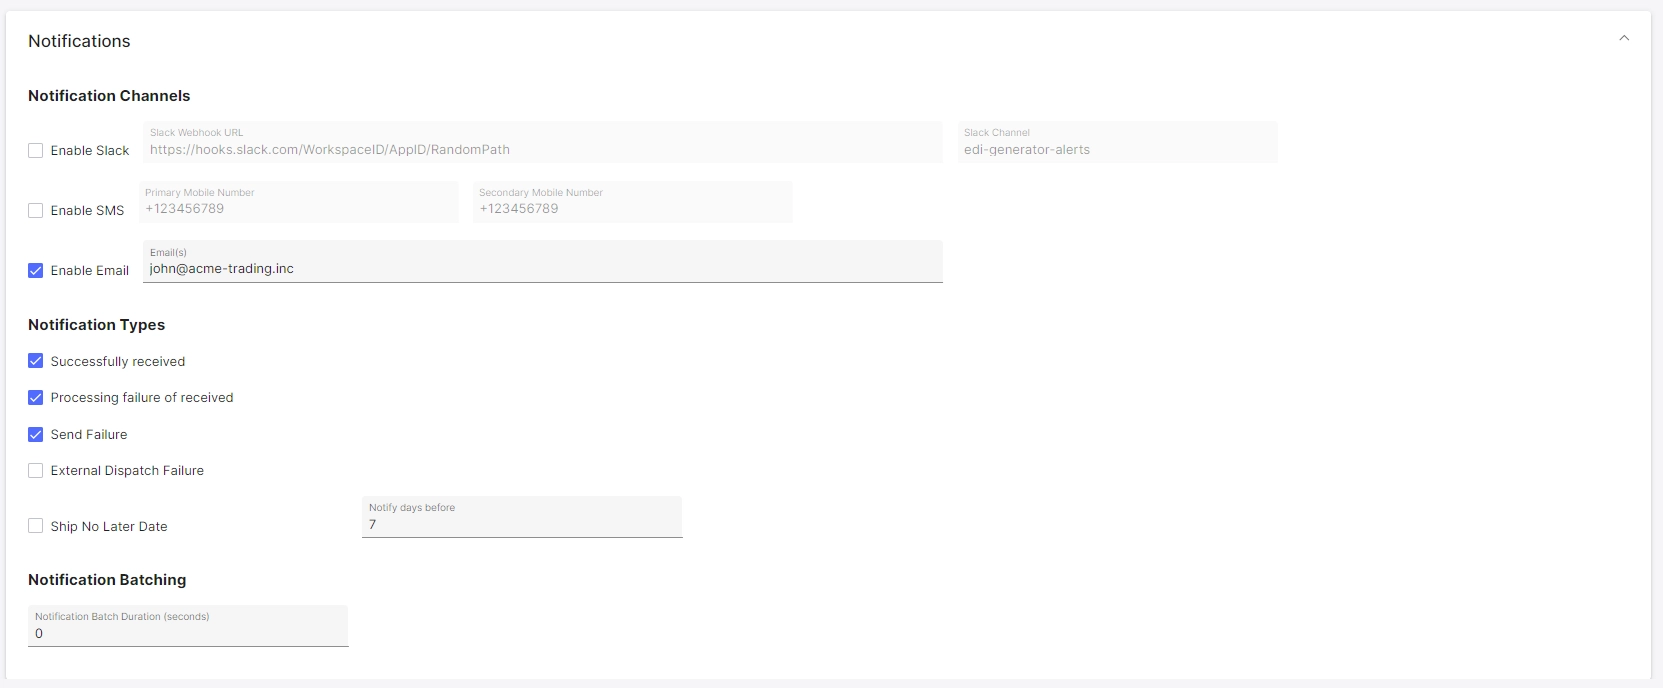
You can also enable a Slack notification, SMS notifications (two phone numbers) and Email notifications (three addresses) for,
- Successfully received - Incoming messages which were successfully processed
- Processing failure of received - Incoming messages which were failed to be processed
- Send Failure - Sending failures of outgoing EDIs
- External Dispatch Failure - Any failures occurred when dispatching a received message to an external integration
- Ship No Later - Will notify about any approaching “Ship No Later” dates before the specified number of days
- Pending FA - Will notify about any sent EDIs which have not received a Functional Acknowledgement (X12 997 / EDIFACT CONTRL) from the partner within the given number of hours
Also, it is possible to batch multiple Successfully received and External Dispatch Failure notifications together within a pre-defined batch window, so that only one notification message will be sent over the selected channels covering all events occurred during that period.