MFT Gateway is a hosted Software as a Service (SaaS) solution that enables file exchange over the AS2 or SFTP protocol, without the need to install or maintain.
- Blog
- AS2 Connection setup for Walmart RetailLink GEM
Walmart
AS2 Connection setup for Walmart RetailLink GEM
A complete guide to Walmart AS2 connection setup on RetailLink Global Enterprise Mailbox GEM

Asankha Perera
Published: 20 May 2021
Table of Contents
- Getting started with Walmart RetailLink and Global Enterprise Mailbox (GEM)
- AS2 Configuration on RetailLink - Part 1
- Creating your AS2 communications infrastructure
- AS2 Configuration on RetailLink - Part 2
- Creating an AS2 Partner on the MFTGateway
- Testing the RetailLink to AS2 Station connectivity
- EDI X12 configuration for Walmart
The Walmart RetailLink application and its Global Enterprise Mailbox (GEM) configuration can be a challenge, especially if you are configuring an AS2 connection with Walmart for the first time. While the user interface could certainly be more intuitive and user-friendly, the use of the word ‘certificate’ throughout the AS2 configuration pages could result in some confusion.
Knowing where each of the AS2 configuration items exist within RetailLink and the Global Enterprise Mailbox will help you can navigate to those pages and help you to successfully configure and test an AS2 connection without hiccups. We will demonstrate the AS2 configuration with a MFTGateway Software as a Service (SaaS) or actually ‘AS2 as a Service’ account, which gives you a one month free trial, with openly published pricing that ensures that you are not charged on how deep your pockets are, and that there are no hidden fees or penalties for your AS2 communications. The lowest package start at $9 per month, and the cost will be based on the volume of messages exchanged, as you pay only for what you use. The complementary service EDIGenerator could optionally allow you to view EDI files received such as X12 850 Purchase Orders, and create 856 ASN and 810 Invoices. This will be covered in a subsequent post.
Getting started with Walmart RetailLink and Global Enterprise Mailbox (GEM)
When you login to your Walmart RetailLink account, you will land on its home page
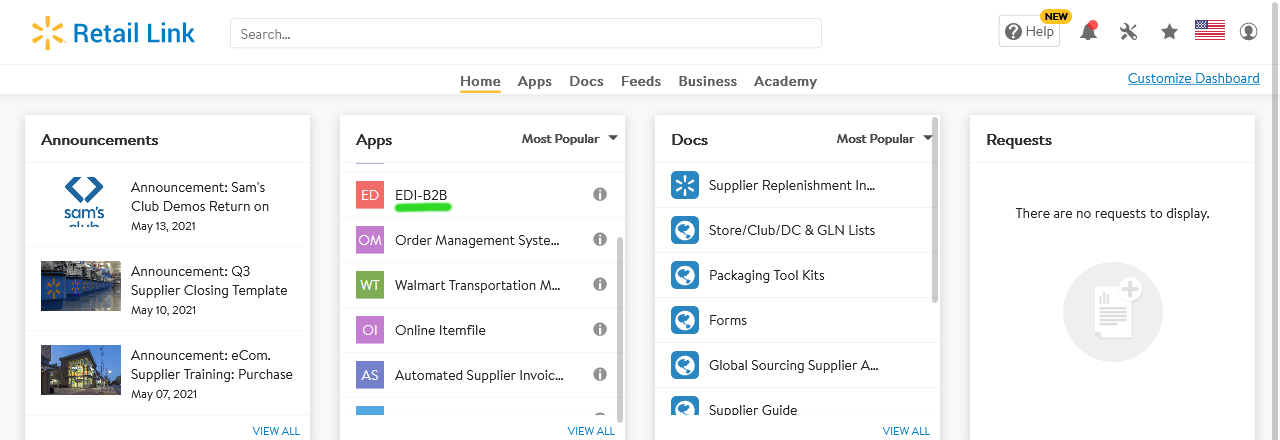
Select ‘EDI-B2B’ under ‘Apps’ and you will see your main page for EDI communications with Walmart.

The AS2 communication is configured under the ‘Global Enterprise Mailbox’ or GEM. When you visit the GEM, you will be presented with the Batch Search page as the home. Your main interactions however, will be through the menu item links at the top.

AS2 Configuration on RetailLink - Part 1
Creating a new mailbox
First we will need to create a new mailbox. Navigate to ‘Document Testing’ and then ‘Survey’ and select your vendor account to be used from the dropdown. For the mailbox ID dropdown, select ‘New Mailbox’ and click ‘Next Page’.

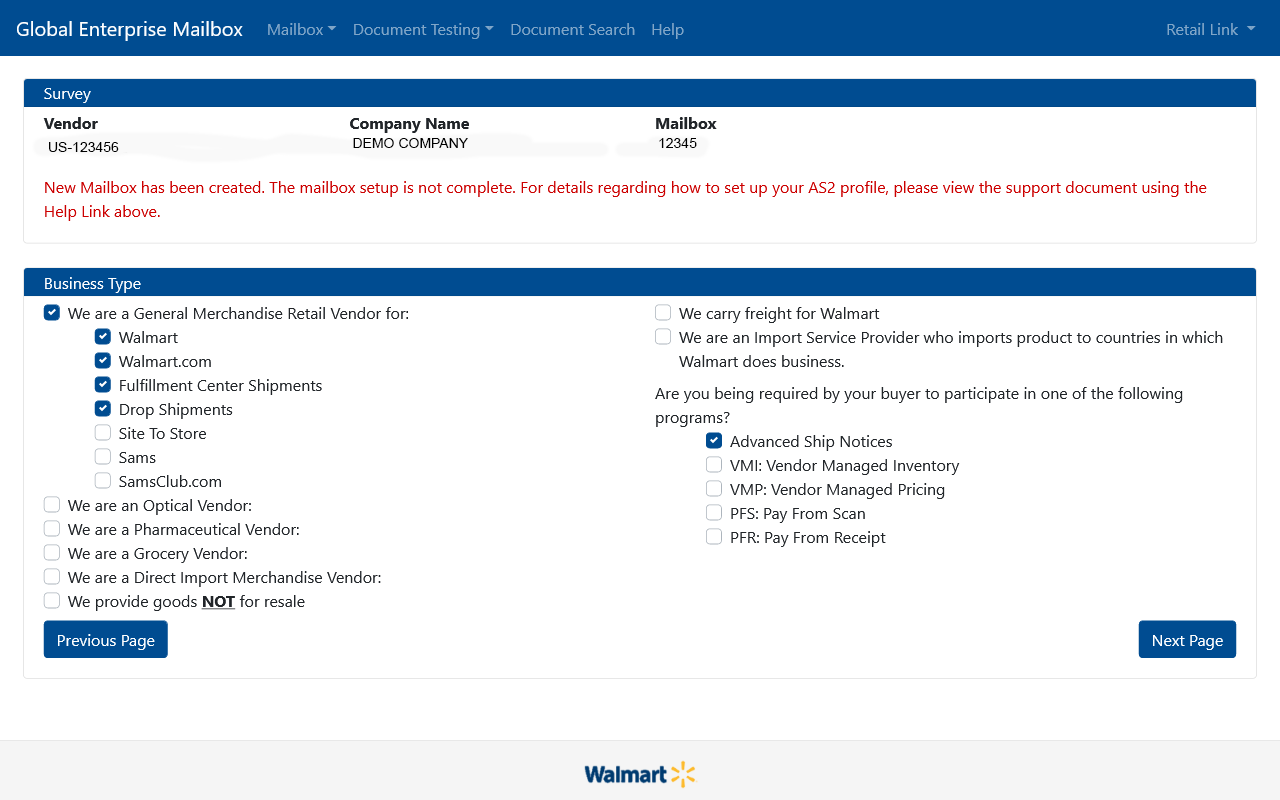
Then you will be presented with a few questions, which will allow you to select if you want to proceed with the creation of a new mailbox for AS2 communications. Answer the questions and click ‘Next Page’.
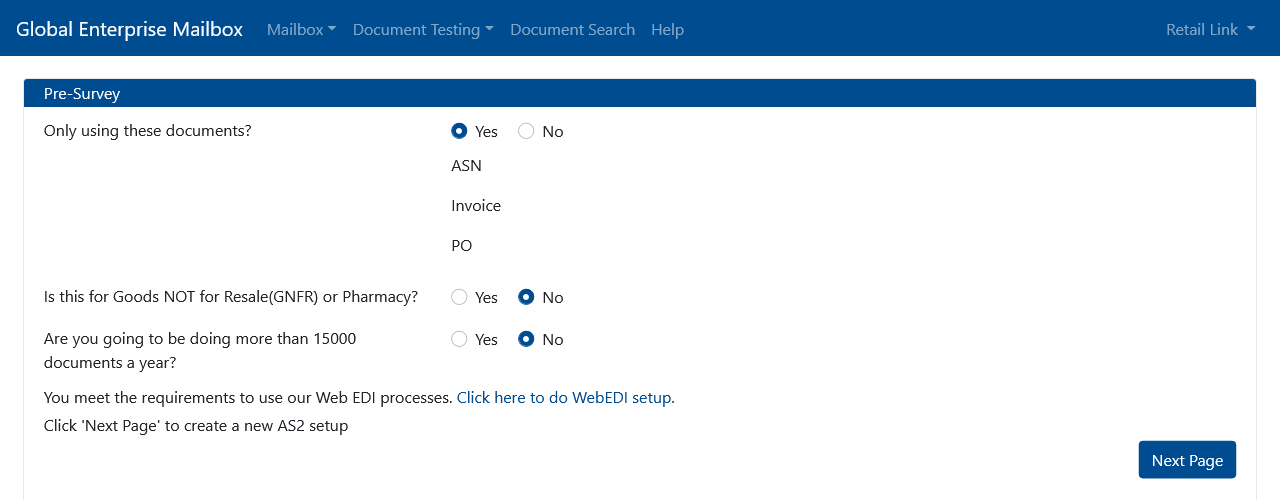
You are then taken into a page with a Survey, where your intended use is understood. Continue with your answers and click ‘Next Page’.
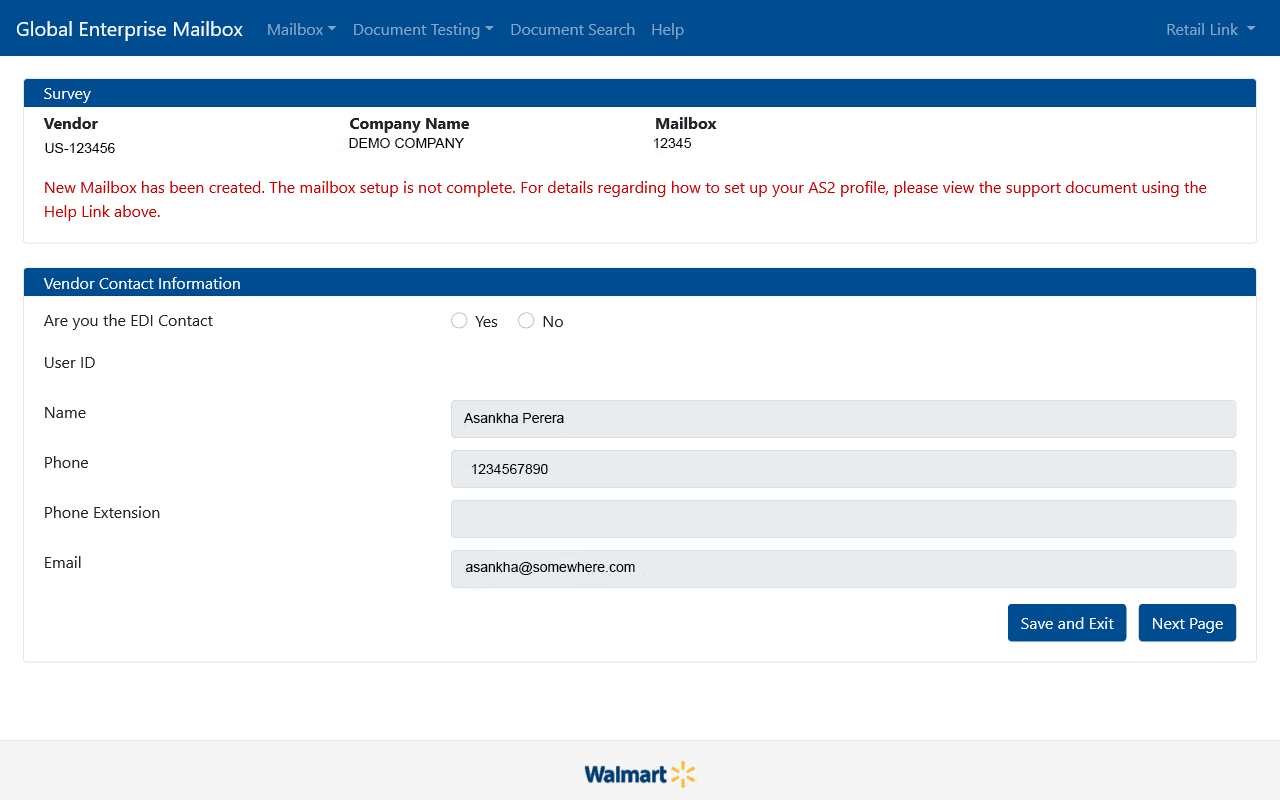
Your contact information for the new mailbox is then requested. You can leave the already existing information and proceed to the ‘Next Page’.
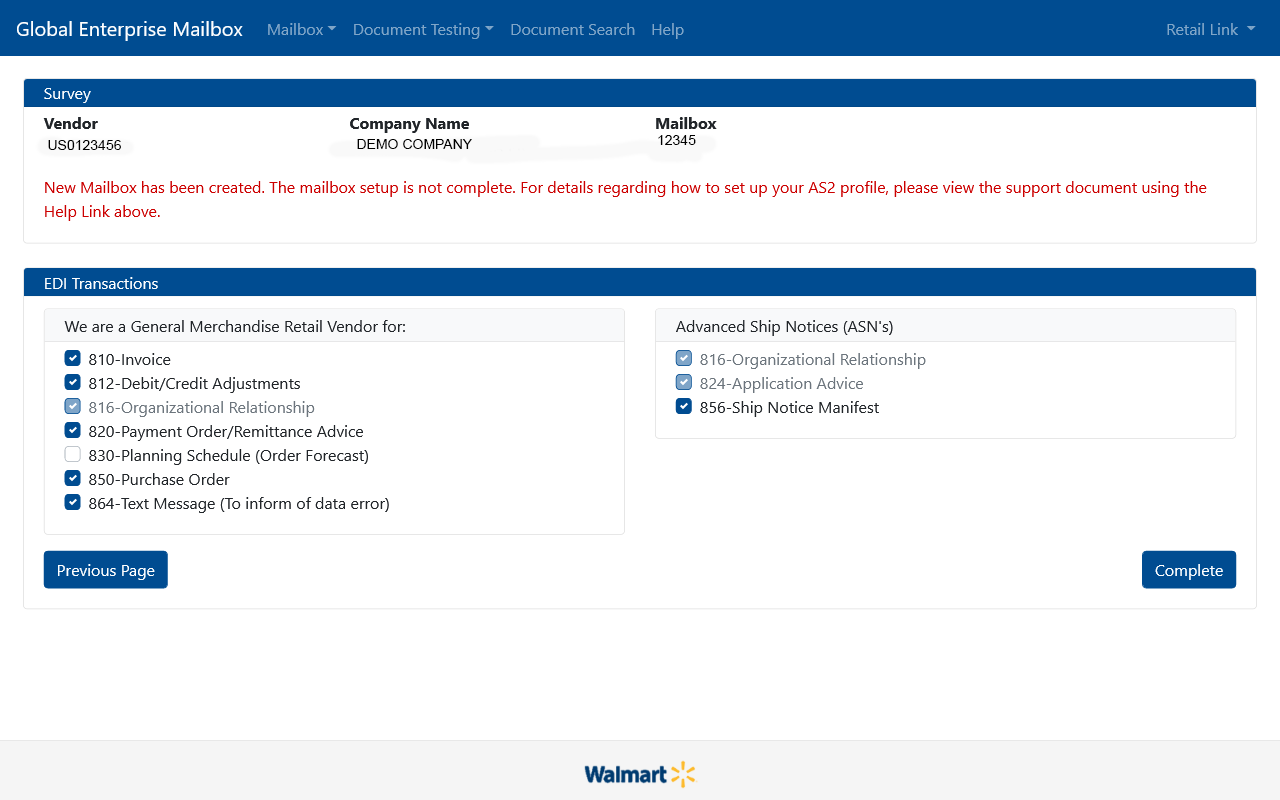
Finally select the EDI transactions intended to be performed over your AS2 connection, and click the ‘Complete’ button.
Creating your AS2 communications infrastructure
Visit the MFTGateway and signup for a new trial account. After completing the registration process and logging into the MFTGateway console, you will see your main menu bar to the left of your screen. The MFTGateway is a very intuitive application with an Inbox and Outbox and operates similarly to a web based email service. However, with AS2, you can only send or receive files with pre-configured trading partners. So you will need to create an AS2 Station in your MFTGateway account and one Partner to represent Walmart. If you want to exchange documents with more partners, you will need to create more configurations under Partners. However, you can, and most possibly should, reuse the same AS2 Station you create as separate Stations and IDs are not required, and one station is enough for one organization.
Creating an AS2 Station
To create your AS2 Station, click ‘Stations’ from the menu and then click ‘New Station’.
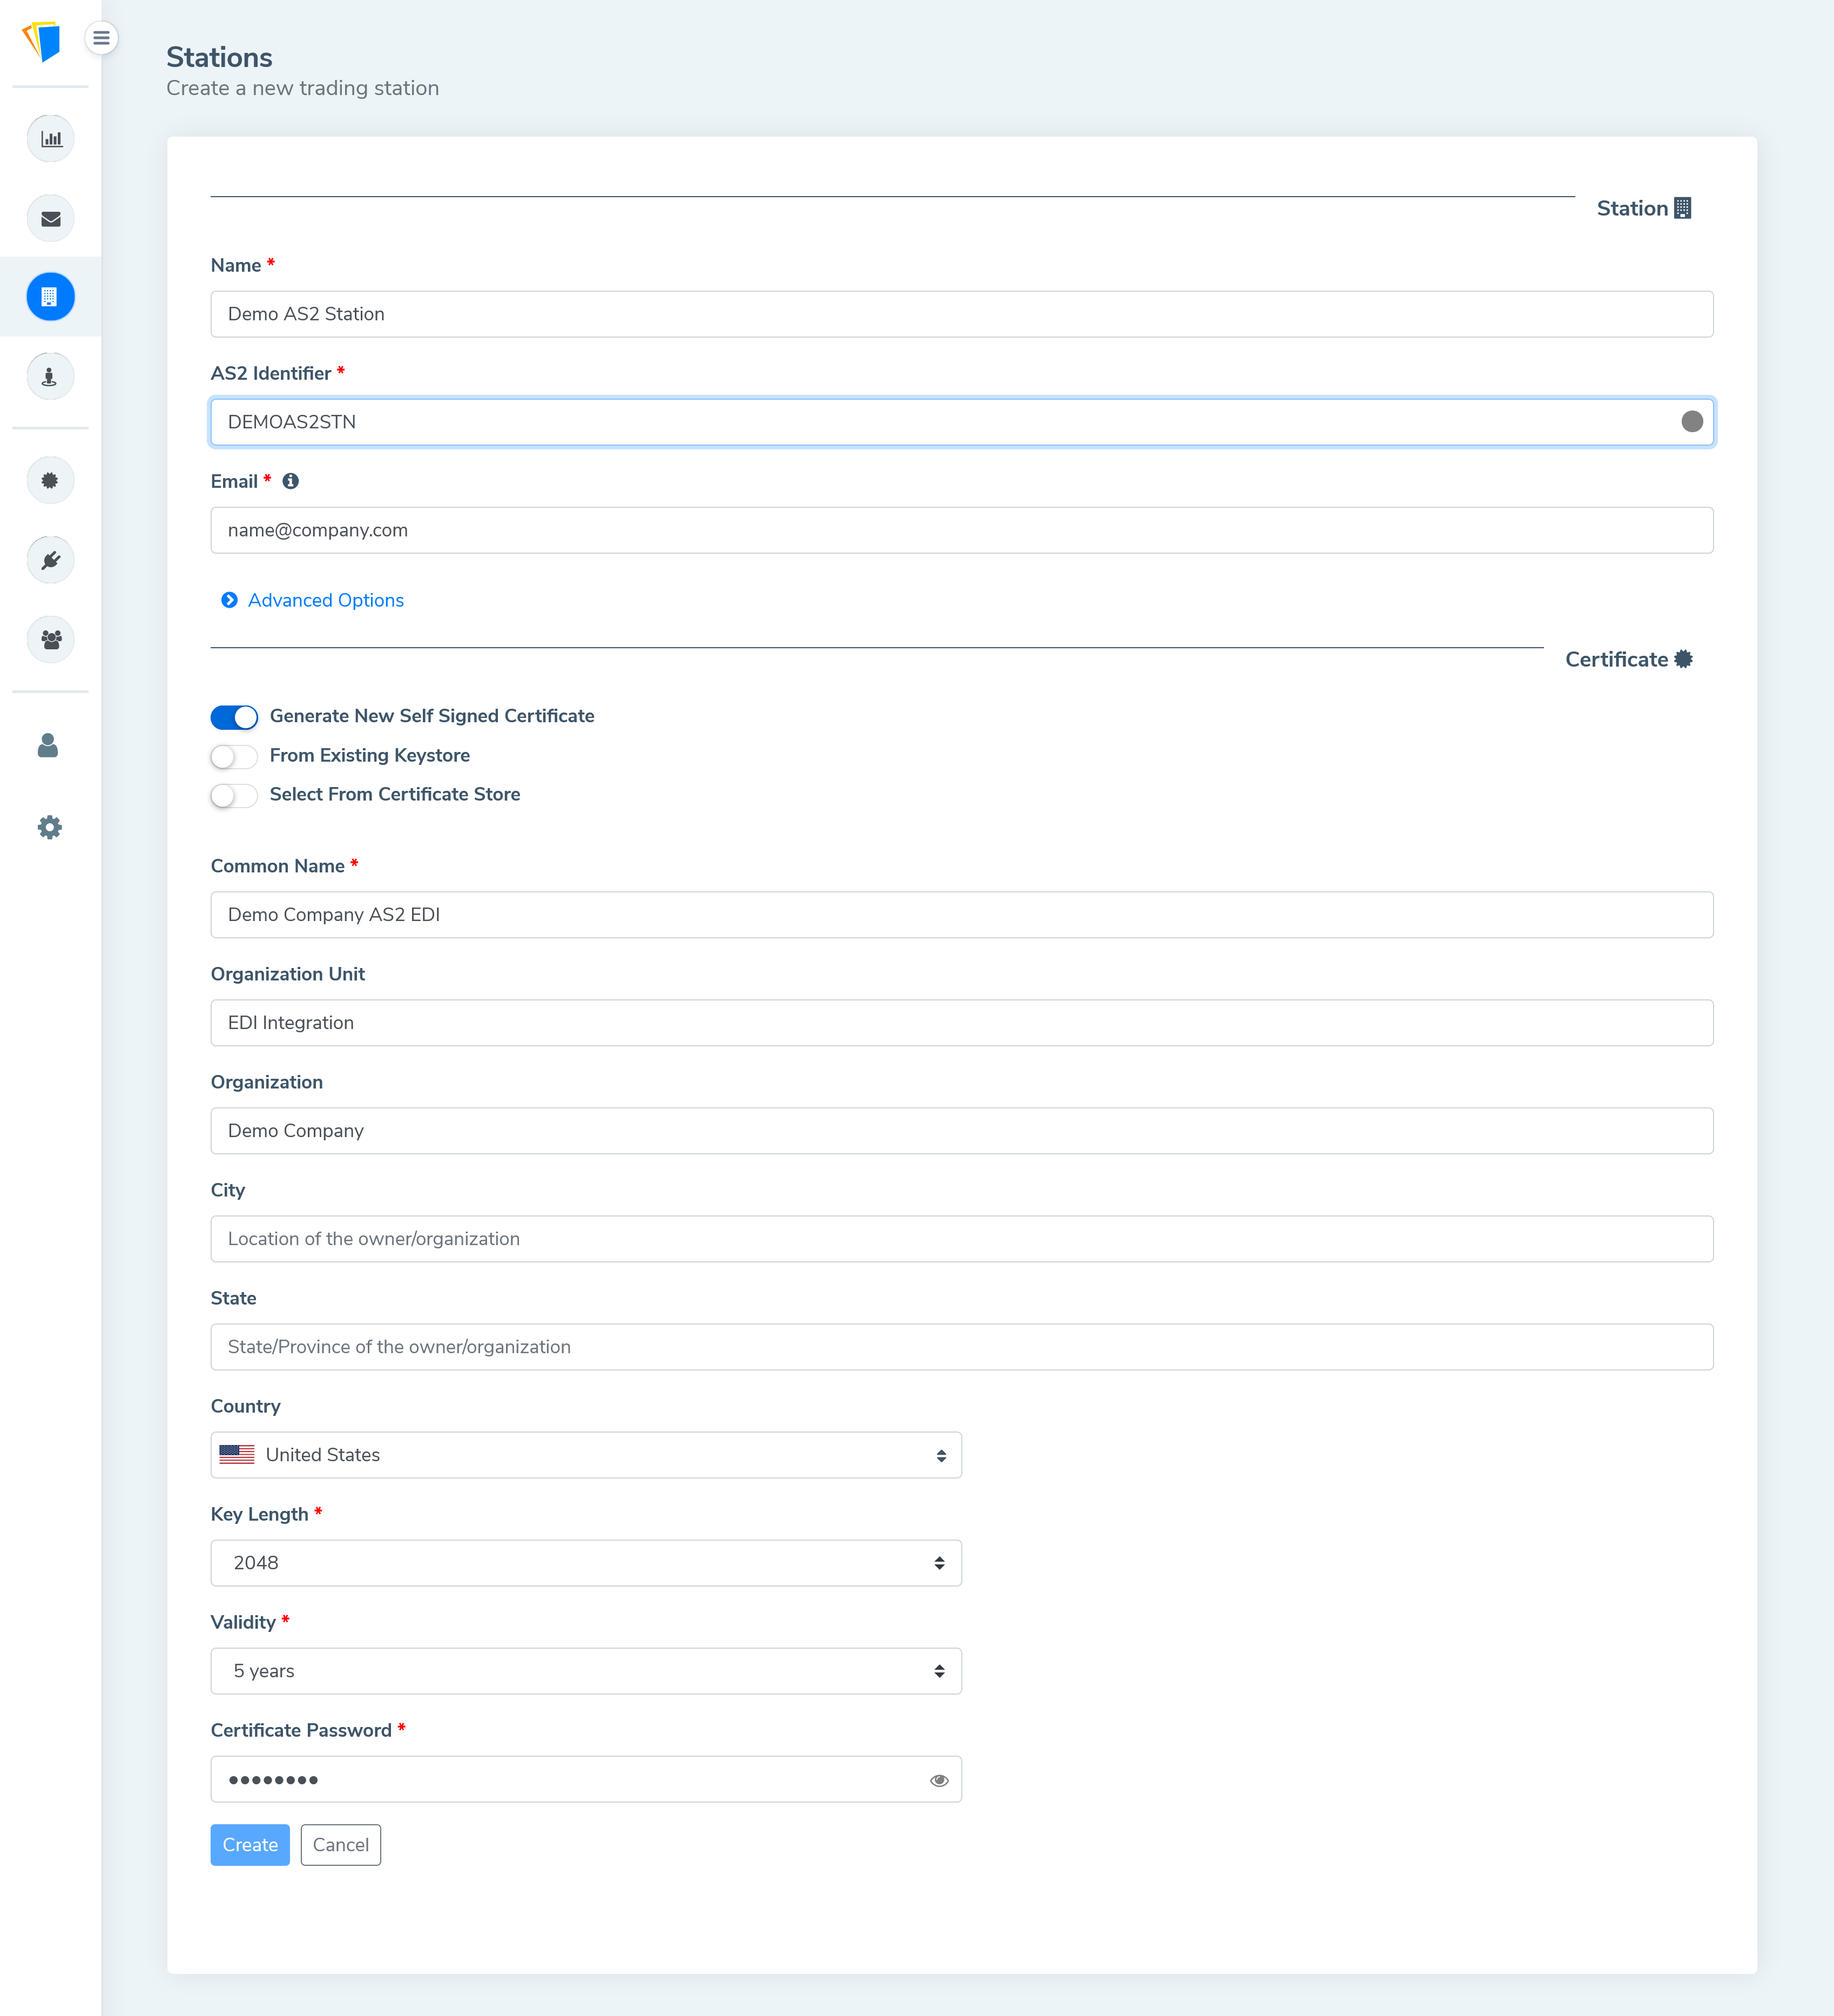
Specify your desired AS2 ID with which you will be identified by Walmart. At this step the MFTGateway will be able to generate a certificate to prove your identity, and to be used for encryption and digital signatures during AS2 communications. Usually AS2 trading partners generate their certificates using the AS2 products they use, like the MFTGateway, and thus these certificates are rarely counter signed by an external Certification Authority - although that is an option, if your trading partner requires it. Walmart does not require such counter signing by a Certification Authority (CA). Provide your organization name, email and other details such as country etc. Make sure to select the key length as 2048 and the validity as 5 years, and remember to also specify a password for the certificate. Walmart will not accept key lengths below 2048 and expects a validity period in the range of ~5 years.
The Partner Configuration of an AS2 Station
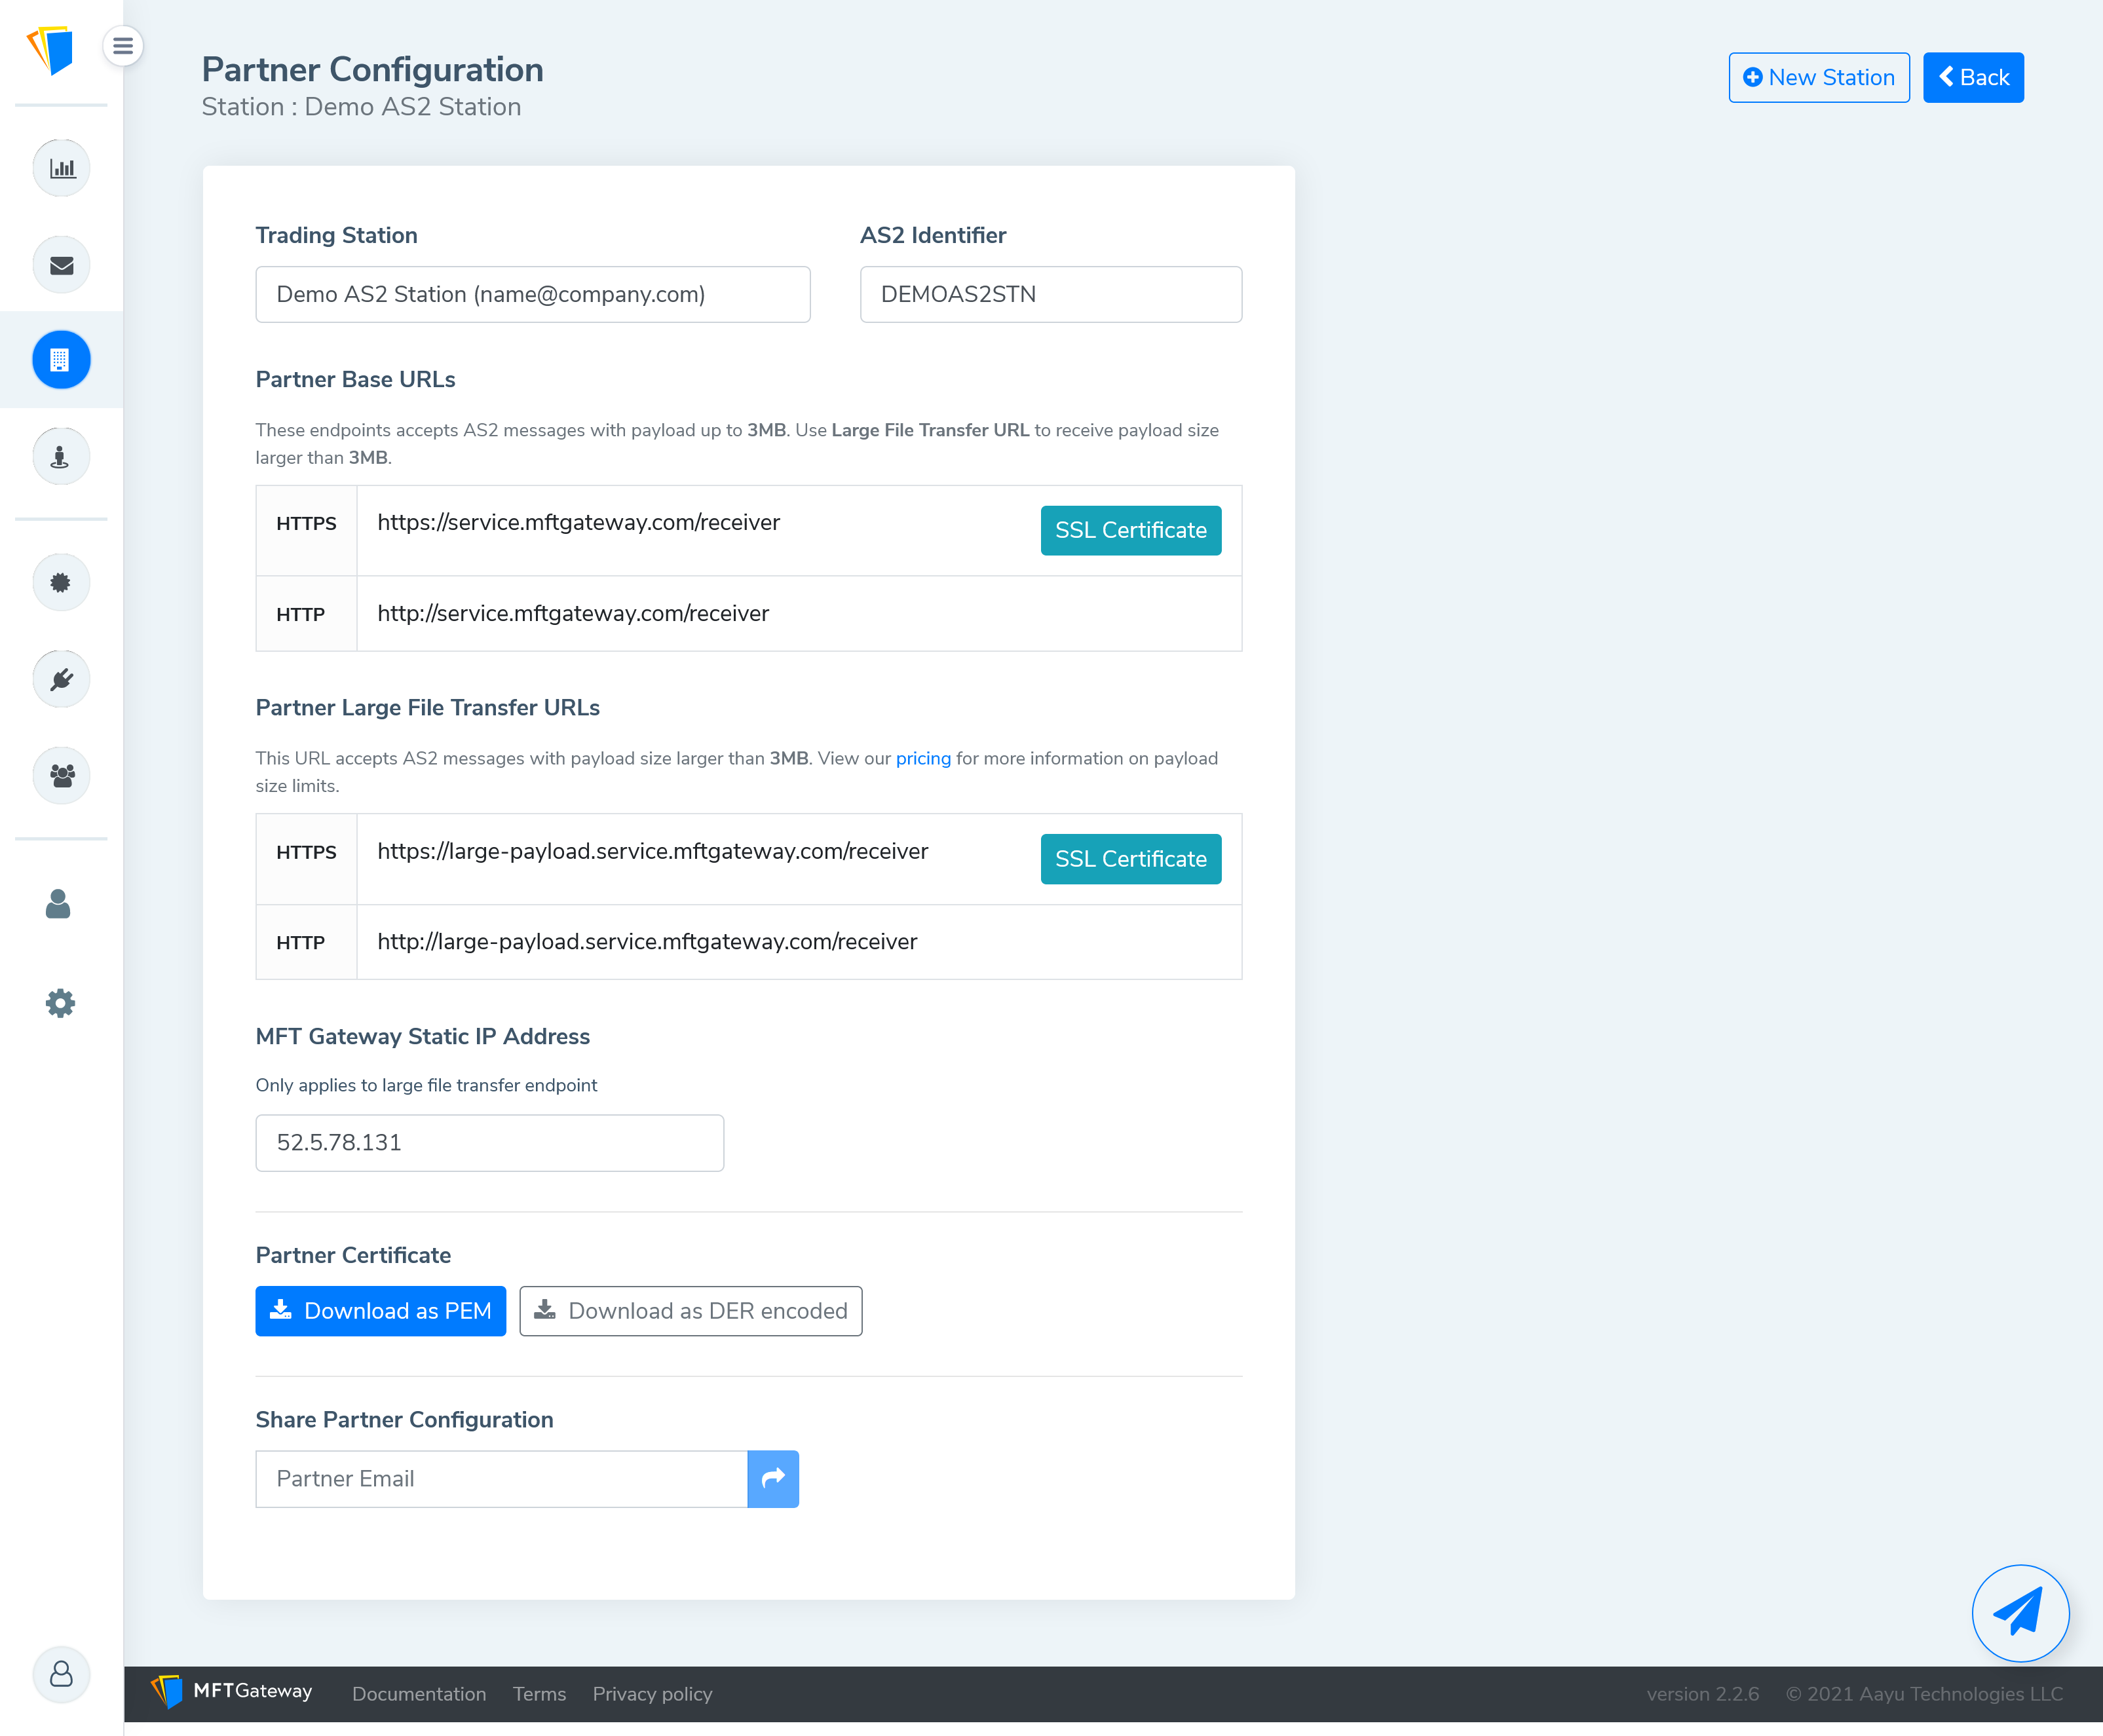
After the AS2 Station is created, go into its ‘Partner Configuration’ and you will be presented with all of the information required for your trading partner to setup their side of the AS2 communications. Download your certificate by clicking Download Certificate → CER encoded. You can also easily email this information to yourself or anyone else using the email feature at the bottom of the page.
AS2 Configuration on RetailLink - Part 2
Now switch to the RetailLink configuration and navigate to ‘Certificate Management’ and then ‘Mailbox maintenance’ by clicking the ‘Start’ link.
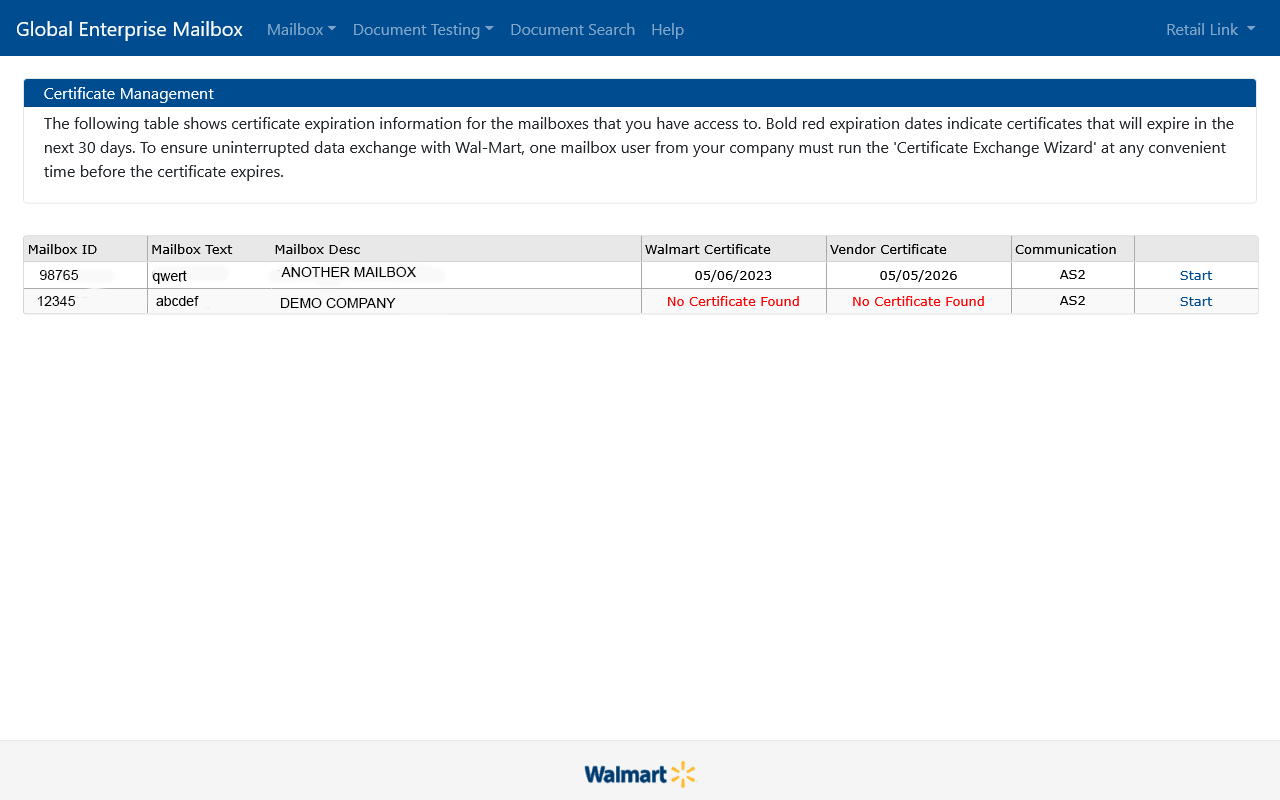
Then click the ‘EDIENT (AS2)’ link at the top.
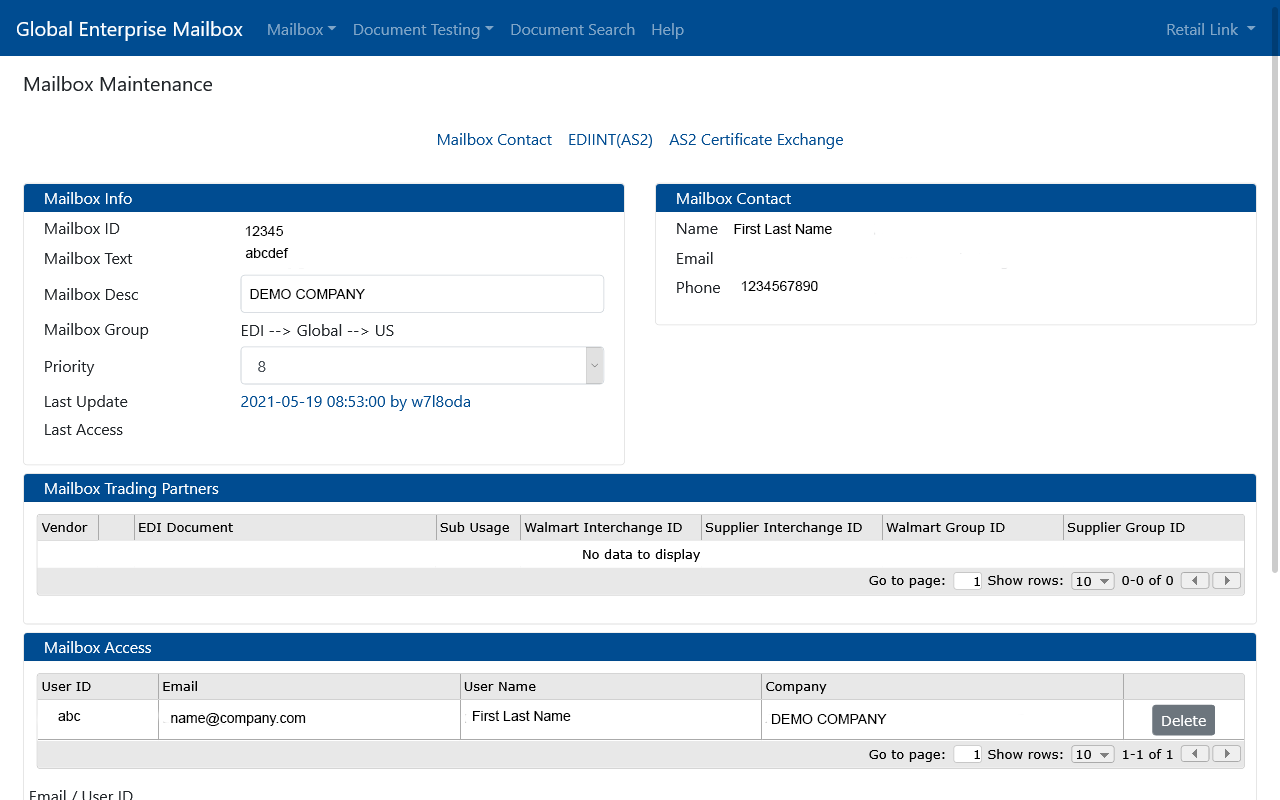
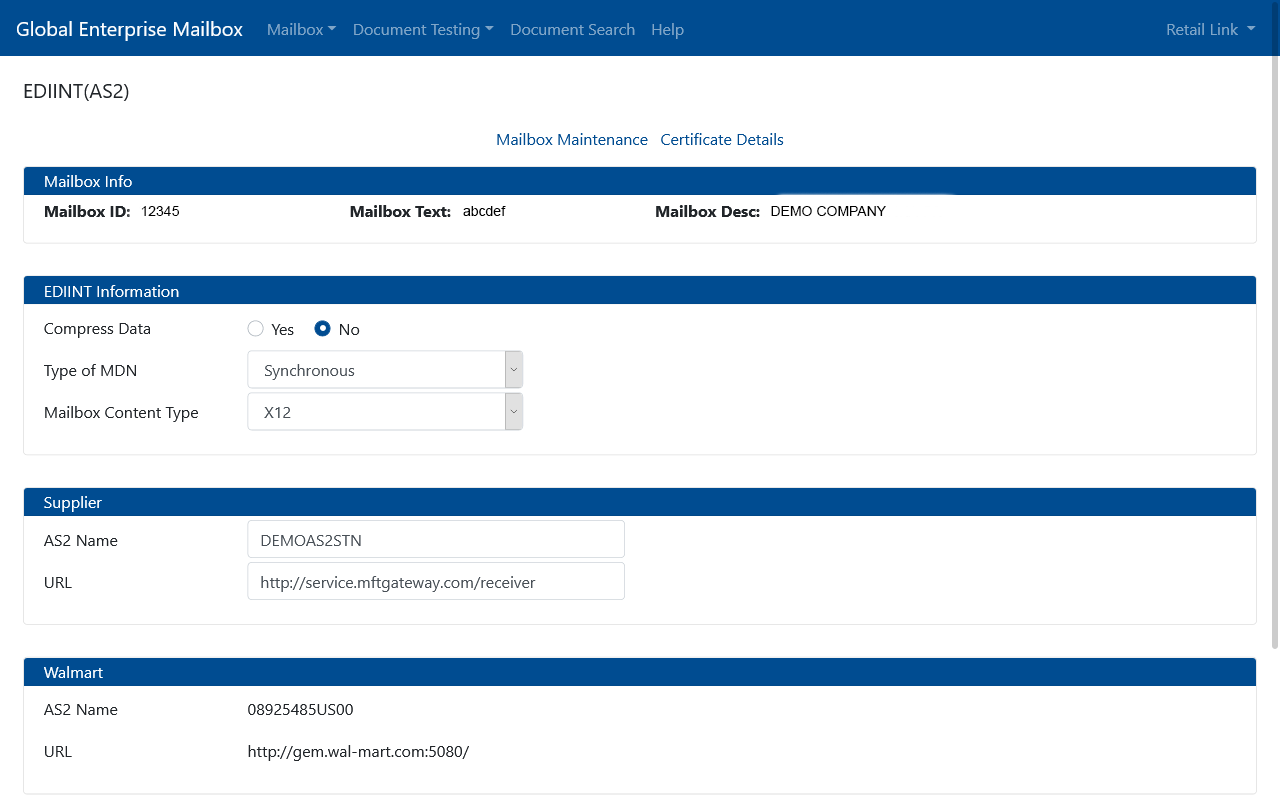
For the ‘Supplier’ section, enter the AS2 ID you used for your AS2 Station, and the URL for the AS2 communications, from the ‘Partner Configuration’ of your AS2 station. Note that specifying a HTTPS URL will result in Walmart also selecting a HTTPS URL for its end - but this is not required as AS2 protocol automatically encrypts and digitally signs all message payloads.
If you are using MFT Gateway as the AS2 communication platform as suggested in this guide, make sure to always use the HTTP URL. Due to a known limitation of Walmart’s systems, if you use the HTTPS URL, it will cause the following error on Walmart/RetailLink side when Walmart tries to transmit files to your MFT Gateway account (e.g. during the testing phase):
iaik.security.ssl.SSLException: Record version mismatch: 00
Next click ‘Certificate Details’ link and upload the certificate you saved from the MFTgateway application as a ‘.cer’ file.
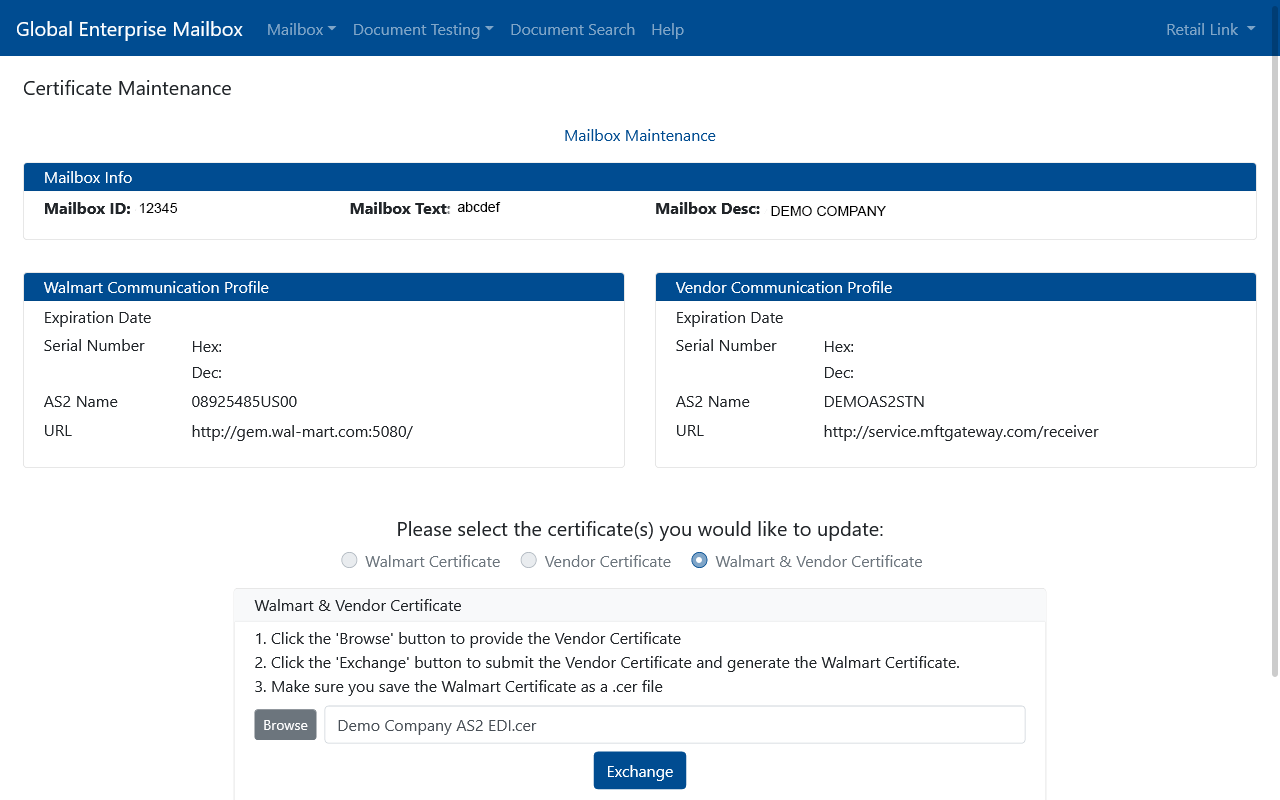
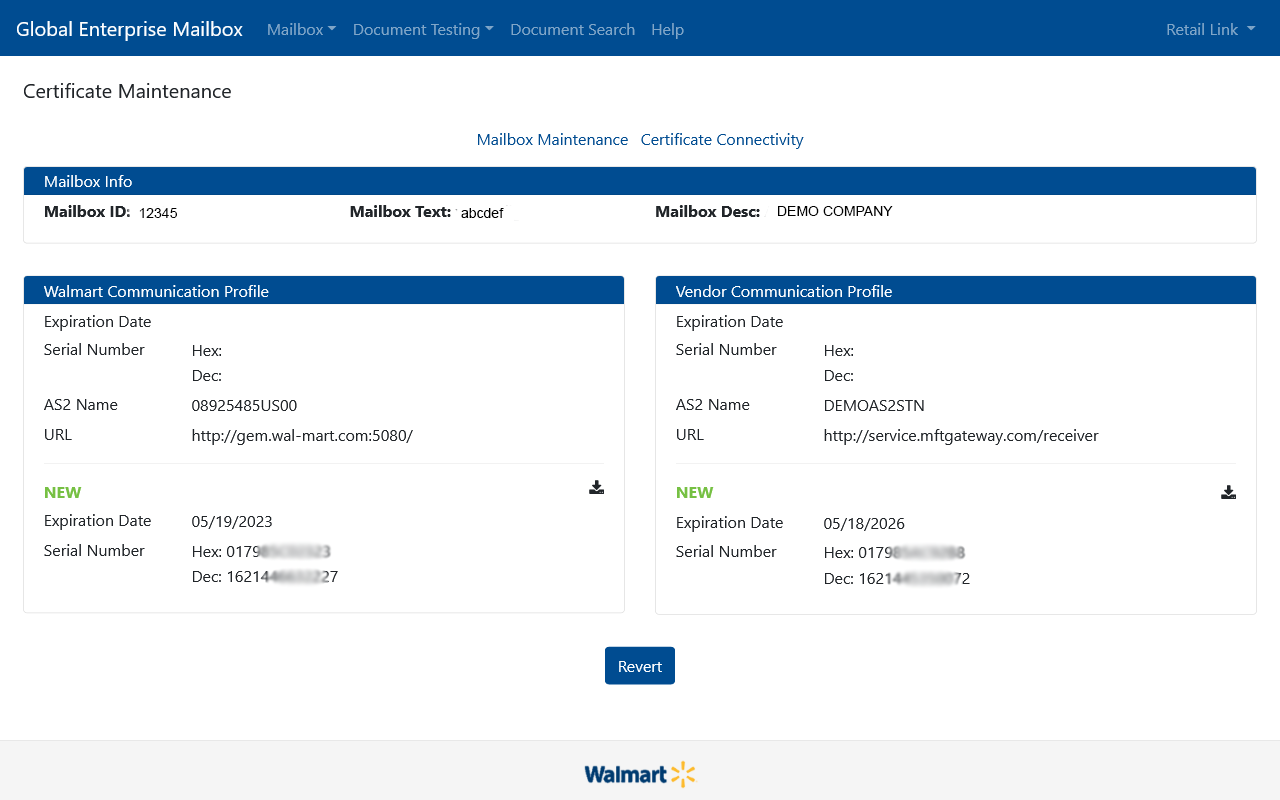
Now you will see a successful screen like below, where you will see the certificate you uploaded being correctly assigned to the vendor communications profile. You can now download the Walmart certificate from this screen under the walmart communications profile, by clicking the download icon.
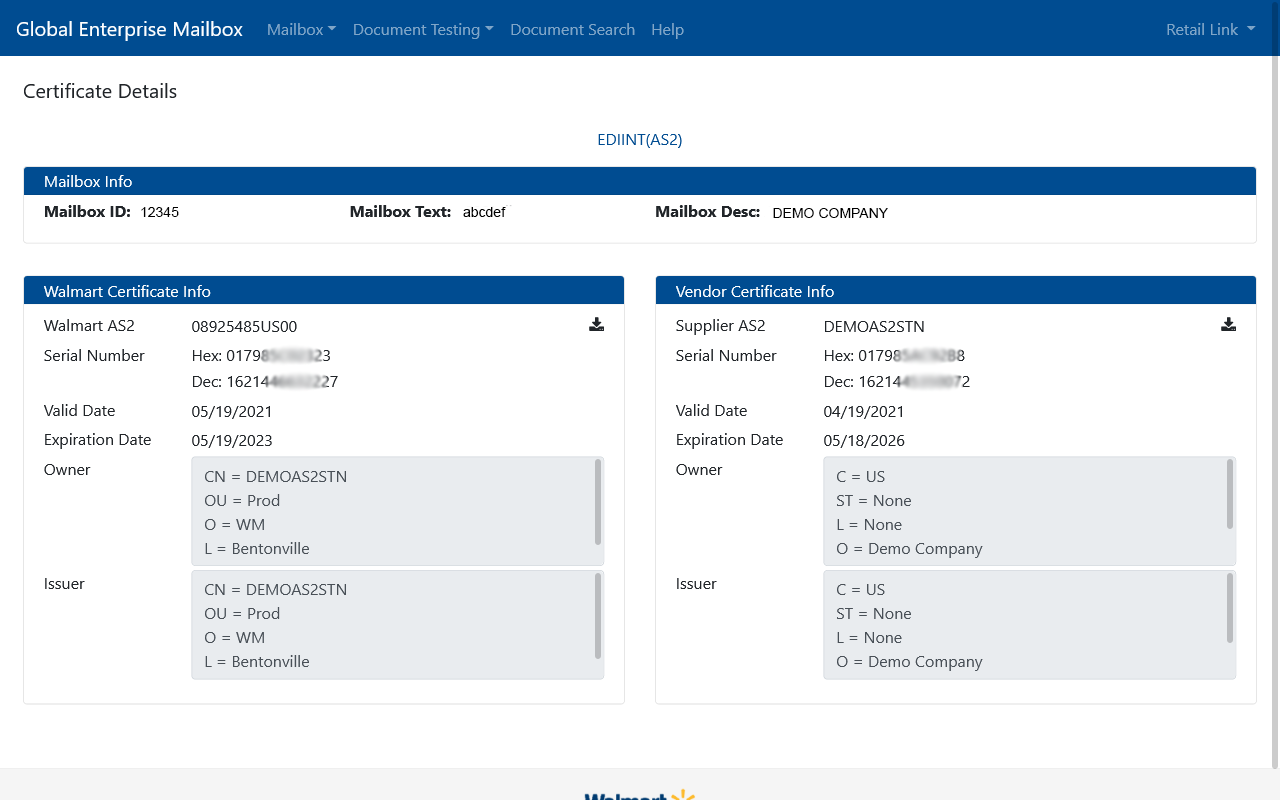
Once the above is complete, if you navigate back to ‘Mailbox Maintenance’ and then ‘EDIINT (AS2)’ and then click ‘Certificate Details’, You can see the configured digital certificates and the details as follows.
Creating an AS2 Partner on the MFTGateway
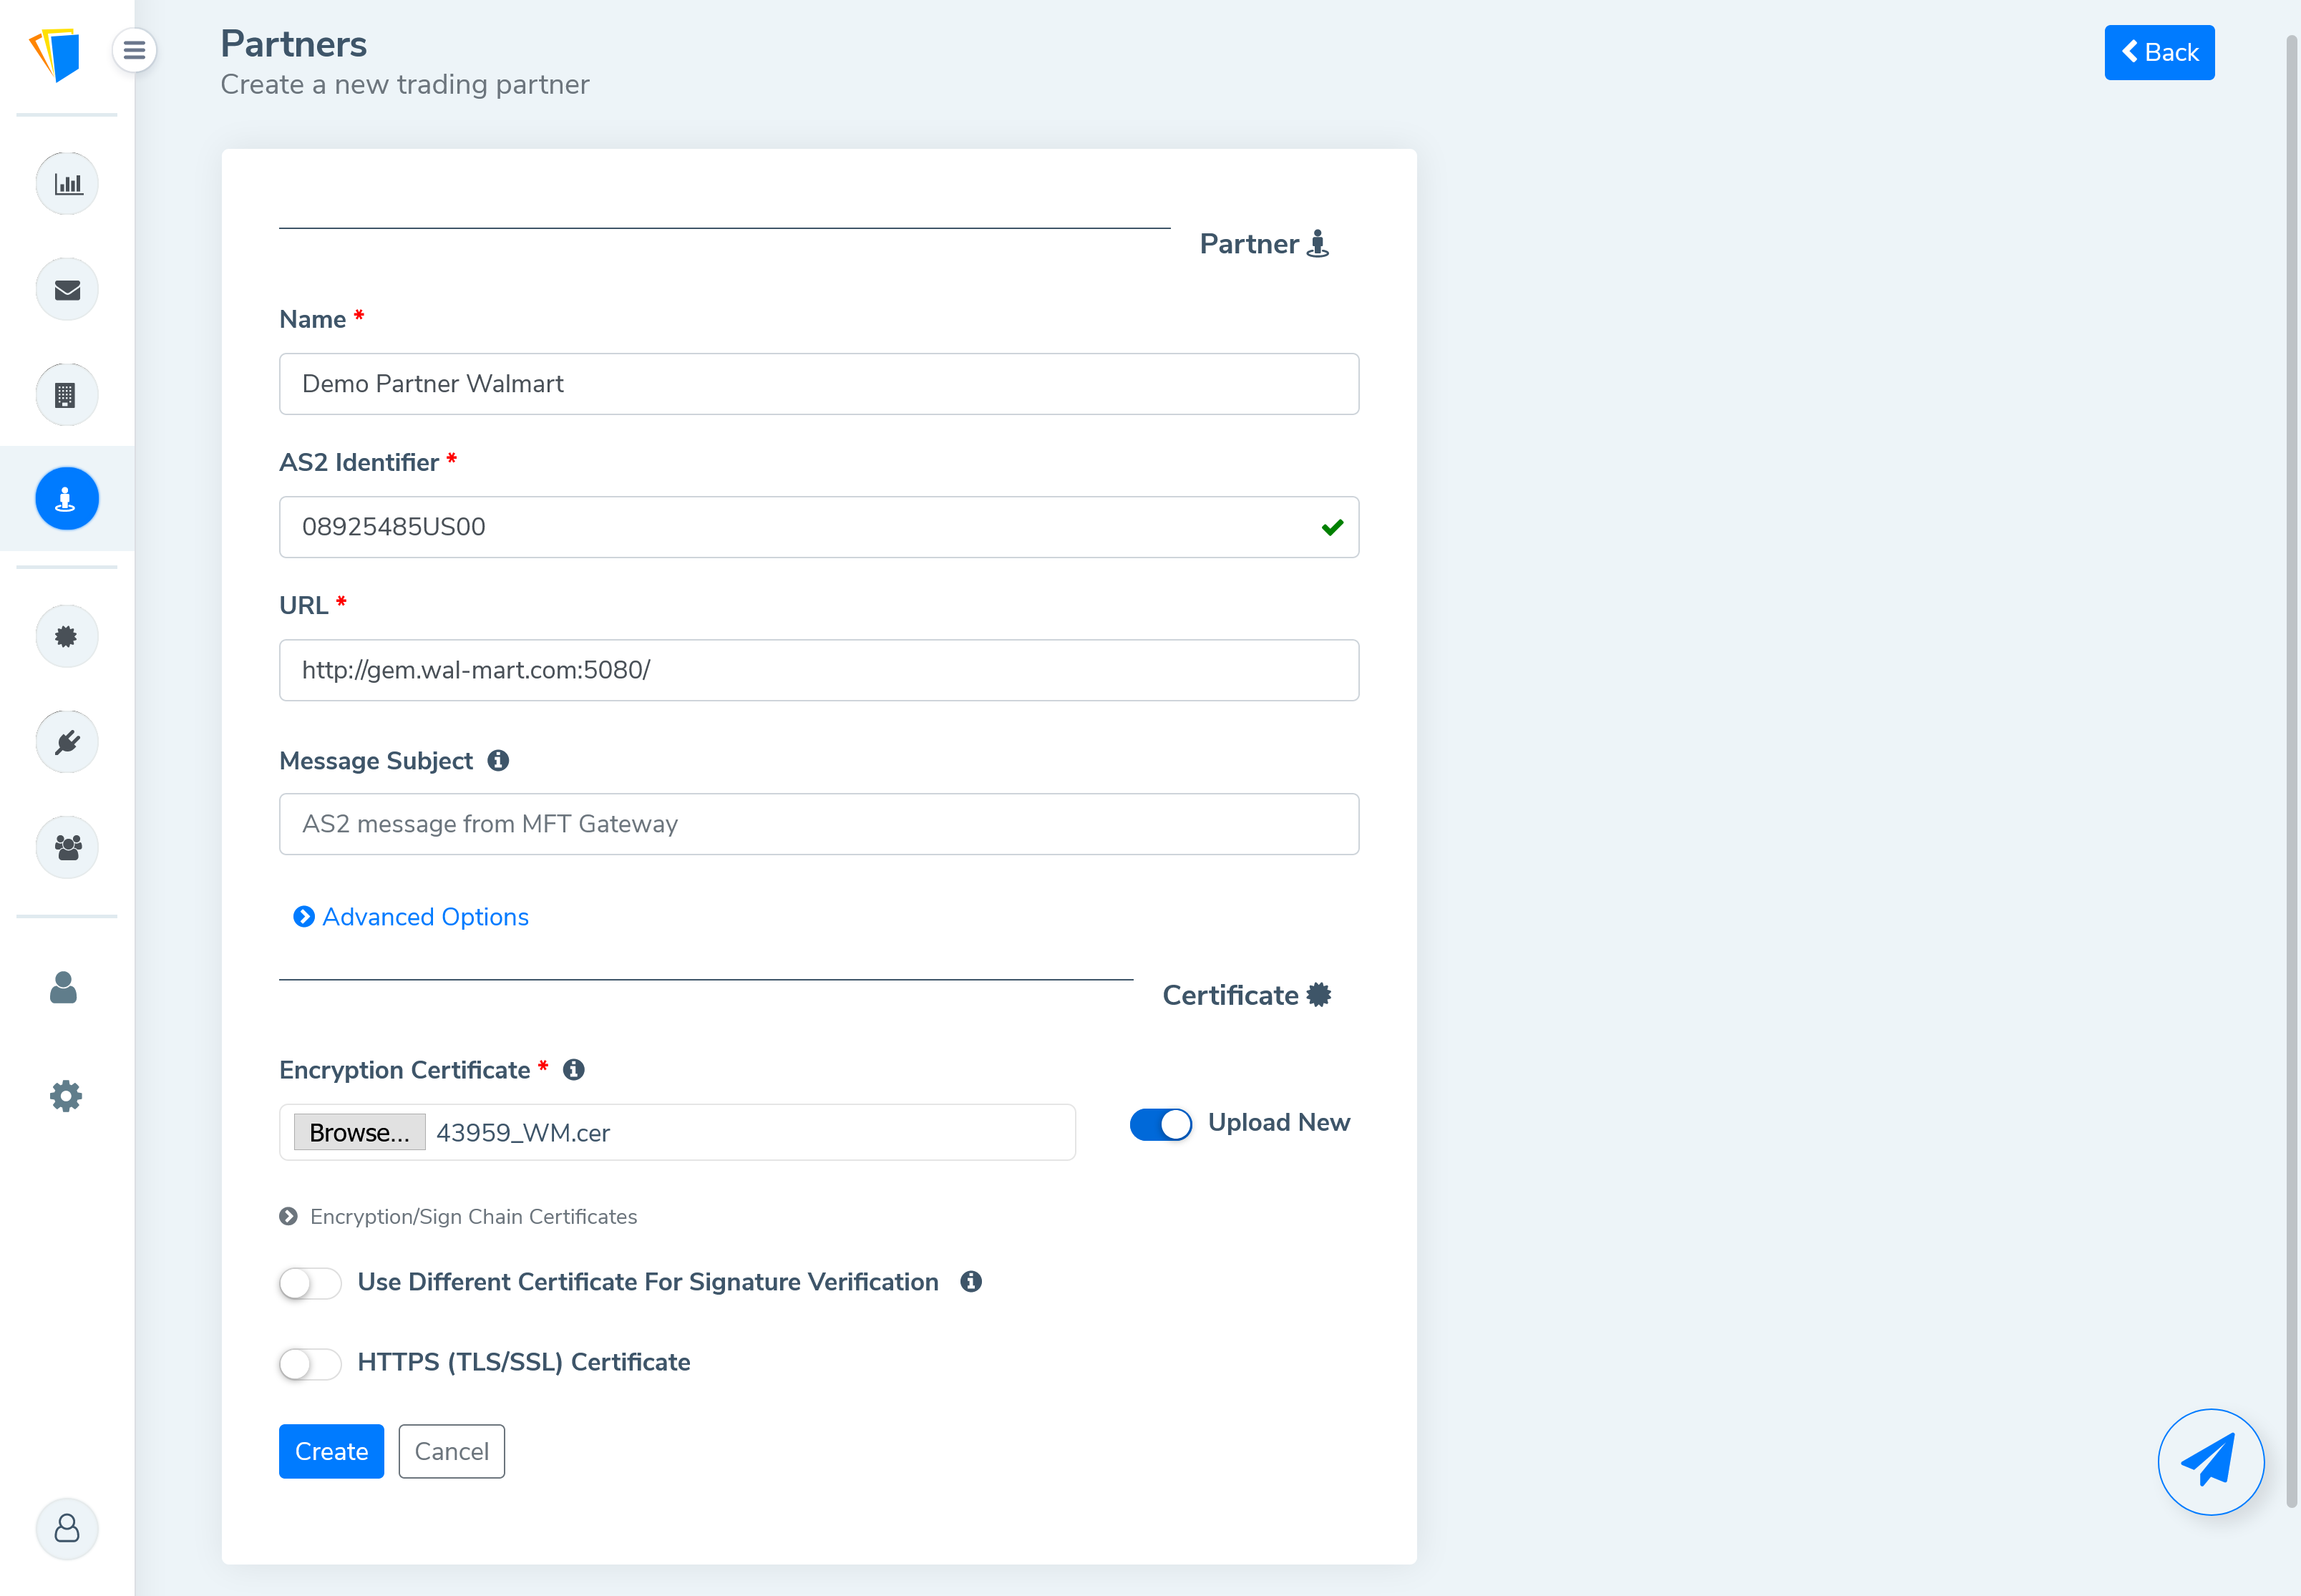
You will now create a Partner in your MFTGateway account to represent Walmart, and use the configuration from RetailLink to populate this information. Use the AS2 ID and the URL from the last screen, and use the certificate downloaded.
Testing the RetailLink to AS2 Station connectivity
Initiating a test message from Walmart
Now click the ‘Certificate Connectivity’ link in the RetailLink window.
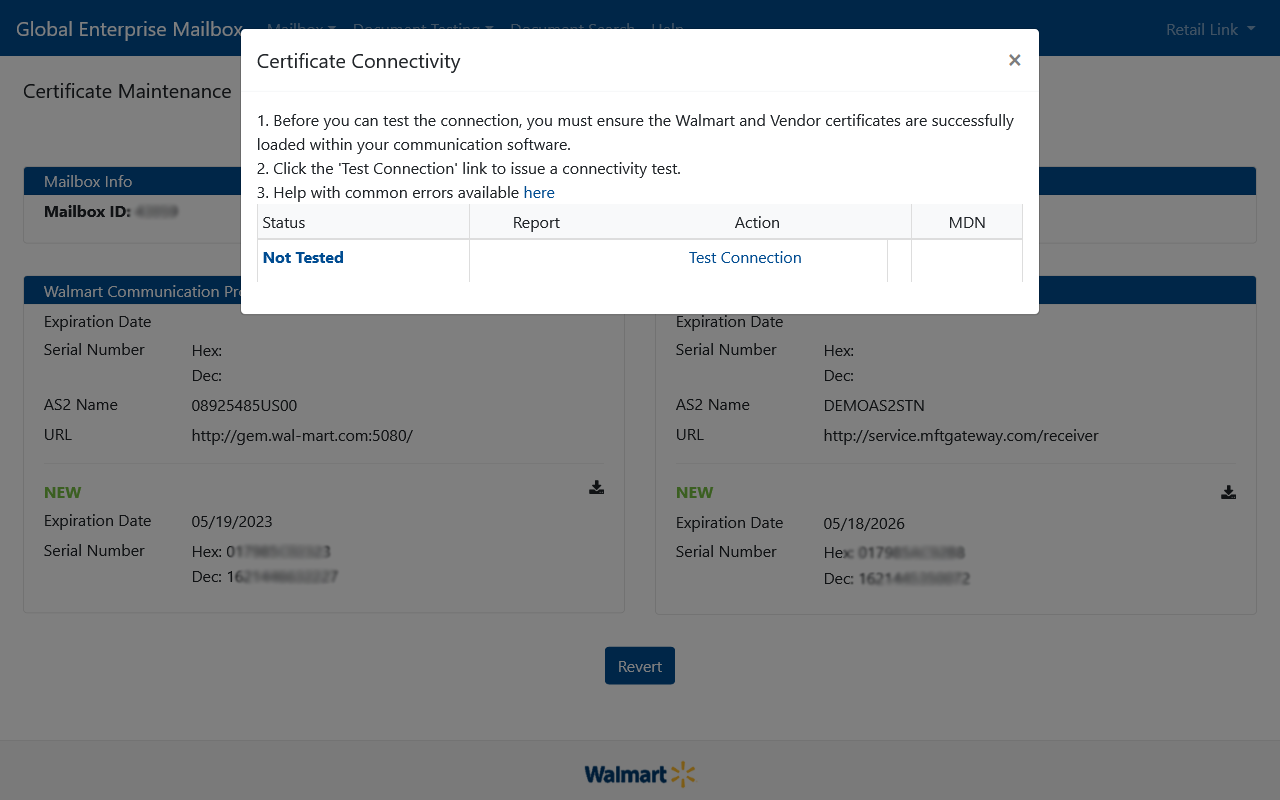
Click ‘Test Connection’ to request Walmart to send a test AS2 file transmission to your AS2 Station.
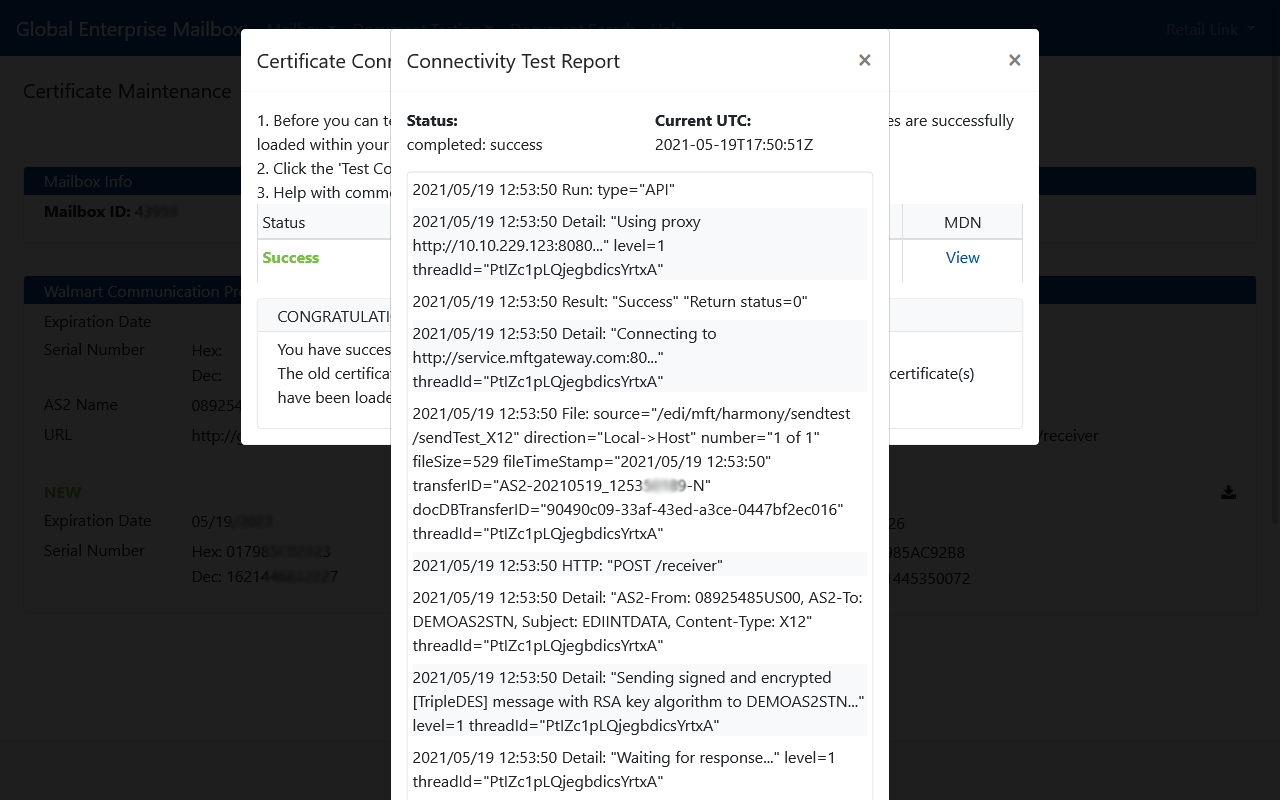
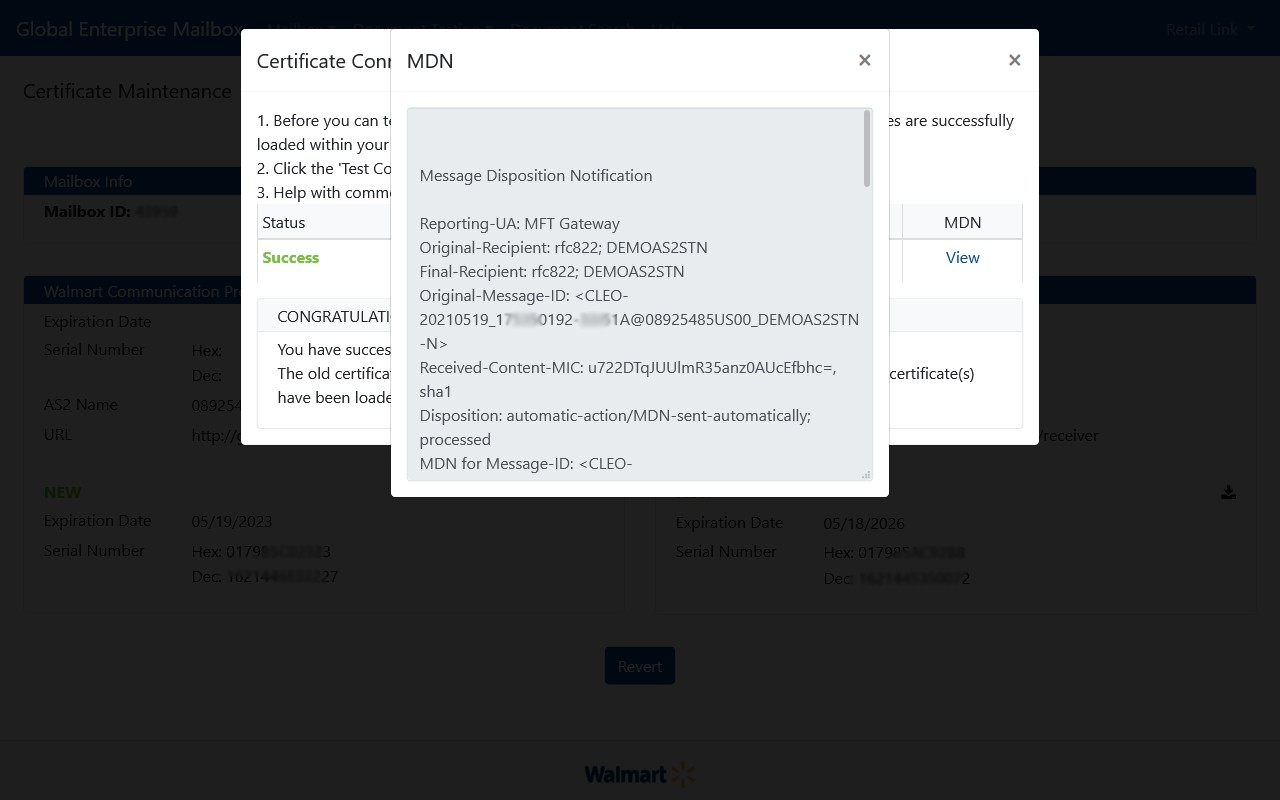
If successful, a detailed report is presented, and if an issue is encountered, the detailed report will help you rectify the issue. This step could be a bit complicated when using HTTPS as Walmart will need to trust the HTTPS or SSL certificate of the MFTGateway or any other AS2 application used. It is recommended to use HTTP for the reasons detailed earlier. You can also see the MDN or Message Disposition Note sent by the remote AS2 station.
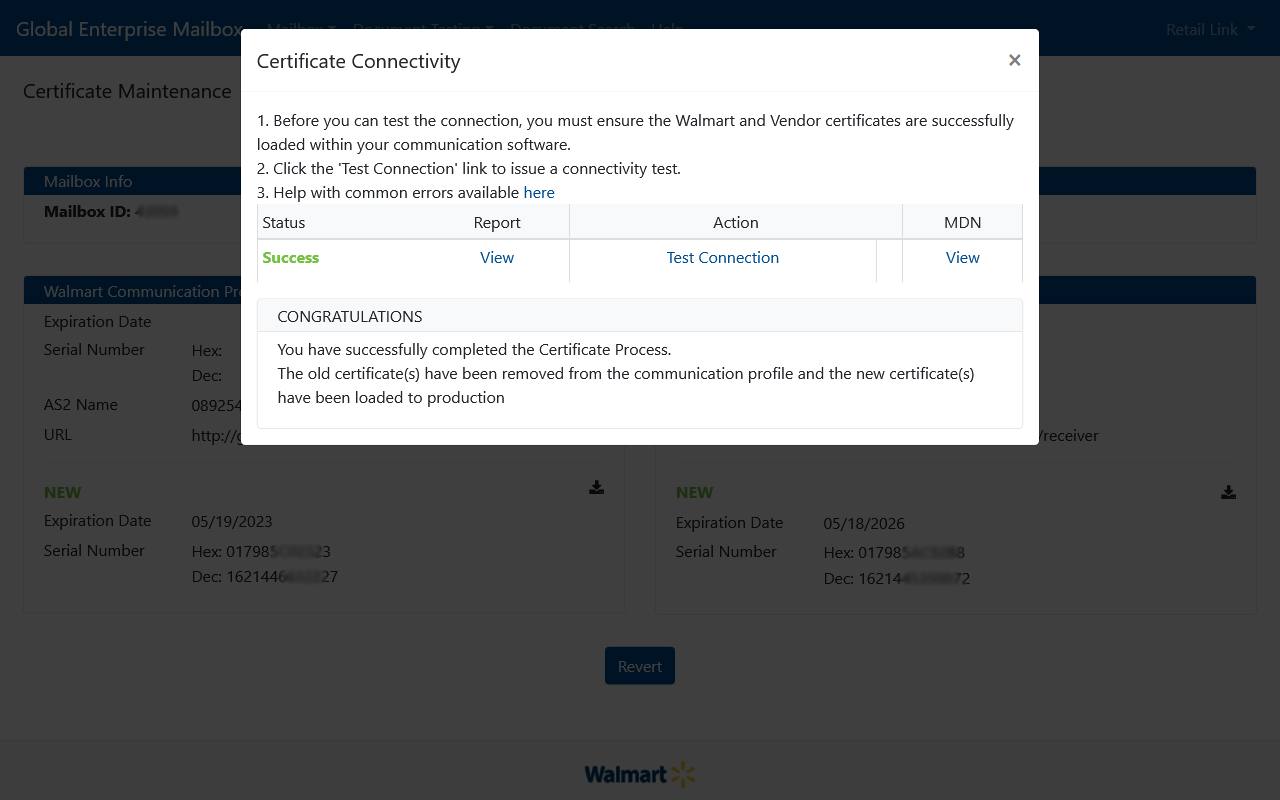
Your AS2 connection with Walmart is now complete and tested to be successful.
Looking at the received message from the MFTGateway
Go to the Inbox of the MFTGateway, and you will see the message sent by Walmart.
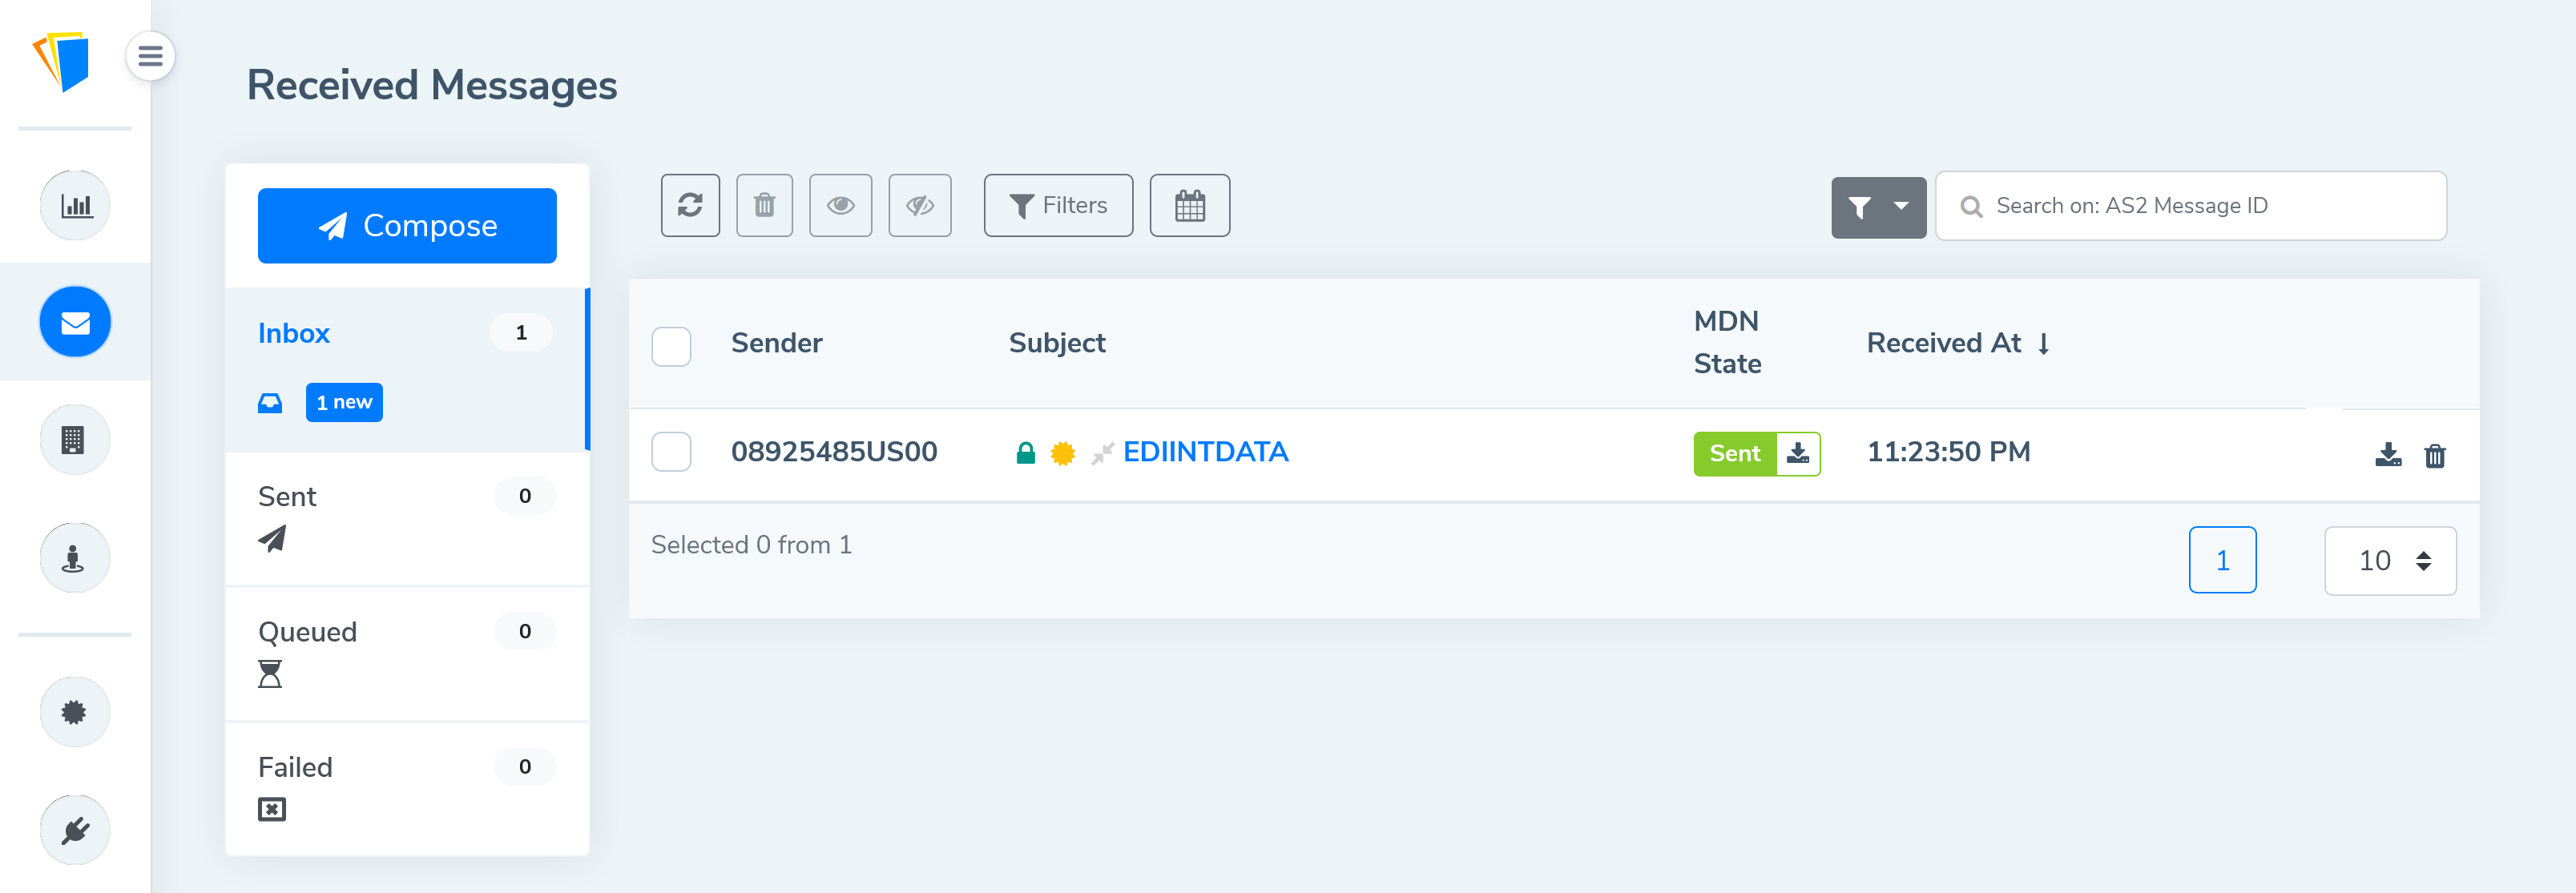
The file sent is usuall called sendTest_X12.txt and contains a message similar to whats shown below.
ISA*00* *00* *ZZ*SENDER *ZZ*RECEIVER *110412*1438*:*00501*864000001*0*T*>~GS*TX*SENDER*RECEIVER*20110412*1438*864000001*X*005010~ST*864*0001~BMG*00*CONNECTIVITY TEST*03~N1*FR*WAL-MART HOME OFFICE 8053*UL*0078742000008~N1*TO*VALUED SUPPLIER PARTNER~REF*IA*000000~MIT*MESSAGE*THIS IS A CONNECTIVITY TEST*175*60~MSG*WE HOPE YOU RECEIVED THIS MESSAGE.*SS~MSG*HAVE A GREAT DAY!*SS~MSG*WAL-MART SUPPLIER SUPPORT*SS~MSG*479-273-8888*SS~MSG*GEM@WAL-MART.COM*SS~SE*12*0001~GE*1*864000001~IEA*1*864000001~
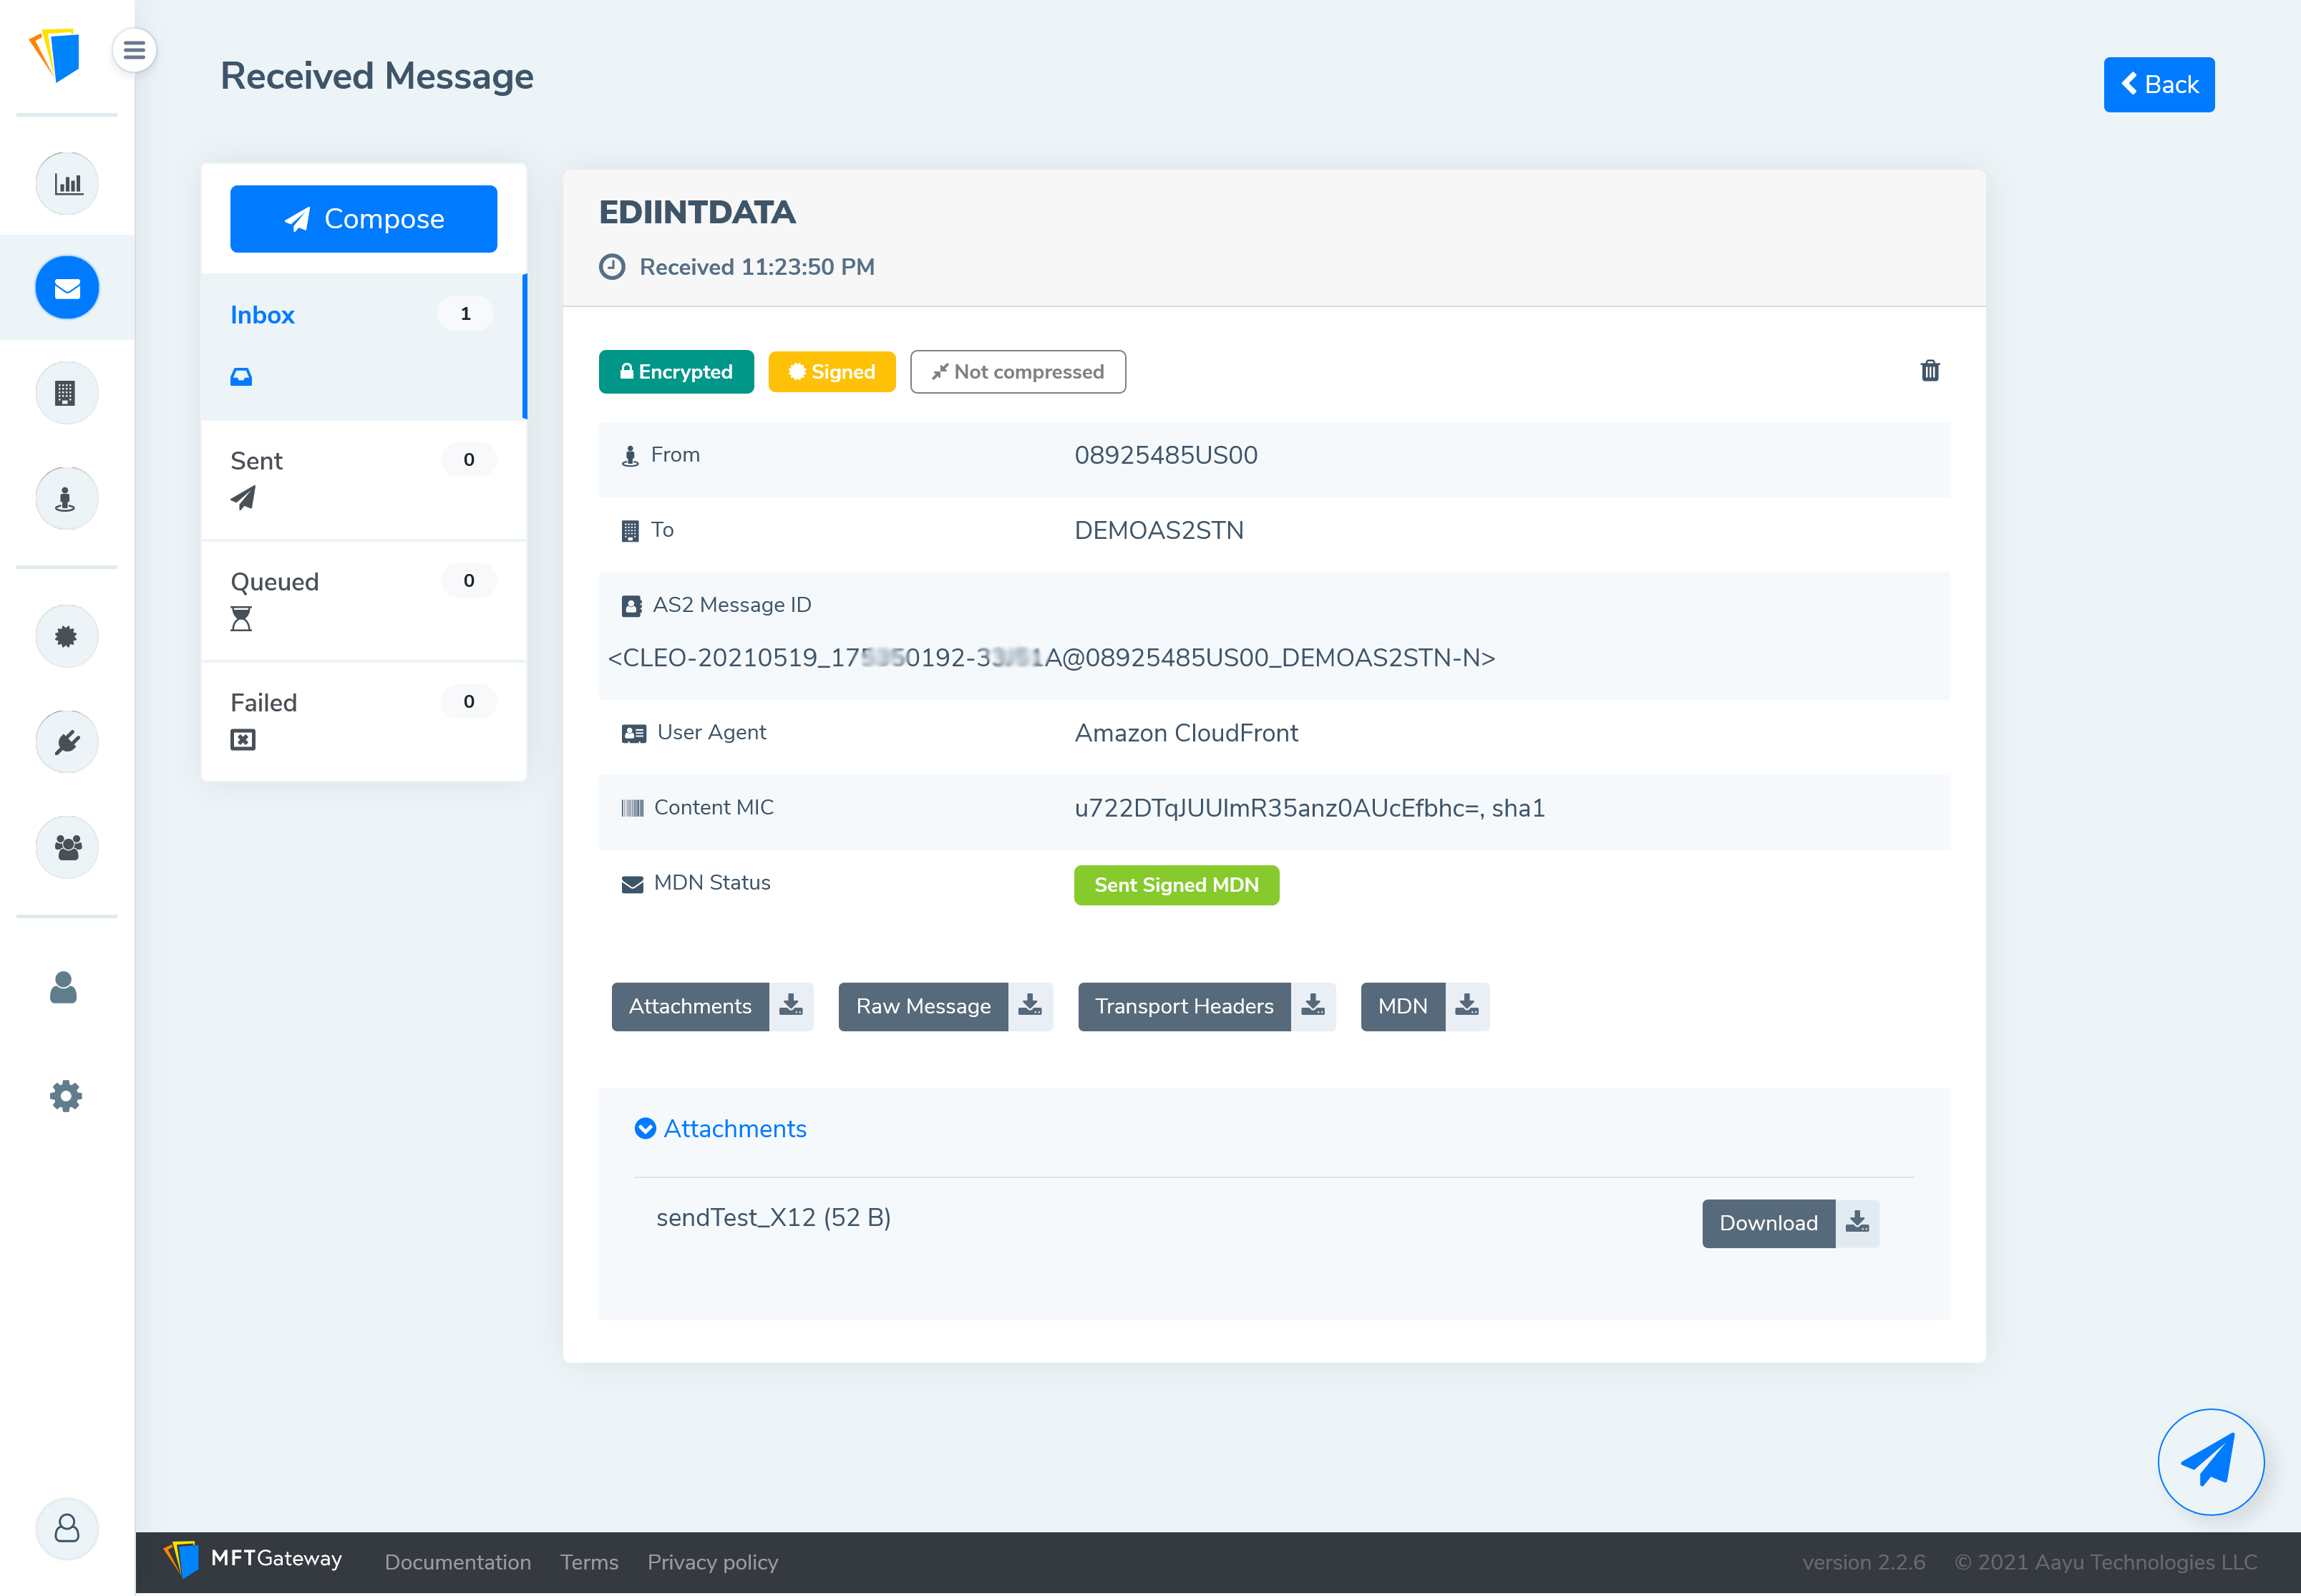
Sending a test message to Walmart
Click the ‘Compose’ button at the top left side of the MFTGateway and select the Walmart Partner created and the AS2 station pair. You can select the file to be sent as the content, and click ‘Send’.
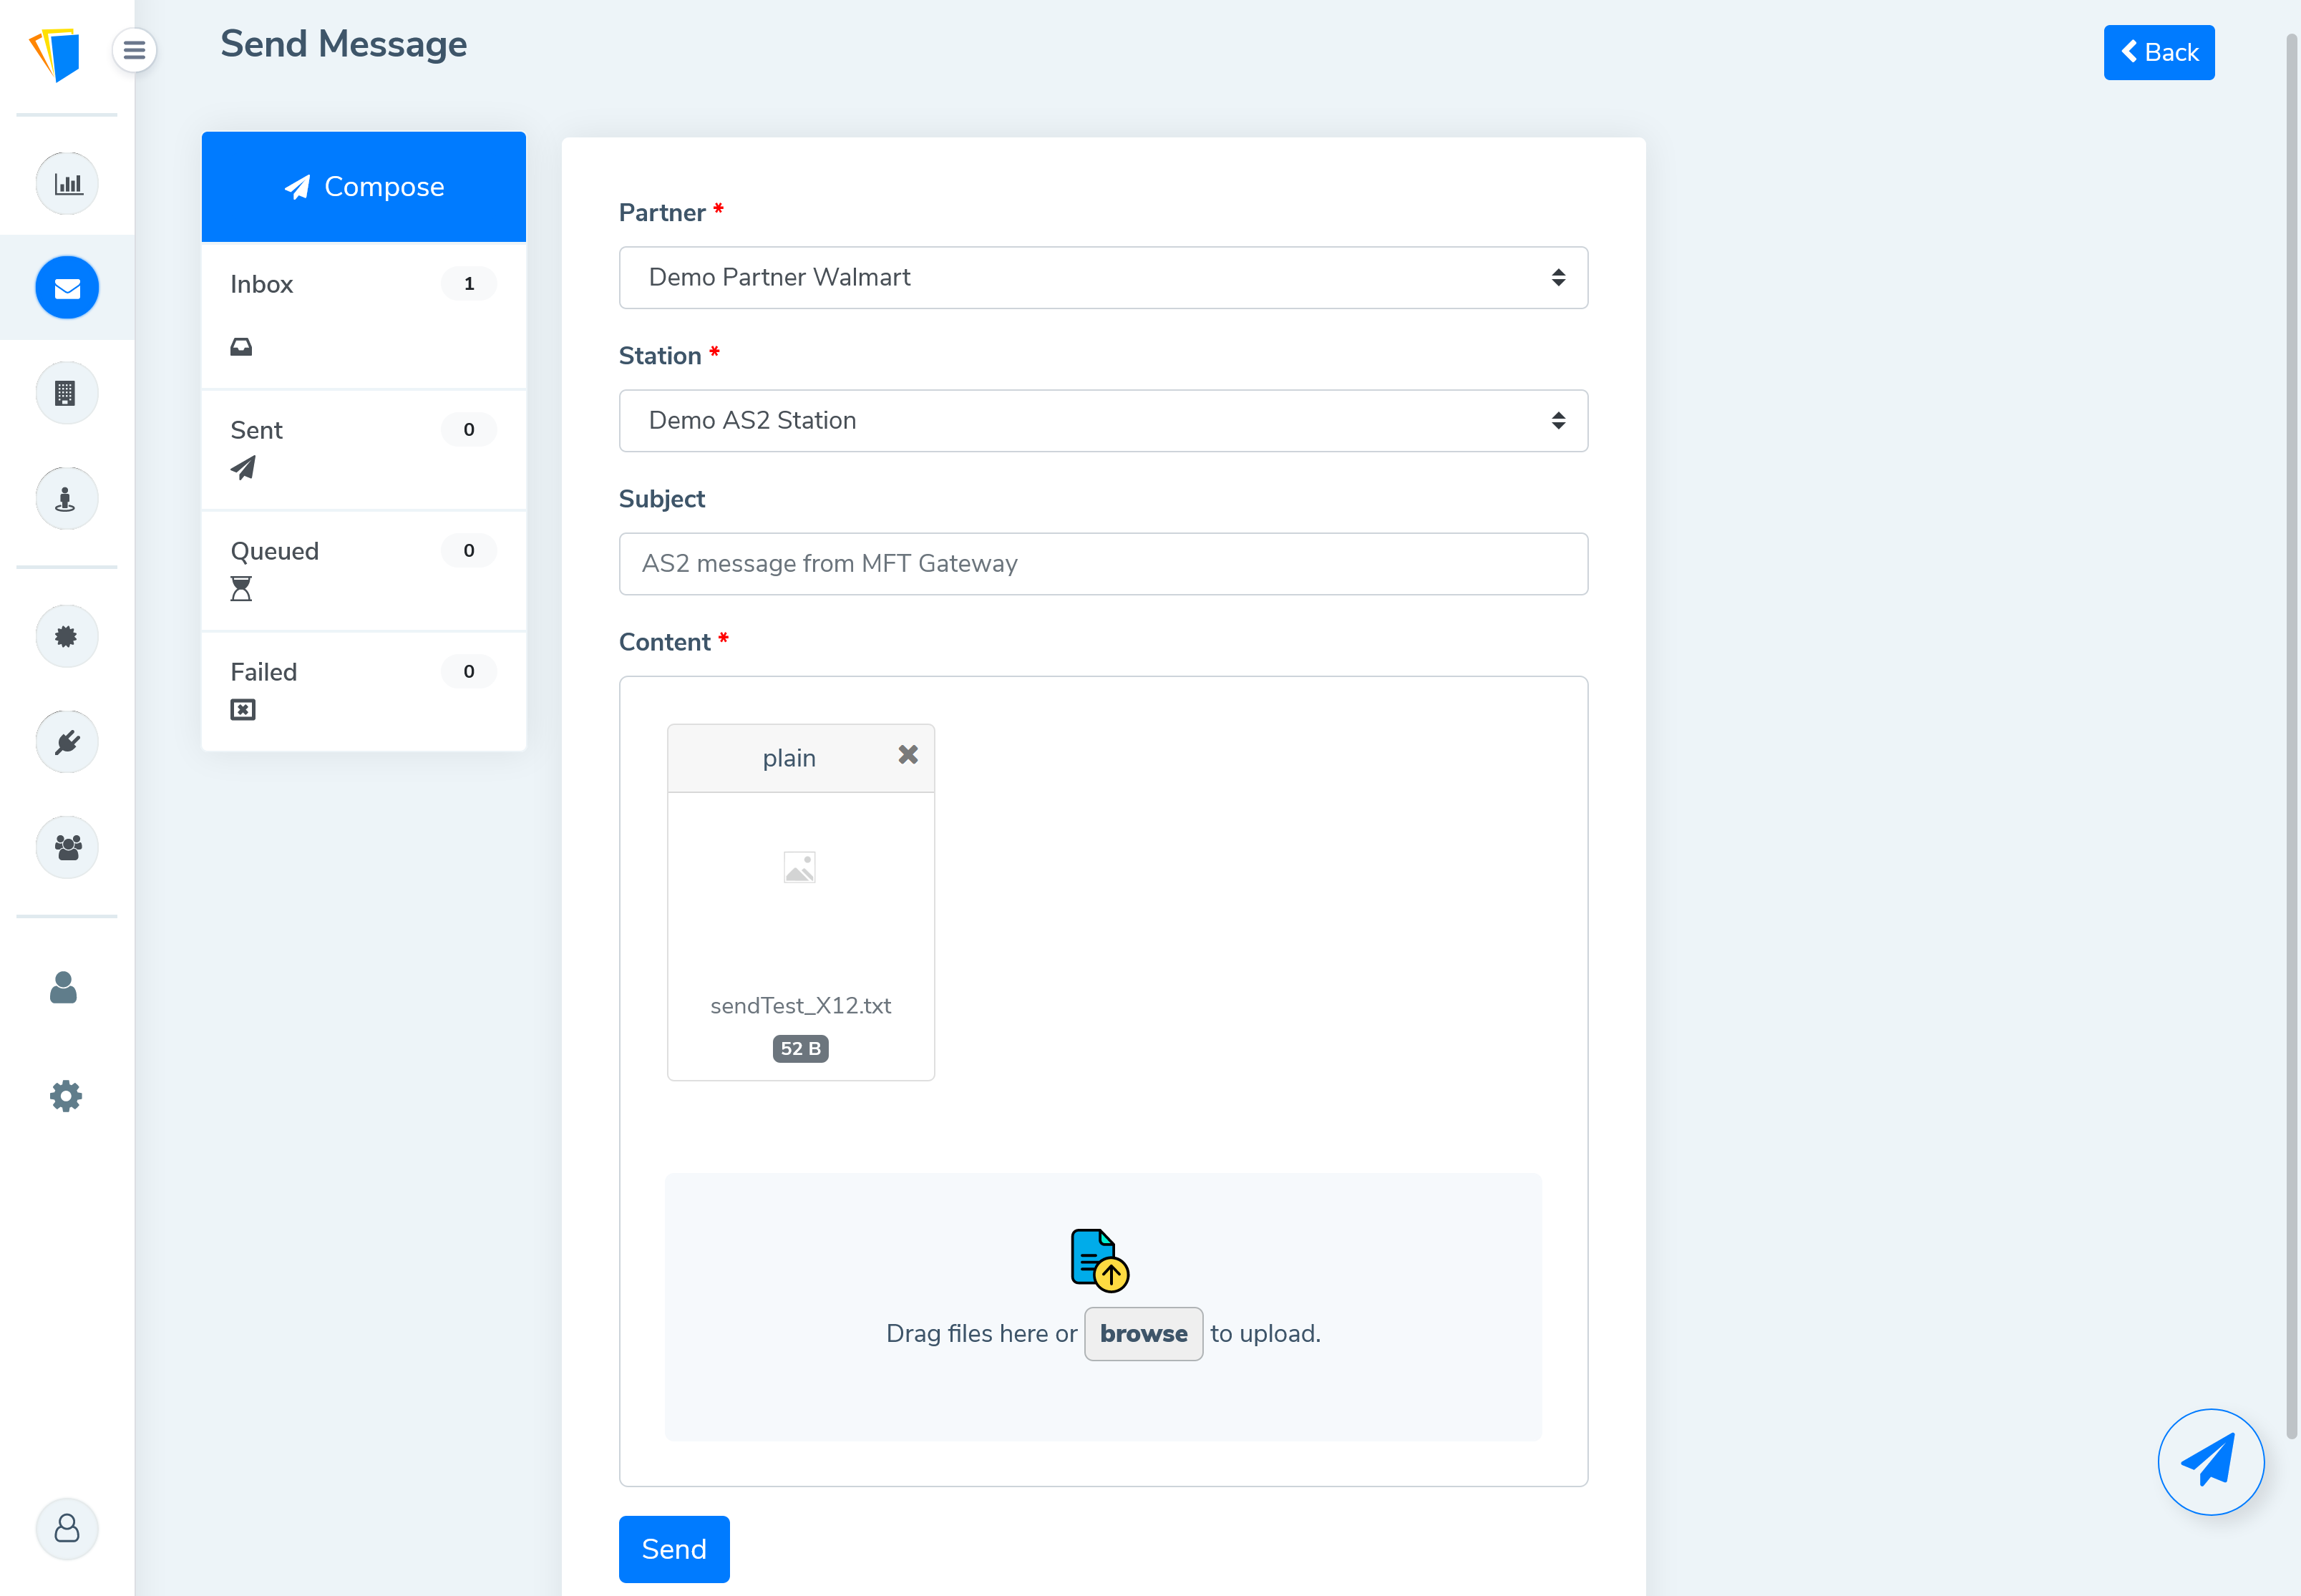
Once the test message is transmitted, it will appear on the ‘Sent’ box and will show a green color (i.e. everything ok) state and the received MDN.
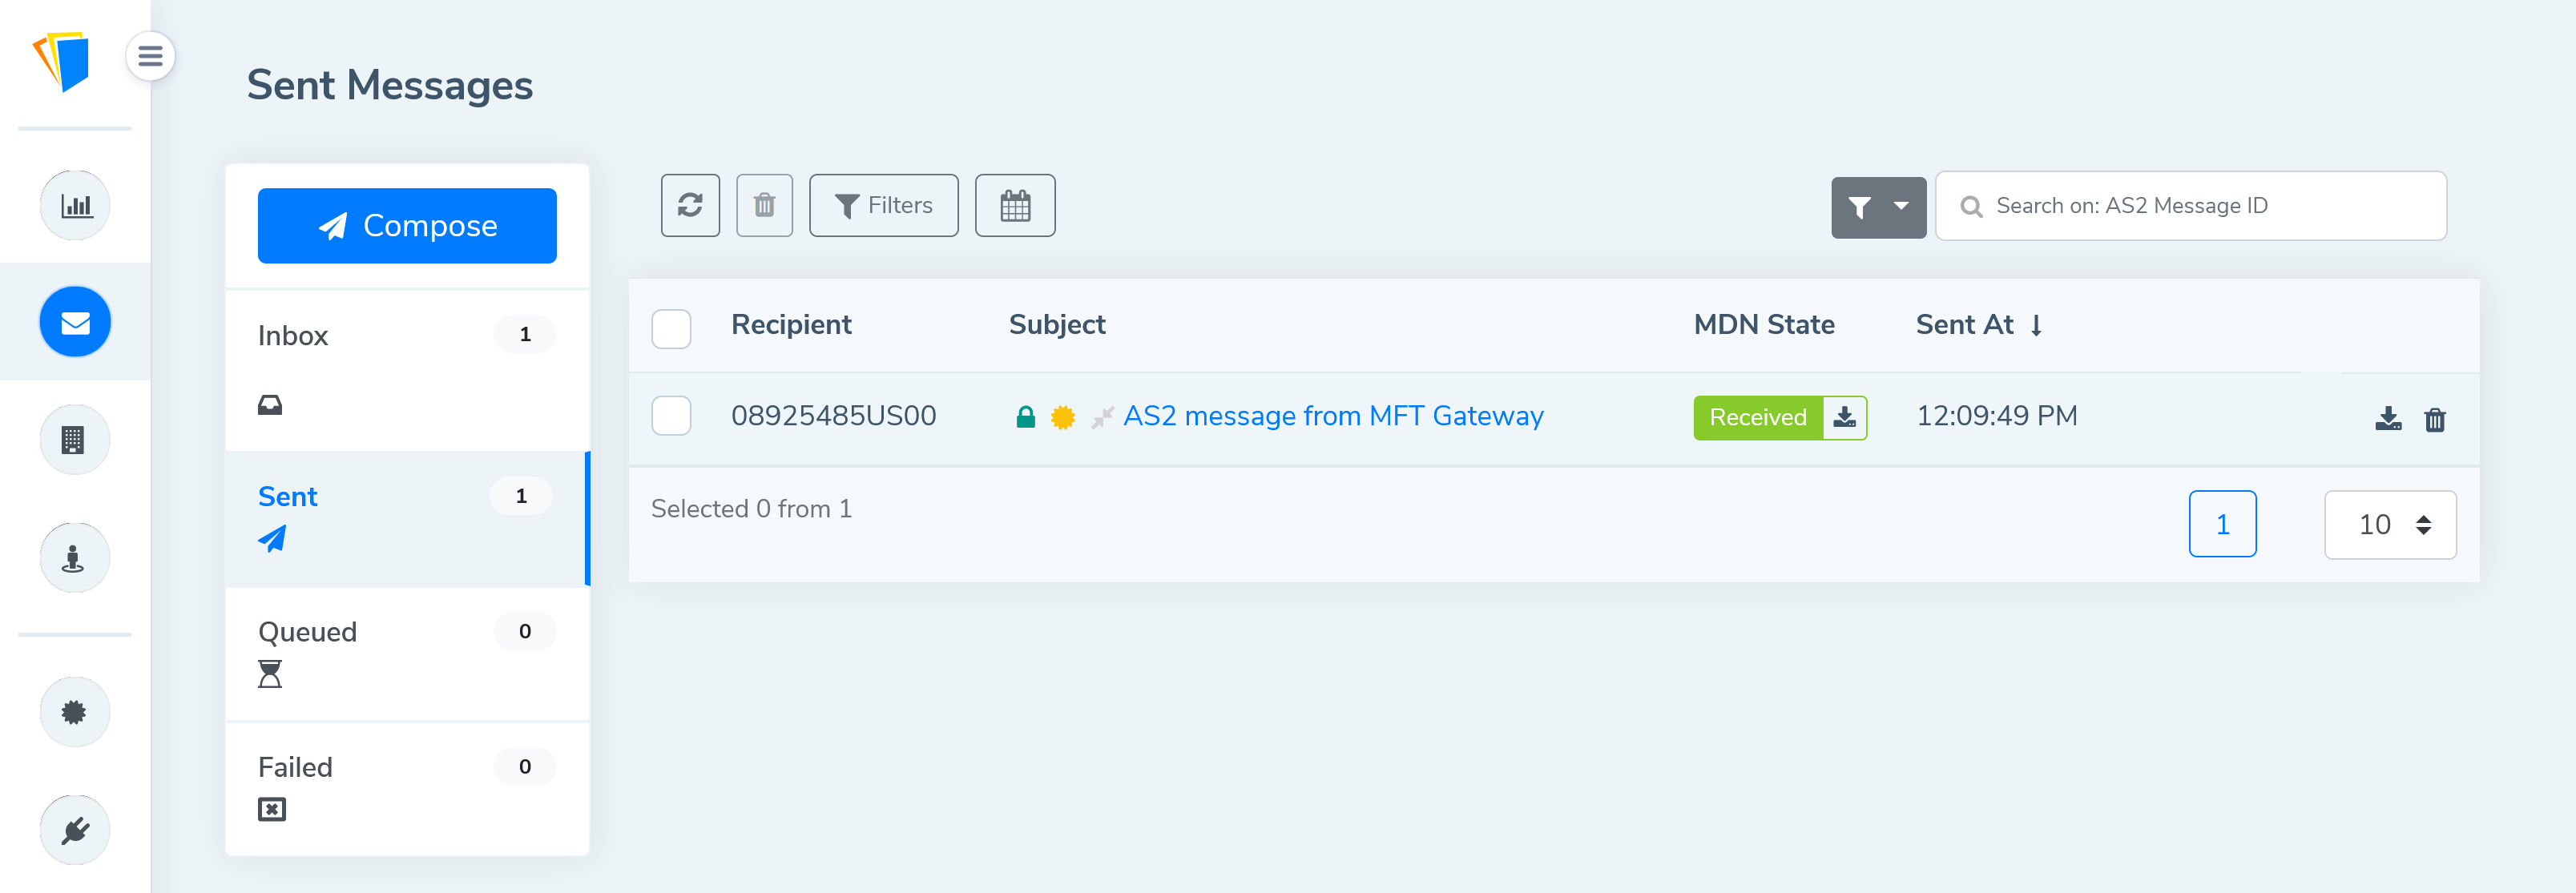
Looking at the received message from RetailLink
Navigate to the ‘Mailbox’ and then ‘Batch Search’. Ensure the proper mailbox is selected on the dropdown, and check the direction ‘To Walmart’ and then click ‘Search’.

EDI X12 configuration for Walmart
Follow through our articles to find out how to perform EDI testing through the RetailLink Global Enterprise Mailbox.

Talk to an EDI Expert
Join hundreds of organizations already taking full control of their B2B AS2 communications with our trusted solutions. Contact us today to tailor a solution that fits your specific AS2 EDI needs.
Related Articles
View All BlogsExplore our product stack
Try before you buy with a 30-day Free Trial
No commitment, all value. Try the AS2 Solution Risk-Free and discover how our solutions can transform your business workflows. No credit card required.
Explore Your Possibilities
Elevate AS2 Communications with our EDI and AS2 Solutions
See how our AS2 and EDI solutions can simplify your integrations, boost efficiency, and keep you compliant—request a personalized demo today.


