MFT Gateway is a hosted Software as a Service (SaaS) solution that enables file exchange over the AS2 or SFTP protocol, without the need to install or maintain.
- Blog
- How to Send AS2 messages in Cloud-Based MFT Gateway
MFT | AS2
How to Send AS2 messages in Cloud-Based MFT Gateway
Learn how to send AS2 messages in Cloud-Based MFT Gateway. Here's a step-through article to set up a serverless cloud EDI.
Published: 12 Jun 2020

When it comes to transferring lots of confidential data, the value of computerized trading and automated, secure trade document exchange is a major concern for all B2B enterprises. Along with the digital transformation, the security risks posed by emerging technologies have a severe impact on B2B trading. Therefore, knowing the importance of Managed File Transfer(MFT) with a secure file transfer protocol is vital. MFT Gateway is the world’s first Serverless Managed File Transfer Gateway (MFT) implemented on Amazon Web Services (AWS), which currently offers AS2 protocol to provide secure, reliable and faster communication for B2B enterprises.
In addition to all the benefits packaged with AS2 protocol, as a Cloud-hosted Managed File Transfer Gateway offered as a Service, MFT Gateway itself provides a scalable, easy-to-use, reliable piece of software to the customers. So, in this article let’s talk about how to send AS2 messages via MFT Gateway.
How to create an account in MFT Gateway
To get started with MFT Gateway, you have to register your organization by providing a few details like Tenant Name (a.k.a. Organization Name), Full Name, Email Address, etc.
Note: the Tenant Name is used on the name of the dedicated storage space (AWS S3 bucket) that MFT Gateway will create for you.

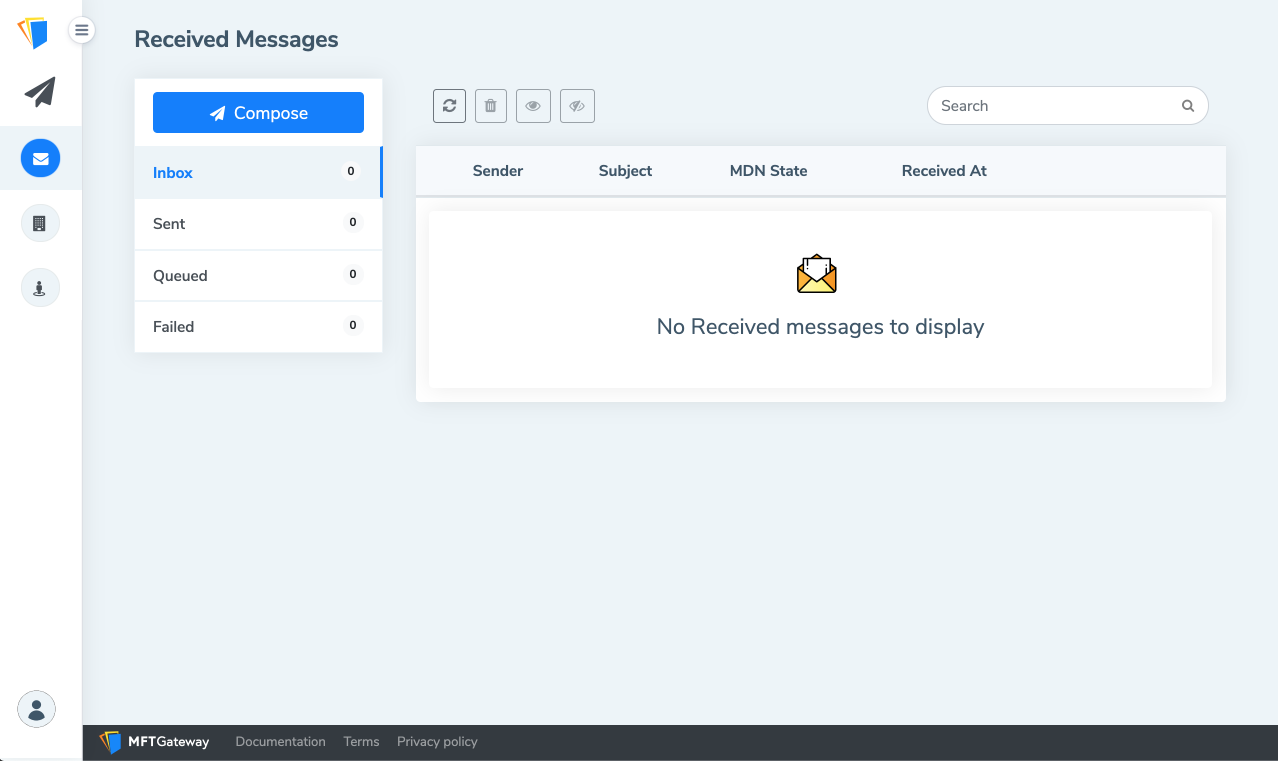
Once you submit the signup form, a confirmation code will be sent to the email you have provided and you will land in the account confirmation page. After the verification process, an account in MFT Gateway will be available for your organization. Then you can log in to your account and you’ll be navigated to the messages view.
How to create a Trading Station
To start sending messages via MFT Gateway, you have to create a trading station for your organization which will act as your local endpoint. To configure a station, click the ‘Stations’ icon on the left navigation menu and click ‘** New Station’ button in ‘Stations**’ view.
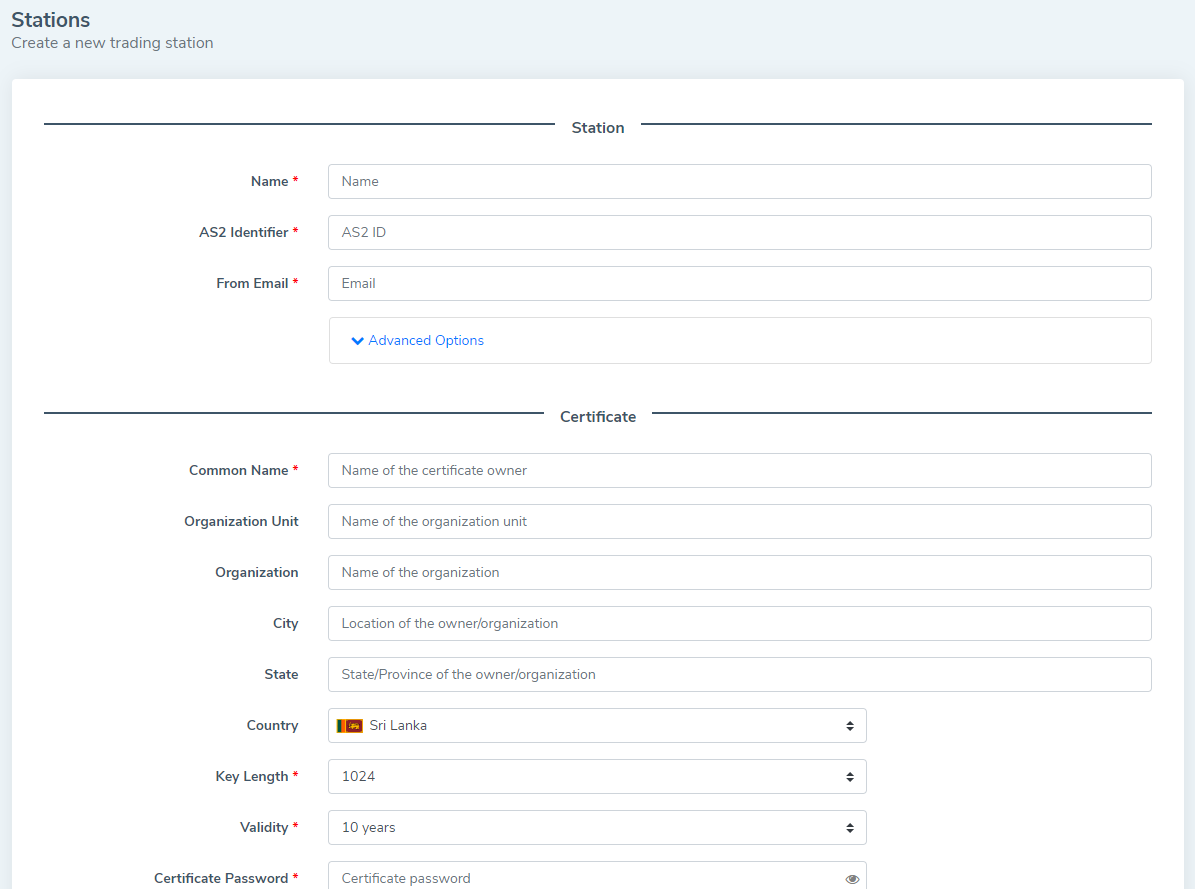
Provide a name for your trading station, and a globally unique AS2 identifier to use in messaging. Then you have to provide an email address which can also be used to receive notifications for received/send-failed messages of the station. Then provide certificate details to configure a certificate for the station and submit the form.
Once you have submitted the form, the station will be created and will appear in the trading station listing view as below.
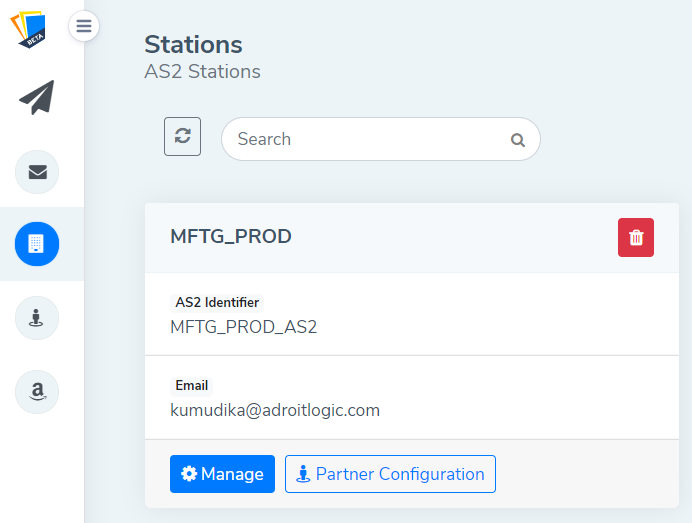
There are 3 actions associated with a station block as below.
- Manage: where you can view and edit station details
- Partner Configuration: where you can find configuration details like AS2 identifier, the message receiving ** URLs, **certificates that you should share with your trading partners, for them to set you up as a trading partner to send AS2 messages to your organization via the trading station. There you can provide your partner’s email address and directly share these configuration details to your partner
- Delete: when deleting a station, all the messages associated with that station will be permanently deleted
How to create a Trading Partner
After configuring a station, you have to add your clients as trading partners. They will act as the receiving endpoints of your station’s outbound messages, and you can receive messages from them as well. To set up a partner, click the ‘Partners’ icon on the left navigation menu and click ‘New Partner’ button in ‘Partners’ view.
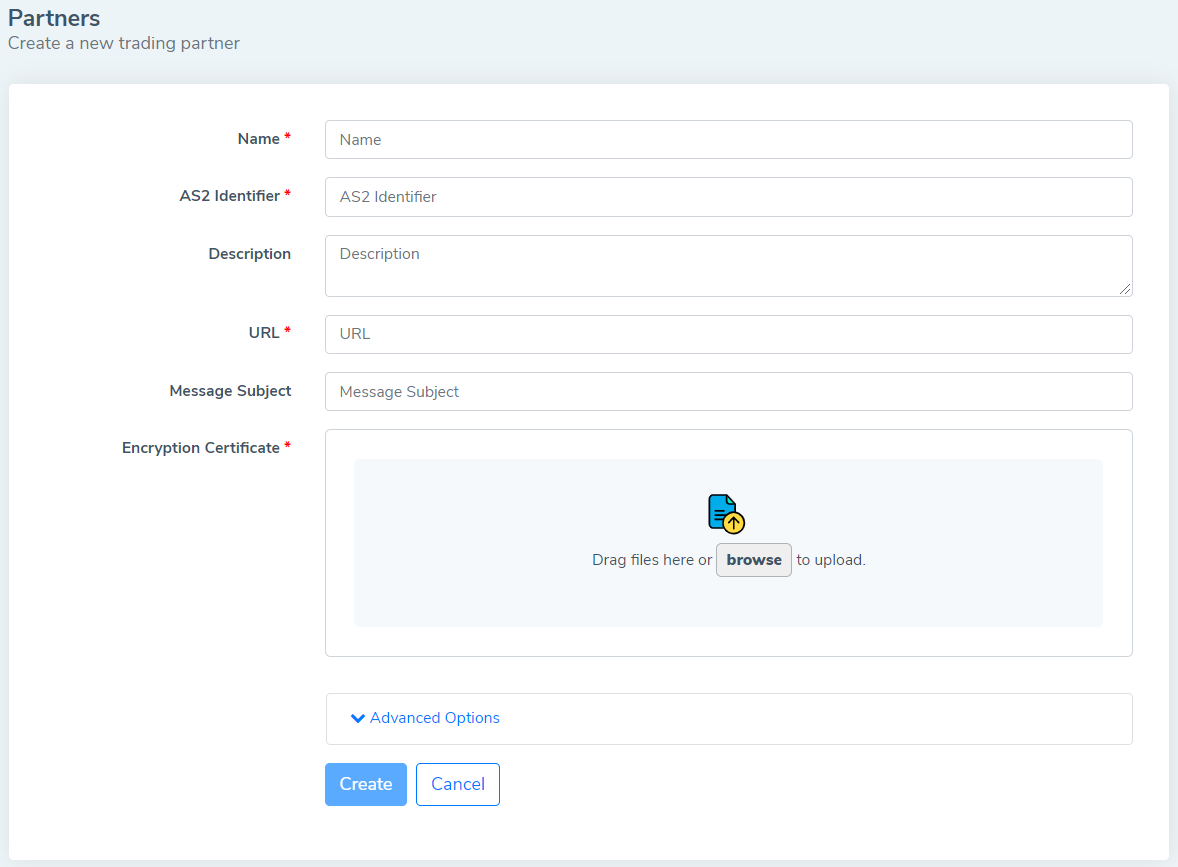
Give the name of your trading partner. Then provide the AS2 identifier, which will uniquely identify the trading partner you are going to address when exchanging messages. And then you can state a small description of your partner. This will be helpful to easily identify the relevant partner if you are going to create more than one. Next, provide the AS2 message receiver URL of the partner. You can also set a predefined message subject for your trading partner, which will be used if you haven’t provided a specific subject while sending a message. Next, upload the encryption certificate which you should have already received from them.
Then under advanced settings, you can customize AS2 messaging configurations like encryption, sign algorithms, and the nature of the expected MDN (receipt), specific to the trading partner.
Once you have submitted the form, the partner will be created and will appear in the trading partner listing view as below.
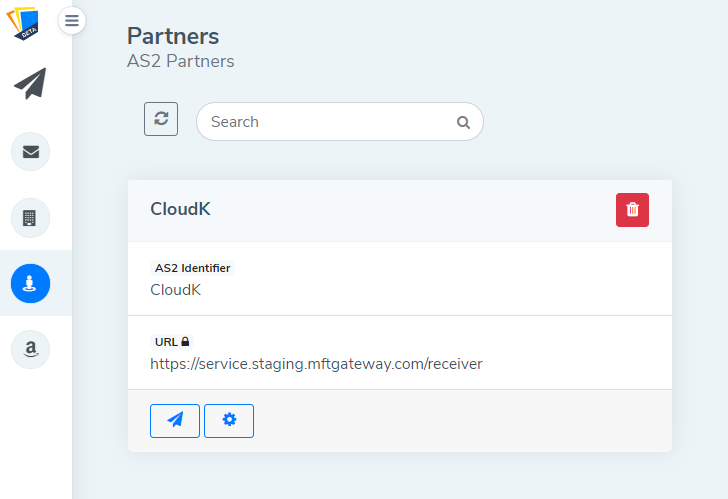
There are 3 actions associated with a partner block as below.
- Send Message: where you can compose a message
- Manage Partner: where you can view and edit partner configurations
- Delete: when deleting a partner, all the messages associated with that partner will be permanently deleted
Send your first AS2 message
Once you have successfully configured a station and a partner, you are ready to send messages via MFT Gateway. Click on the ‘Send Message’ icon on partner card or Click on the ‘New Message’ icon on the left navigation menu or ‘** Compose’ button on the Messages view. Then in ‘New message’ view select the relevant **station and partner from the dropdown list, specify a message subject (optional), attach a document(s) and click ‘Send’ button.
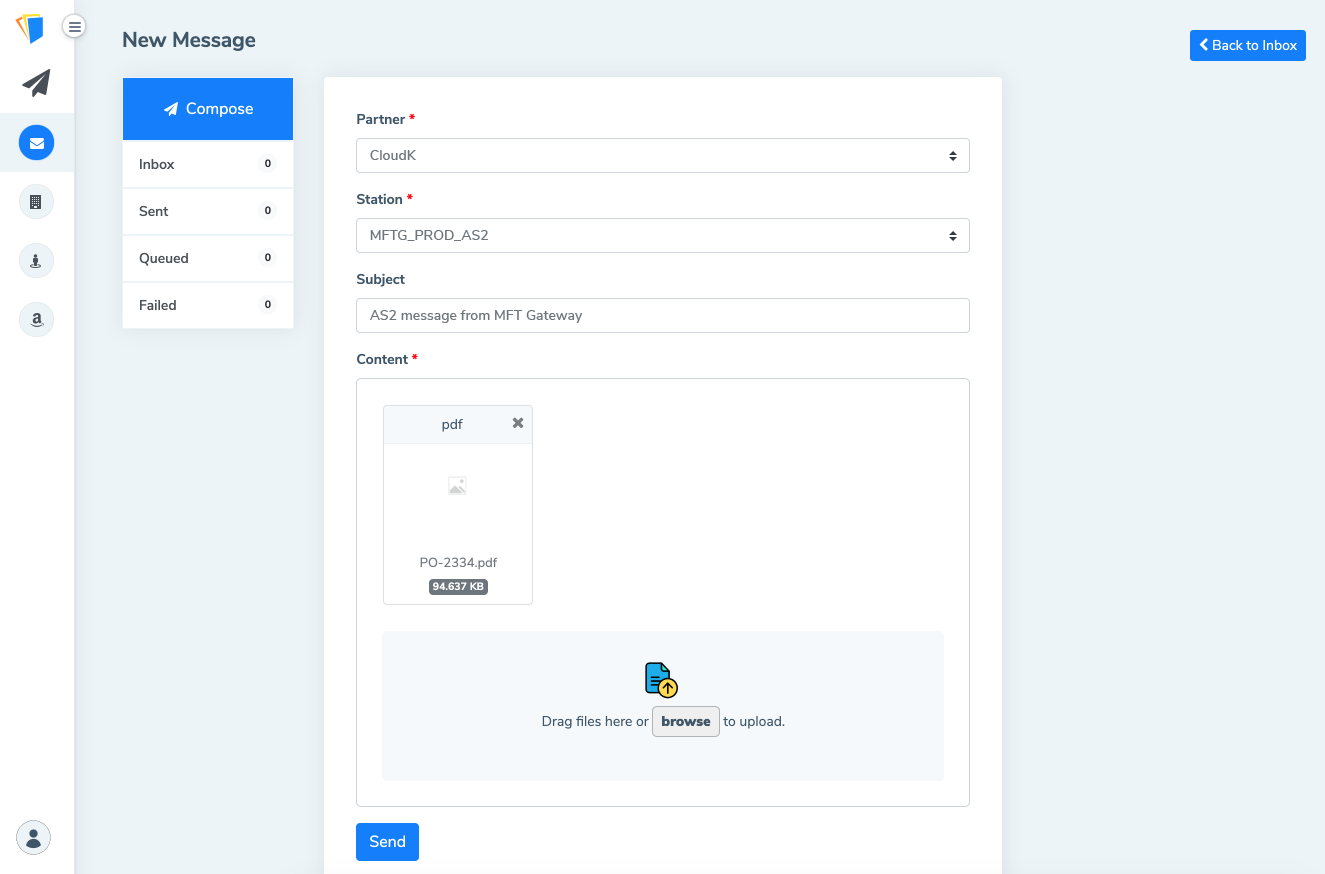
The message will be added to the queue and you will be redirected to the ‘Queued Messages’ view which displays the status of the outbound message. If the message was successfully delivered to the partner, the message will be moved to the ‘Sent’ view where you can find all the necessary details of the message. If the MFT Gateway is unable to successfully send the queued message out, it will be moved to ‘Failed’ view where you can find its failure reason, along with other message details.
Talk to an EDI Expert
Join hundreds of organizations already taking full control of their B2B AS2 communications with our trusted solutions. Contact us today to tailor a solution that fits your specific AS2 EDI needs.
Related Articles
View All BlogsExplore our product stack
Try before you buy with a 30-day Free Trial
No commitment, all value. Try the AS2 Solution Risk-Free and discover how our solutions can transform your business workflows. No credit card required.
Explore Your Possibilities
Elevate AS2 Communications with our EDI and AS2 Solutions
See how our AS2 and EDI solutions can simplify your integrations, boost efficiency, and keep you compliant—request a personalized demo today.


