


MFT Gateway is a hosted Software as a Service (SaaS) solution that enables file exchange over the AS2 or SFTP protocol, without the need to install or maintain.
Start Free Trial
This article discusses how EDI Generator can be integrated with a QuickBooks Online account

Udith Gunaratna
Published: 23 Aug 2024

QuickBooks Online is a widely used accounting and bookkeeping software in the business world, especially popular among small and medium-sized enterprises (SMEs) due to its user-friendly interface and affordable pricing models.
A key use case of QuickBooks Online is managing invoices for products or services provided by your company to external parties. This process includes creating invoices based on purchase orders received from buyers, sharing the finalized invoices with them, and tracking the payment status to ensure timely payments.
If you are a supplier for a large retailer like Walmart, Amazon, Best Buy, or Tractor Supply, you will typically receive purchase orders as EDI documents. In such cases, you have two options for creating QuickBooks Online invoices for those purchase orders.
The first and more straightforward approach is to manually create invoices by entering the necessary details, such as PO numbers, line items, quantities, and pricing, based on the data from the received purchase order EDI. Most EDI processing software, including our own EDI Generator, provides a human-readable view of the received purchase orders. This allows someone from your accounting team to create an invoice in your QuickBooks Online account by manually copying the relevant information from that view. While this method may seem simple, it can become overwhelming if you receive a large volume of purchase orders daily or if your purchase orders typically contain many line items.
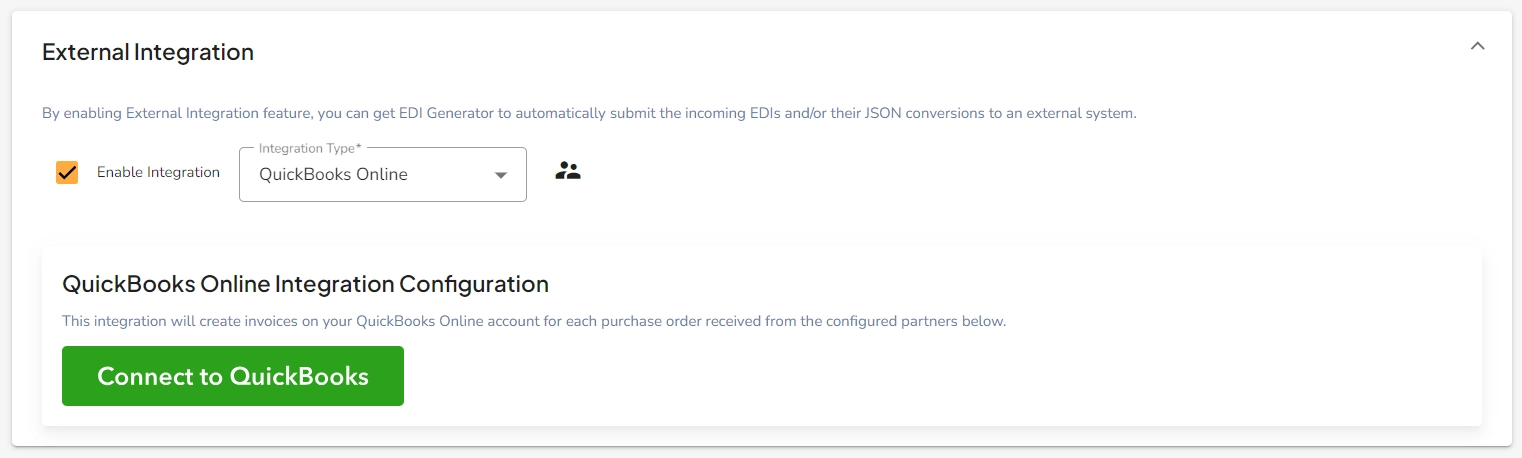
The second approach is to automate the invoice creation process. Essentially, whenever you receive a purchase order EDI from one of your buyers, this automated process will create a corresponding invoice in your QuickBooks Online account without any manual intervention. Your accounting team would only need to fill in any missing fields, verify the invoice for accuracy, and share it with the buyer as needed. If you’re using EDI processing software like EDI Generator, which has built-in capabilities for this, automating the process will be easier. Otherwise, your team would need to implement some form of integration using QuickBooks Online APIs to achieve this.
In this article, we will explore how you can integrate EDI Generator with your QuickBooks Online account to automate the creation of invoices for the purchase orders you receive from your partners or buyers.
Before diving into the details of the QuickBooks Online EDI integration, please ensure that the following prerequisites are met.

If you are trying out or evaluating this integration for the first time, we recommend using a QuickBooks Online Sandbox account to prevent any testing data getting added to your production QuickBooks Online account.
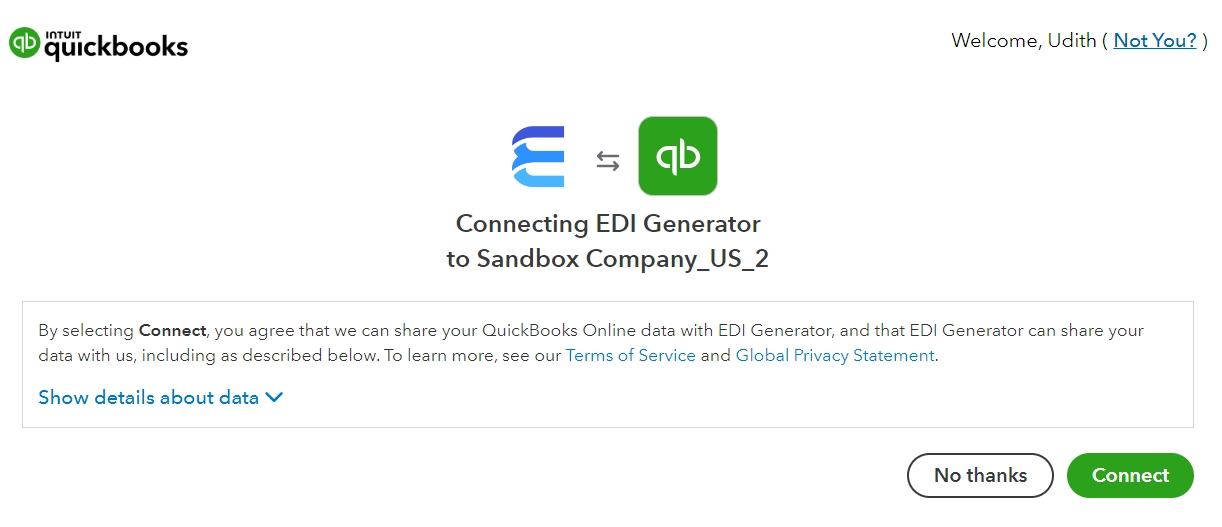
Typically, this popup window will open within 10 seconds after you’ve made the account type selection. If it doesn’t, your browser may have blocked the popup. In that case, please ensure your browser is allowing popups from the domain https://console.edigenerator.com:443 and then click the Connect to QuickBooks button again.
Now that the connectivity has been established, you can proceed with the remaining configurations for the QuickBooks Online EDI integration. Once the connection is successful, you’ll find a new set of fields and controls under the QuickBooks Online Integration Configuration section.

You can use this field to specify how many days after the purchase order date you prefer to set the invoice date. For example, if you set this field to 7 and you receive a purchase order dated September 1, 2024, the invoice will be generated with a date of September 8, 2024.
EDI Generator will list all the custom sales fields configured in your QuickBooks Online account in this drop down. Next, you’ll need to select one of the fields to store the purchase order number. This is important for identifying the purchase order associated with each generated invoice.
Under this subsection, you need to specify the relationship between the partner entities defined in your EDI Generator account and the QuickBooks Online customer entity corresponding to that partner.
SKU Custom Format: If the SKUs in QuickBooks Online use a custom format (e.g., including dashes such
as 1-12345-67890-1), you should specify this format here. This allows the EDI Generator to convert the SKUs
extracted from the purchase order into the custom format before including them in the invoice.
For example, if the SKU field value in the purchase order is 123456789 and the corresponding SKU in QuickBooks
Online is 123-456-789, you can specify the format as XXX-XXX-XXX. In this format, the character X represents
each character in the PO SKU value, and the - character (or any other character) represents the additional
characters to be inserted between the segments.
Under this subsection, you can specify any allowances or charges that should be included in all the invoices generated by this integration.
Once you’ve completed these configurations, click the Update button at the bottom of the page to save them to your account. After saving, an invoice will be automatically added to your QuickBooks Online account for each new purchase order received from the configured partners. If you have any purchase orders already received in the Inbox, you can use the Dispatch Again option for those entries to process them through this integration.
Important
The invoices created through this integration are generated based on the information from the corresponding purchase order and the configured settings. As such, they may be missing certain details and should not be considered final. It is essential to review and adjust these invoices before sharing them with the partner.
Join hundreds of organizations already taking full control of their B2B AS2 communications with our trusted solutions. Contact us today to tailor a solution that fits your specific AS2 EDI needs.
No commitment, all value. Try the AS2 Solution Risk-Free and discover how our solutions can transform your business workflows. No credit card required.
